CS2103/T-AY1718S2
  • Schedule
  • Table of Contents
  • List of all LOs
  • Printer-Friendly(ish)
  • Admin
  • Instructors
  • Announcements
  • Submissions
  • Slack
  • Forum
  • Report Bugs
  • Forum
  • Tutorial Schedule
  • Team IDs
  • Java Coding Standard
  • samplerepo-things
  • Addressbook-level1
  • Addressbook-level2
  • Addressbook-level3
  • Addressbook-level4
  • Projects List
  • Preliminaries

    The Schedule page is the one page you need to refer weekly. Although there is a lot of content in the Admin page and the Textbook page -- which you are welcome to read in those respective pages -- the same content is also embedded in the relevant weeks of the Schedule page. In sum, the Schedule page organizes the content chronologically while the other two pages has some of the same content but organized by topic.

    Same lectures, same exam. Separate tutorials, separate project grading. Unless specified otherwise, whatever is stated for one module applies to the other.

    Learning Outcomes

    This module is organized primarily around a list of Learning Outcomes.

    Each week has a suggested list of LOs. They are categorized using the following star-rating system:

    The LOs you need to achieve just to keep up with the module. We recommend you to achieve these LOs if you want to pass the module (i.e. up to a C grade).

    Can get you up to a B+.

    Can get you up to an A.

    These are meant for self-driven students who aims for a SE career in a high-end SE company.

    Required for an A+ and can be used for CS2103R credit.

    Lectures

    Timing/venue:

    Semester Venue Time
    Semester 1 (Aug-Nov) ICube Auditorium 1400-1600
    Semester 2 (Jan-April) ICube Auditorium 1600-1800

    Lectures start on time sharp and end around 15 minutes before official end time.

    CS2103T lectures are same as that for CS2103. Please ignore the CS2101 session scheduled at the same slot. That is a dummy slot used to work around a limitation on the CORS IT system. The system doesn't allow lectures of two modules to be scheduled in the same venue at the same time.

    Each lecture is a mixture of:

    • A flipped classroom format activities covering learning outcomes of the current week.
    • A preview of the learning outcomes for the following week.

    Attendance: Attendance for the first lecture is compulsory.

    Webcast: All lectures will be webcast. However, some things are not captured well in the webcast recording. You are advised to treat the webcast as a 'backup' for you to catch up anything missed during the lecture.

    Handouts: There are no handouts. All learning materials are organized around learning outcomes (not lectures or topics), are given in Web format, and can be found in the Textbook section and are also hyperlinked from the Schedule Page.

    Slides: Our lecture slides are not suited for printing or using as a reference during the lecture/exams. They are only an aid for lecture delivery. Slides will be uploaded after the lecture (link available in the Schedule Page).

    Tutorials

    Our tutorials start on week 2 (even before CORS tutorial bidding is over), not in week 3 as other modules do. CS2103 (not CS2103T) students need to choose a temporary tutorial slot for week 2 tutorial. We'll inform you the procedure to do so in due course.

    Our tutorial IDs are different from CORS. Format: W09 means Wednesday 0900 and so on.

    Module Tutorial ID (ID in CORS) Time Venue Tutors (contact details)
    CS2103T (CS) W09 (T4) Wed 0900 COM1-B103 (ALL) TBD
    CS2103 W10 (10) Wed 1000 COM1-B103 (ALL) TBD
    CS2103T (CS) W11 (T6) Wed 1100 COM1-B103 (ALL) TBD
    CS2103T (CS) W13 (T1) Wed 1300 COM1-B103 (ALL) TBD
    CS2103T (CS) W14 (T2) Wed 1400 COM1-B103 (ALL) TBD
    CS2103T (CS) W15 (T3) Wed 1500 COM1-B103 (ALL) TBD
    CS2103T (CEG) T09 (C01) Thu 0900 COM1-B103 (ALL) TBD
    CS2103 T11 (2) Thu 1100 COM1-B103 (ALL) TBD
    CS2103 T15 (4) Thu 1500 COM1-B103 (ALL) TBD
    CS2103 T16 (5) Thu 1600 COM1-B103 (ALL) TBD
    CS2103T (CS) F09 (T7) Fri 0900 COM1-B103 (ALL) TBD
    CS2103 F11 (9) Fri 1100 COM1-B103 (ALL) TBD
    CS2103 F12 (11) Fri 1200 COM1-B103 (ALL) TBD
    CS2103T (CS) F14 (T5) Fri 1400 COM1-B103 (ALL) TBD

    *ALL: Active Learning Room

    What happens during the tutorial:

    • A tutorial group is handled by two tutors. Each tutor will work with two teams.
    • The tutor will direct students to share/discuss evidence of achieving the weekly learning outcomes (LO).
    • If some students have met with difficulties while achieving an LO, the tutor can direct those students to get help from those who have achieved the LO. The number of LOs that can be covered in the tutorial session depends on how well-prepared you are.
    • The tutor will observe, and give feedback on, how well you are achieving required LOs.
    • Please bring your laptop to tutorials. You often need it to show evidence of LOs you achieved. At other times, we ask you to work on project related things with your team members, which too may require the laptop.

    If you do not have a laptop or prefer not to bring the laptop, it is up to you to show your work to the tutor in some way (e.g. by connecting to your home PC remotely), without requiring extra time/effort from the tutor or team members.

    Reason: As you enjoy the benefits of not bring the laptop; you (not others) should bear the cost too.

    The role of our tutors is different from tutors in other modules.

    • No direct tech help: Tutors are prohibited from giving technical help. Rationale: We want you to learn the vital survival skill of troubleshooting technical problems.


    We want to move you away from 'hand holding' and make you learn how to solve problems on your own. This is a vital survival skill in the industry and it needs practice.

    Whether it is a technical problem (e.g. error when using the IDE) or a doubt about a concept (e.g. what is the difference between scripted testing and exploratory testing?)  we the teaching team are happy to work with you when you look for a solution/answer, but we do not do it for you. We discourage unconditional direct help from tutors because we want you to learn to help yourself. Yes, we believe in ‘tough love’😝.

    The question you should always ask yourself is, 'how do I solve this problem if the lecturer/tutors are not around to help me?'

    Note: This guide is mostly about getting tech help, but it also applies to getting clarifications on module topics too. e.g. what is the difference between refactoring and rewriting?

    What not to do:

    When faced with a technical problem or a doubt about a concept, don'f fire off an email lecturer/tutor immediately after you encounter a problem or a doubt, unless it is something only the lecturer/tutor is supposed to know. Instead, here are some things you can do:

    • Check what is given: Check if the problem/concept has been discussed in the lectures, text book, or the list of resources given to you. Yes it is easier for you to write an email to the tutor/lecturer instead, but that shouldn't be your default behavior. We know that sometimes it is difficult to find stuff in the resources we have provided. But you should try first.

    • Search: It is very likely the answer already exists somewhere in the cyberspace. Almost every programming-related question has been answered in places like stackoverflow. Don't give an opportunity for someone to ask you to STFW.
      Pay attention to the error message you encounter. Sometimes it also contains hints as to how to fix the problem. Even if not, a web search on the error message is a good starting point.  

    • Ask peers:

      Ask your team members.

      Ask classmates using the module forum or the slack channel. Even if you figured out one way to solve a problem, discussing it on a public forum might lead you to better ways of solving it, and will help other classmates who are facing similar problems too. If you are really shy to ask questions in the forum, you may use this form to submit your question anonymously which we will then post in the forum.


      Rubber duck debugging is an informal term used in software engineering to refer to a method of debugging code. The name is a reference to a story in the book The Pragmatic Programmer in which a programmer would carry around a rubber duck and debug his code by forcing himself to explain it, line-by-line, to the duck.

      [for more, see wikipedia entry]

    • Ask the world using programming forums such as stackoverflow.

      Here are some tips for posting help request:

      • PLEASE search for existing answers before you post your question in those public forums; You don't want to appear as a 'clueless' or 'too lazy to do your research' person in a public forum.

      • Learn to isolate the problem. "My code doesn't work" isn't going to help even if you post the whole code online. Others don't have time to go through all of your code. Isolate the part that doesn't work and strip it down to the bare minimum that is enough reproduce the error. Sometimes, this process actually helps you to figure out the problem yourself. If not, at least it increases the chance of someone else being able to help you.

        💡 How to isolate problematic code? Delete code (one bit at a time) that is confirmed as not related to the problem. Do that until you can still reproduce the problem with the least amount of code remaining.

      • Generalize the problem. "How to write tasks to a text file using Java" is too specific to what you are working on. You are more likely to find help if you post a thread called (or search for) "How to write to a file using Java".

      • Explain well. Conversations via online forums take time. If you post everything that is relevant to your problem, your chances of getting an answer in the first try is higher. If others have to ask you more questions before they can help you, it will take longer. But this doesn't mean you dump too much information into the thread either.

        💡 Know what these stand for: RTFM, STFW, GIYF

    • Talk to the lecturer before or after the lecture. The lecturer will be at the lecture venue from 30 minutes before the start of the lecture.

    • Request our help: Failing all above, you can always request for help by emailing the lecturer.

    Resources

    • No ‘teaching’: Tutors are prohibited from “teaching” concepts that are covered in lectures or other learning resources given to you. Self-learning is a vital part of the module. But tutors may help you clarify doubts.

    Consider these two questions you might want to ask a tutor:

    • This is how I understood/applied coupling. Is that correct? - Such questions are welcome. Reason:This question shows you have put in some effort to learn the topic and seeking further clarification from the tutor.
    • 🚫 What is coupling? - Such questions will not be entertained. Reason: This question implies you haven’t done what you could to learn the topic in concern.

    • No leading from the front: Tutors are not expected to lead your project effort. They will not tell you how to do project tasks or when to do project tasks. You have to figure those out yourselves. But tutors will give you feedback on how you are doing (or have done) project tasks so that you can improve further.

    Timing/venue:

    • Please refer to the Schedule page for further details on each tutorial.
    • You are expected to arrive on time. Punctuality is considered for participation marks.
    • You may leave the class 15 minutes before the hour if you have another class right after. There is no need to wait till the tutor dismisses you. However, inform the tutor (as a courtesy) before leaving if you leave before the class is dismissed.
    • Please make sure you vacate the table 5 minutes before the hour so that the next group can start on time.
    • In the past many students have suggested to increase the tutorial duration because 1 hour is barely enough to get through all weekly LOs. Increasing the tutorial time is not possible due to lack of venues and tutors. Instead, let's try to make the best of the one hour available by coming well prepared and starting on time.

    Grading:

    Tutorials are not graded. However, your conduct will be reviewed by team members and the tutor which will determine your participation marks.

    Text Books

    The main text book is here. While it is in a dynamic Web page format, there is a way to save the main text as pdf files.

    Programming Language

    The main language used in this module is Java. You should use Java for all programming activities, the project, and exam answers.

    The module doesn’t “teach” Java. We assume you already know Java basics. We expect you to learn on your own any Java constructs not covered in your previous modules.

    Our Java coding standard is here.

    Project

    Overview

    The high-level learning outcome of the project (and to a large degree, the entire module):

    🏆 Can contribute production quality SE work to a small/medium software project

    Accordingly, the module project is structured to resemble an intermediate stage of a non-trivial real-life software project. In this project you will,

    1. conceptualize and implement enhancements to a given product,
    2. and have it ready to be continued by future developers.

    The Product

    In this semester, we are going to enhance an AddressBook application.

    This product is meant for users who can type fast, and prefer typing over mouse/voice commands. Therefore, Command Line Interface (CLI) is the primary mode of input.

    • Constraint-CLI: Command Line Interface is the primary mode of input. The GUI should be used primarily to give visual feedback to the user rather than to collect input. Some minimal use of mouse is OK (e.g. to click the minimize button), but the primary input should be command-driven.
      • Mouse actions should have keyboard alternatives.
      • Typing is preferred over key combinations. Design the app in a way that you can do stuff faster by typing compared to mouse or key combinations.
      • One-shot commands are preferred over multi-step commands. If you provide a multi-step command to help new users, you should also provide a one-shot equivalent for regular users.  Reason: We want the user to be able to accomplish tasks faster using CLI than a GUI; having to enter commands part-by-part will slow down the user.
      • ❗️ While we don't prohibit GUI-only features, such features will be ignored during grading.

    Project Scope

    In general, each team is expected to take one of these two directions:

    [Direction 1] Optimize AddressBook for a more specific target user group:

    An AddressBook,

    • for users in a specific profession  e.g. doctors, salesmen, teachers, etc.
    • based on the nature/scale of contacts  e.g. huge number of contacts (for HR admins, user group admins), mostly incomplete contacts, highly volatile contact details, contacts become inactive after a specific period (e.g. contract employees)
    • based on what users do with the contacts  e.g. organize group events, share info, do business, do analytics

    [Direction 2] Morph AddressBook into a different product: Given that AddressBook is a generic app that manages a type of elements (i.e. contacts), you can use it as a starting point to create an app that manages something else.
    ❗️ This is a high-risk high-reward option because morphing requires extra work but a morphed product may earn more marks than an optimized product of similar complexity.

    An app to manage,

    • Bookmarks of websites
    • Tasks/Schedule
    • Location info
    • Thing to memorize i.e. flash cards, trivia
    • Forum posts, news feeds, Social media feeds
    • Online projects or issue trackers that the user is interested in
    • Emails, possibly from different accounts
    • Multiple types of related things  e.g. Contacts and Tasks (if Tasks are allocated to Contacts)

    For either direction, you need to define a target user profile and a value proposition:

    • Target user profile: Define a very specific target user profile.
      💡 We required you narrow down the target user profile  as opposed to trying to make it as general as possible. Here is an example direction of narrowing down target user: anybody → teachers → university teachers → tech savvy university teachers → CS2103 instructors.
      ❗️ Be careful not to contradict given project constraints when defining the user profile  e.g. the target user should still prefer typing over mouse actions.

    • Value proposition: Define a clear value proposition  what problem does the product solve? how does it make the the user's life easier that matches the target user profile.

    It is expected that your product will be optimized for those specific target users  i.e., add features that are especially/only applicable for target users (to make the app especially attractive to them). To add to the example above, there can be features that are applicable to CS2103 instructors only, such as the ability to navigate to a student's project on GitHub
    💡 Your project will be graded based on how well the features match the target user profile and how well the features fit-together.

    • It is an opportunity to exercise your product design skills because optimizing the product to a very specific target user requires good product design skills.
    • It minimizes the overlap between features of different teams which can cause plagiarism issues. Furthermore, higher the number of other teams having the same features, less impressive your work becomes especially if others have done a better job of implementing that feature.

    👤 Individually, each student is expected to,

    1. Contribute one major enhancement to the product

      • Each enhancement should be stand-alone but,
        • should fit with the rest of the software (and the target user profile),
        • and should have the consent of the team members.

      Here are the allowed options for enhancing AddressBook:

      1. Add a new feature
      2. Enhance an existing features in a major way e.g. make the command syntax more user friendly and closer to natural language
      3. Modify the internal design in a major way e.g. change the architecture
      4. A major redesign of the GUI e.g. make it work like a chat application (note: chat is a form of CLI)
      5. Integrate with online services e.g. Google contacts, Facebook, GitHub, etc.

      Here are some examples of different major enhancements and the grade the student is likely to earn for the relevant parts of the project grade.

    2. Contribute one minor enhancement to the product:

      • In the initial stages of the project you are required to add one small generic enhancements in order to get familiar with the project.
      • Minor enhancements earn a minimal amount of marks. You are advised not to spend a lot of effort on the minor enhancement.
      • The minor enhancement must touch multiple components  so that it helps you to familiarize yourself wit the codebase.

      Here is a non-exhaustive list of minor enhancements:

      1. Support different themes for the Look & Feel  dark, light, etc.
      2. Support more fields  e.g. Birthday
      3. Load a different page instead of the default Google search page  e.g. Google Maps page or Twitter page
      4. Sort items
      5. Multiple panels  e.g. an additional panel to show recently accessed items
      6. Marking some items as favorites
      7. Ability to search by labels
      8. Ability to specify colors for labels

    3. Contribute to all aspects of the project: e.g. write backend code, frontend code, test code, user documentation, and developer documentation. If you limit yourself to certain aspects only, you will lose marks allocated for the aspects you did not do.
      In particular, you are required to divide work based on features rather than components:

      • By the end of this project (i.e. by v1.5) each team member is expected to have implemented one minor and one major enhancement/feature end-to-end, doing required changes in almost all components.  Reason: to force you to learn all components of the software, instead of limiting yourself to just one/few components.
      • Nevertheless, you are still expected to divide the components of the product among team members so that each team member is in charge of one or more components. While others will be modifying those components as necessary for the features they are implementing, your role as the in charge of a component is to guide others modifying that component  (reason: you are supposed to be the most knowledgeable about that component) and protect that component from degrading  e.g., you can review others' changes to your component and suggest possible changes.
    4. Do a share of team-tasks: These are the tasks that someone in the team has to do. Marks allocated to team-tasks will be divided among team members based on how much each member contributed to those tasks.

      Here is a non-exhaustive list of team-tasks:

      1. Necessary general code enhancements
        1. Work related to renaming the product
        2. Work related to changing the product icon
        3. Morphing the product into a different product
      2. Setting up the GitHub, Travis, AppVeyor, etc.
      3. Maintaining the issue tracker
      4. Release management
      5. Updating user/developer docs that are not specific to a feature  e.g. documenting the target user profile
      6. Incorporating more useful tools/libraries/frameworks into the product or the project workflow (e.g. automate more aspects of the project workflow using a GitHub plugin)

    5. Write ~0.5 KLoC of code, on average.

    👥 As a team, you are expected to work together to,

    1. Preserve product integrity: i.e.
      1. Enhancements added fit together to form a cohesive product.
      2. Documentation follows a consistent style and presents a cohesive picture to the reader.
      3. Final project demo presents a cohesive picture to the audience.
    2. Maintain product quality: i.e. prevent regressions in other parts of the product as the product evolves. Note that bugs local to a specific feature will be counted against the author of that feature. However, if a new enhancement breaks the entire product, the whole team will have to share the penalty.
    3. Manage the project smoothly: i.e. ensure PR workflow, repo maintenance, integration, releases, etc. are done smoothly.

    Project Constraints

    Your project should comply with the following constraints. Reason: to increase comparability among submissions and to maximize applicability of module content in the project.

    • Constraint-Morph: The final product should be a result of morphing the given code base. i.e. enhance and/or evolve the given code to arrive at the new software. However, you are allowed to replace all existing code with new code, as long as it is done incrementally. e.g. one feature/component at a time
      Reason: To ensure your code has a decent quality level from the start.

    • Constraint-Incremental: The product needs to be developed incrementally over the project duration (week 6-13). While it is fine to do less in some weeks and more in other weeks, a reasonably consistent delivery rate is expected. For example, it is not acceptable to do the entire project over the recess week and do almost nothing for the remainder of the semester.  Reasons: 1. To simulate a real project where you have to work on a code base over a long period, possibly with breaks in the middle. 2. To learn how to deliver big features in small increments.

    • Constraint-CLI: Command Line Interface is the primary mode of input. The GUI should be used primarily to give visual feedback to the user rather than to collect input. Some minimal use of mouse is OK (e.g. to click the minimize button), but the primary input should be command-driven.
      • Mouse actions should have keyboard alternatives.
      • Typing is preferred over key combinations. Design the app in a way that you can do stuff faster by typing compared to mouse or key combinations.
      • One-shot commands are preferred over multi-step commands. If you provide a multi-step command to help new users, you should also provide a one-shot equivalent for regular users.  Reason: We want the user to be able to accomplish tasks faster using CLI than a GUI; having to enter commands part-by-part will slow down the user.
      • ❗️ While we don't prohibit GUI-only features, such features will be ignored during grading.
    • Constraint-Human-Editable-File: The data should be stored locally and should be in a human editable text file. Use of relational or No-SQL databases are not allowed.
      Reason: To allow advanced users to manipulate the data by editing the data file.

    • Constraint-OO: The software should follow the Object-oriented paradigm.
      Reason: For you to practice OOP that you learned in the course.

    • Constraint-Platform-Independent: The software should work on the Windows, Linux, and OS-X platforms. Even if you are unable to manually test the app on all three platforms, consciously avoid using OS-dependent libraries and OS-specific features.
      Reason: Peer testers can use any of these platforms.

    • Constraint-No-Installer: The software should work without requiring an installer. Having an optional installer is OK as longs as the portable (non-installed) version has all the critical functionality.
      Reason: We do not want to install all your projects on our testing machines when we test them for grading.

    • Constraint-External-Software: The use of third-party frameworks/libraries is allowed but only if they,

      • are free.
      • do not require any installation by the user of your software.
      • do not violate other constraints.

      and is subjected to prior approval by us.
      Reason: We will not allow third-party software that can interfere with the learning objectives of the module.

      Please post in the forum your request to use a third-party libraries before you start using the library. Once a specific library has been approved for one team, other teams may use it without requesting permission again.
      Reason: The whole class should know which external software are used by others so that they can do the same if they wish to.

    Project Deliverables

    To expedite your project implementation, you will be given some sample code (AddressBook-Level1 to AddressBook-Level4, shown as AB1 to AB4 in the diagram above) that you can use as the basis for improving your individual skills during Phases A and as the basis for your project in Phase B.

    AB4 is the version you will use as the starting point for your final project. Some of the work you do in AB1 to AB3 can be ported over to AB4 and can be used to claim credit in the final project.

    The sub-sections further down explain each project deliverable in detail.

    v1.0 [week 7]

    Before you do any coding for the project, please ensure you have set the Git username correctly (see panel below for more details) in all Computers you use for coding.

    Setting Git Username to Match GitHub Username

    We use various tools to analyze your code. For us to be able to identify your commits, you should use the GitHub username as your Git username as well. If there is a mismatch, or if you use multiple user names for Git, our tools might miss some of your work and as a result you might not get credit for some of your work.

    In each Computer you use for coding, after installing Git, you should set the Git username as follows.

    1. Open a command window that can run Git commands (e.g., Git bash window)
    2. Run the command git config --global user.name YOUR_GITHUB_USERNAME
      e.g., git config --global user.name JohnDoe
      ( Note: if you are using git for other projects, you may want to remove the --global flag and run the command only for cs2103 related repos)

    More info about setting Git username is here.

    v1.0 Summary of Milestone

    Here is a summary of items you need to deliver to reach v1.0 individual (👤) and team (👥) milestones. See sections below for more details of each item.

    Milestone Minimum acceptable performance to consider as 'reached'
    👤 Have done some enhancement to the code at least attempted to enhance the code of a component, even if you did not fully succeed
    👥 Team org/repo set up as stated
    👥 All project documents updated as required at least have a full draft version of the required document updates in some format (e.g. GoogleDoc), even if you did not have time to update the documents in the repo

    ❗️ Reaching weekly individual and team milestones are considered for grading the project management component of your project grade (expand the panel below for more info).

    A. Process:

    Evaluates: How well you did in project management related aspects of the project, as an individual and as a team

    Based on: Supervisor observations of weekly milestones and GitHub data. Marks will be deducted if,

    • if you missed more than two individual milestones  out of the six milestones v1.0 - v1.5rc (only the team member loses marks)
    • if your team missed more than two team milestones  out of the six milestones v1.0 - v1.5rc (all team members lose marks)

    Milestones need to be reached before the start of the tutorial. If you reach the milestone during the tutorial, it will be considered as missed.

    Other criteria:

    • Good use of GitHub milestones
    • Good use of GitHub release mechanism
    • Good version control, based on the repo
    • Reasonable attempt to use the forking workflow
    • Good task definition, assignment and tracking, based on the issue tracker
    • Good use of buffers (opposite: everything at the last minute)
    • Project done iteratively and incrementally (opposite: doing most of the work in one big burst)

    B. Team-based tasks:

    Evaluates: how much you contributed to common team-based tasks

    Based on: peer evaluations and tutor observations

    Here is a non-exhaustive list of team-tasks:

    1. Necessary general code enhancements
      1. Work related to renaming the product
      2. Work related to changing the product icon
      3. Morphing the product into a different product
    2. Setting up the GitHub, Travis, AppVeyor, etc.
    3. Maintaining the issue tracker
    4. Release management
    5. Updating user/developer docs that are not specific to a feature  e.g. documenting the target user profile
    6. Incorporating more useful tools/libraries/frameworks into the product or the project workflow (e.g. automate more aspects of the project workflow using a GitHub plugin)

    v1.0 Documentation

    Objective: To analyze requirements, conceptualize the next version of the product (i.e. v2.0), and document it.

    Step 1 : Decide project direction, target user profile, and problem addressed

    Discuss with your team members and decide your project direction, target user profile, and the value proposition of the product, as described in [Admin » Project Scope]

    In general, each team is expected to take one of these two directions:

    [Direction 1] Optimize AddressBook for a more specific target user group:

    An AddressBook,

    • for users in a specific profession  e.g. doctors, salesmen, teachers, etc.
    • based on the nature/scale of contacts  e.g. huge number of contacts (for HR admins, user group admins), mostly incomplete contacts, highly volatile contact details, contacts become inactive after a specific period (e.g. contract employees)
    • based on what users do with the contacts  e.g. organize group events, share info, do business, do analytics

    [Direction 2] Morph AddressBook into a different product: Given that AddressBook is a generic app that manages a type of elements (i.e. contacts), you can use it as a starting point to create an app that manages something else.
    ❗️ This is a high-risk high-reward option because morphing requires extra work but a morphed product may earn more marks than an optimized product of similar complexity.

    An app to manage,

    • Bookmarks of websites
    • Tasks/Schedule
    • Location info
    • Thing to memorize i.e. flash cards, trivia
    • Forum posts, news feeds, Social media feeds
    • Online projects or issue trackers that the user is interested in
    • Emails, possibly from different accounts
    • Multiple types of related things  e.g. Contacts and Tasks (if Tasks are allocated to Contacts)

    For either direction, you need to define a target user profile and a value proposition:

    • Target user profile: Define a very specific target user profile.
      💡 We required you narrow down the target user profile  as opposed to trying to make it as general as possible. Here is an example direction of narrowing down target user: anybody → teachers → university teachers → tech savvy university teachers → CS2103 instructors.
      ❗️ Be careful not to contradict given project constraints when defining the user profile  e.g. the target user should still prefer typing over mouse actions.

    • Value proposition: Define a clear value proposition  what problem does the product solve? how does it make the the user's life easier that matches the target user profile.

    It is expected that your product will be optimized for those specific target users  i.e., add features that are especially/only applicable for target users (to make the app especially attractive to them). To add to the example above, there can be features that are applicable to CS2103 instructors only, such as the ability to navigate to a student's project on GitHub
    💡 Your project will be graded based on how well the features match the target user profile and how well the features fit-together.

    • It is an opportunity to exercise your product design skills because optimizing the product to a very specific target user requires good product design skills.
    • It minimizes the overlap between features of different teams which can cause plagiarism issues. Furthermore, higher the number of other teams having the same features, less impressive your work becomes especially if others have done a better job of implementing that feature.

    Step 2 : Brainstorm user stories

    Get together with your team members and brainstorm for user stories  for the v2.0 of the product. Note that in the module project you will deliver only up to v1.5 but here you should consider up to v2.0 (i.e. beyond the module).

    • It is ok to have more user stories than you can deliver in the project. Aim to create at least 30 user stories. Include all 'obvious' ones you can think of but also look for 'non obvious' ones that you think are likely to be missed by other teams.

    • Refer [Textbook » Specifying Requirements → UserStories → Usage → (section) Tips] for tips on how to use user stories in this task.

    • You can write each user story in a piece of paper (e.g. yellow sticky note, index card, or just pieces of paper about the size of a playing card). Alternatively you can use an online tool (some examples given in [Textbook » Specifying Requirements → UserStories → Usage → (panel) Tool Examples ]).

    • Note that you should not 'evaluate' the value of user stories while doing the above.  Reason: an important aspect of brainstorming is not judging the ideas generated.

    Requirements → Gathering Requirements →

    Brainstorming

    Brainstorming: A group activity designed to generate a large number of diverse and creative ideas for the solution of a problem.

    In a brainstorming session there are no "bad" ideas. The aim is to generate ideas; not to validate them. Brainstorming encourages you to "think outside the box" and put "crazy" ideas on the table without fear of rejection.

    What is the key characteristic about brainstorming?

    (b)

    Requirements → Specifying Requirements → User Stories →

    Introduction

    User story: User stories are short, simple descriptions of a feature told from the perspective of the person who desires the new capability, usually a user or customer of the system. [Mike Cohn]

    A common format for writing user stories is:

    User story format: As a {user type/role} I can {function} so that {benefit}

    📦 Examples (from a Learning Management System):

    1. As a student, I can download files uploaded by lecturers, so that I can get my own copy of the files
    2. As a lecturer, I can create discussion forums, so that students can discuss things online
    3. As a tutor, I can print attendance sheets, so that I can take attendance during the class

    We can write user stories on index cards or sticky notes, and arrange on walls or tables, to facilitate planning and discussion. Alternatively, we can use a software (e.g., GitHub Project Boards, Trello, Google Docs, ...) to manage user stories digitally.

    [credit: https://www.flickr.com/photos/jakuza/2682466984/]

    [credit: https://www.flickr.com/photos/jakuza/with/2726048607/]

    [credit: https://commons.wikimedia.org/wiki/File:User_Story_Map_in_Action.png]

    • a. They are based on stories users tell about similar systems
    • b. They are written from the user/customer perspective
    • c. They are always written in some physical medium such as index cards or sticky notes
    • a. Reason: Despite the name, user stories are not related to 'stories' about the software.
    • b.
    • c. Reason: It is possible to use software to record user stories. When the team members are not co-located this may be the only option.

    Critique the following user story taken from a software project to build an e-commerce website.

    As a developer, I want to use Python to implement the software, so that we can resue existing Python modules.

    Refer to the definition of a user story.

    User story: User stories are short, simple descriptions of a feature told from the perspective of the person who desires the new capability, usually a user or customer of the system. [Mike Cohn]

    This user story is not written from the perspective of the user/customer.

    Bill wants you to build a Human Resource Management (HRM) system. He mentions that the system will help employees to view their own leave balance. What are the user stories you can extract from that statement?

    Remember to follow the correct format when writing user stories.

    User story format: As a {user type/role} I can {function} so that {benefit}

    As an employee, I can view my leave balance, so that I can know how many leave days I have left.

    Note: the {benefit} part may vary as it is not specifically mentioned in the question.

    You can create issues for each of the user stories and use a GitHub Project Board to sort them into categories.

    📦 Example Project Board:

    📦 Example Issue to represent a user story:

    A video on GitHub Project Boards:


    📦 Example Google Sheet for recording user stories:


    📦 Example Trello Board for recording user stories:


    Given their lightweight nature, user stories are quite handy for recording requirements during early requirements gathering.

    💡 Here are some tips for using user stories for early stages of requirement gathering:

    • Define the target user:
      Decide your target user's profile (e.g. a student, office worker, programmer, sales person) and work patterns (e.g. Does he work in groups or alone? Does he share his computer with others?). A clear understanding of the target user will help when deciding the importance of a user story. You can even give this user a name.  e.g. Target user Jean is a university student studying in a non-IT field. She interacts with a lot of people due to her involvement in university clubs/societies. ...
    • Define the problem scope: Decide that exact problem you are going to solve for the target user.  e.g. Help Jean keep track of all her school contacts
    • Don't be too hasty to discard 'unusual' user stories:
      Those might make your product unique and stand out from the rest, at least for the target users.
    • Don't go into too much details:
      For example, consider this user story: As a user, I want to see a list of tasks that needs my attention most at the present time, so that I pay attention to them first.
      When discussing this user story, don't worry about what tasks should be considered needs my attention most at the present time. Those details can be worked out later.
    • Don't be biased by preconceived product ideas:
      When you are at the stage of identifying user needs, clear your mind of ideas you have about what your end product will look like.
    • Don't discuss implementation details or whether you are actually going to implement it:
      When gathering requirements, your decision is whether the user's need is important enough for you to want to fulfil it. Implementation details can be discussed later. If a user story turns out to be too difficult to implement later, you can always omit it from the implementation plan.

    As a user I can add a task by specifying a task description only, so that I can record tasks that need to be done ‘some day’.
    As a user I can find upcoming tasks, so that I can decide what needs to be done soon.
    As a user I can delete a task, so that I can get rid of tasks that I no longer care to track.
    As a new user I can view more information about a particular command, so that I can learn how to use various commands.
    As an advanced user I can use shorter versions of a command, so that type a command faster.

    Step 3: Prioritize the user stories

    Suggested workflow:

    • Take one user story at a time and get team member opinions about it.

    • Based on the team consensus, put the story (i.e. the piece of paper) onto one of these three piles:

      • Must-Have : The product will be practically useless to the target user without this feature.
      • Nice-To-Have : The target user can benefit from this user story significantly but you are not certain if you'll have time to implement it.
      • Not-Useful : No significant benefit to the target user, or does not fit into the product vision.
    • If using physical paper to record user stories: After all stories have been put in the above three piles, you can make a record of which stories are in the three piles.

    Step 4: Record v2.0 Requirements in the Developer Guide

    Based on your user story categorization in step 1, given project requirements, and the current state of the product, select which user stories you are likely to include in v2.0.

    Update the following pages of the Developer Guide:

    • Target user profile, value proposition, and user stories: Update the target user profile and value proposition to match the project direction you have selected. Give a list of the user stories (and update/delete existing ones, if applicable), including priorities. This can include user stories considered but will not be included in the final product.
    • Use cases: Give use cases (textual form) for a few representative user stories that need multiple steps to complete. e.g. Adding a tag to a person (assume the user needs to find the person first)
    • Non-functional requirements:
      Note: Many of the project constraints mentioned above are NFRs. You can add more. e.g. performance requirements, usability requirements, scalability requirements, etc.
    • Glossary: Define terms that are worth defining.
    • [Optional] Product survey: Explore a few similar/related products and describe your findings i.e. Pros, cons, (from the target user's point of view).

    Introduction

    🏆 Can explain use cases

    Use Case: A description of a set of sequences of actions, including variants, that a system performs to yield an observable result of value to an actor.[ 📖 : uml-user-guideThe Unified Modeling Language User Guide, 2e, G Booch, J Rumbaugh, and I Jacobson ]

    Actor: An actor (in a use case) is a role played by a user. An actor can be a human or another system. Actors are not part of the system; they reside outside the system.

    A use case describes an interaction between the user and the system for a specific functionality of the system.

    • System: ATM
    • Actor: Customer
    • Use Case: Check account balance
      1. User inserts an ATM card
      2. ATM prompts for PIN
      3. User enters PIN
      4. ATM prompts for withdrawal amount
      5. User enters the amount
      6. ATM ejects the ATM card and issues cash
      7. User collects the card and the cash.
    • System: A Learning Management System (LMS)
    • Actor: Student
    • Use Case: Upload file
      1. Student requests to upload file
      2. LMS requests for the file location
      3. Student specifies the file location
      4. LMS uploads the file

    UML includes a diagram type called use case diagrams that can illustrate use cases of a system visually, providing a visual ‘table of contents’ of the use cases of a system. In the example below, note how use cases are shown as ovals and user roles relevant to each use case are shown as stick figures connected to the corresponding ovals.

    Unified Modeling Language (UML) is a graphical notation to describe various aspects of a software system. UML is the brainchild of three software modeling specialists James Rumbaugh, Grady Booch and Ivar Jacobson (also known as the Three Amigos). Each of them has developed their own notation for modeling software systems before joining force to create a unified modeling language (hence, the term ‘Unified’ in UML). UML is currently the de facto modeling notation used in the software industry.

    Use cases capture the functional requirements of a system.

    Identifying

    🏆 Can use use cases to list functional requirements of a simple system

    A use case is an interaction between a system and its actors.

    Actors in Use Cases

    Actor: An actor (in a use case) is a role played by a user. An actor can be a human or another system. Actors are not part of the system; they reside outside the system.

    📦 Some example actors for a Learning Management System

    • Actors: Guest, Student, Staff, Admin, ExamSys, LibSys.

    A use case can involve multiple actors.

    • Software System: LearnSys
    • Use case: UC01 conduct survey
    • Actors: Staff, Student

    An actor can be involved in many use cases.

    • Software System: LearnSys
    • Actor: Staff
    • Use cases: UC01 conduct survey, UC02 Set Up Course Schedule, UC03 Email Class, ...

    A single person/system can play many roles.

    • Software System: LearnSys
    • Person: a student
    • Actors (or Roles): Student, Guest, Tutor

    Many persons/systems can play a single role.

    • Software System: LearnSys
    • Actor(or role) : Student
    • Persons that can play this role : undergraduate student, graduate student, a staff member doing a part-time course, exchange student

    Use cases can be specified at various levels of detail.

    📦 Consider the three use cases given below. Clearly, (a) is at a higher level than (b) and (b) is at a higher level than (c).

    • System: LearnSys
    • Use cases:
      a. Conduct a survey
      b. Take the survey
      c. Answer survey question

    While modeling user-system interactions,

    💡 Start with high level use cases and progressively work toward lower level use cases.

    💡 Be mindful at which level of details you are working on and not to mix use cases of different levels.

    Consider a simple movie ticket vending machine application. Every week, the theatre staff will enter the weekly schedule as well as ticket price for each show. A customer sees the schedule and the ticket price displayed at the machine. There is a slot to insert money, a keypad to enter a code for a movie, a code for the show time, and the number of tickets. A display shows the customer's balance inside the machine. A customer may choose to cancel a transaction before pressing the “buy” button. Printed tickets can be collected from a slot at the bottom of the machine. The machine also displays messages such as "Please enter more money”, “Request fewer tickets" or "SOLD OUT!”. Finally, a "Return Change" button allows the customer to get back his unspent money.

    Draw a use case diagram for the above requirements.

    Note that most of the details in the description are better given as part of the use case description rather than as low-level use cases in the diagram.

    A software house wishes to automate its Quality Assurance division.

    The system is to be used by Testers, Programmers and System Administrators. Only an administrator can create new users and assign tasks to programmers. Any tester can create a bug report, as well as set the status of a bug report as ‘closed’. Only a programmer can set the state of a bug report to ‘fixed’, but a programmer cannot set the status of a bug report to ‘closed’. Each tester is assigned just one task at a time. A task involves testing of a particular component for a particular customer. Tester must document the bugs they find. Each bug is given a unique identifier. Other information recorded about the bug is component id, severity, date and time reported, programmer who is assigned to fix it, date fixed, date retested and date closed. The system keeps track of which bugs are assigned to which programmer at any given time. It should be able to generate reports on the number of bugs found, fixed and closed e.g. number of bugs per component and per customer; number of bugs found by a particular tester ; number of bugs awaiting to be fixed; number of bugs awaiting to be retested; number of bugs awaiting to be assigned to programmers etc.

    Develop a use case diagram to capture their requirements given below.

    Explanation: The given description contains information not relevant to use case modeling. Furthermore, the description is not enough to complete the use case diagram All these are realities of real projects. However, the process of trying to create this use case diagram prompts us to investigate issues such as:

    • Is ‘edit bug report’ a use case or editing the bug report is covered by other use cases such as those for setting the status of bug reports? If it is indeed a separate use case, who are the actors of that use case?
    • Does ‘assign task’ simply means ‘assign bug report’ or is there any other type of tasks?
    • There was some mention about Customers and Components. Does the system have to support use cases for creating and maintaining details about those entities? For example, should we have a ‘create customer record’ use case?
    • Which actors can perform the ‘generate report’ use case? Are reports generated automatically by the system at a specific time or generated ‘on demand’ when users request to view them? Do we have to treat different types of reports as different use cases (in case some types of reports are restricted to some types of users)? The above diagram assumes (just for illustration) that the report is generated on demand and only the system admin can generate any report.

    Details

    🏆 Can specify details of a use case in a structured format

    Writing use case steps

    The main body of the use case is the sequence of steps that describes the interaction between the system and the actors. Each step is given as a simple statement describing who does what.

    📦 An example of the main body of a use case.

    1. Student requests to upload file
    2. LMS requests for the file location
    3. Student specifies the file location
    4. LMS uploads the file

    A use case describes only the externally visible behavior, not internal details, of a system i.e. should not mention give details that are not part of the interaction between the user and the system.

    📦 This example use case step refers to behaviors not externally visible .

    1. LMS saves the file into the cache and indicates success.

    A step gives the intention of the actor (not the mechanics). That means UI details are usually omitted. The idea is to leave as much flexibility to the UI designer as possible. That is, the use case specification should be as general as possible (less specific) about the UI.

    ❌ User right-clicks the text box and chooses ‘clear’  : this contains UI-specific details and is not a good use case step)

    ✅ User clears the input  : this is better because it omits UI-specific details

    This is how you can include repetitive steps in a scenario.

    Software System: Square game Use case: UC02 - Play a Game Actors: Player (multiple players)

    1. A Player starts the game.
    2. SquareGame asks for player names.
    3. Each Player enters his own name.
    4. SquareGame shows the order of play.
    5. SquareGame prompts for the current Player to throw die.
    6. Current Player adjusts the throw speed.
    7. Current Player triggers the die throw.
    8. Square Game shows the face value of the die.
    9. Square Game moves the Player's piece accordingly.
      Steps 5-9 are repeated for each Player, and for as many rounds as required until a Player reaches the 100th square.
    10. Square Game shows the Winner.

      Use case ends.

    The Main Success Scenario (MSS) describes the most straightforward interaction for a given use case, which assumes that nothing goes wrong. This is also called the Basic Course of Action or the Main Flow of Events of a use case.

    • System: Online Banking System (OBS)
    • Use case: UC23 - Transfer Money
    • Actor: User
    • MSS:
      1. User chooses to transfer money.
      2. OBS requests for details of the transfer.
      3. User enters the requested details.
      4. OBS requests for confirmation.
      5. OBS transfers the money and displays the new account balance.
      6. Use case ends.

    Note how the MSS assumes that all entered details are correct and ignores problems such as timeouts, network outages etc. Fro example, MSS does not tell us what happens if the user enters an incorrect data.

    Extensions are "add-on"s to the MSS that describe exceptional/alternative flow of events. They describe variations of the scenario that can happen if certain things are not as expected by the MSS. Extensions appear below the MSS.

    📦 This example adds some extensions to the use case in the previous example.

    • System: Online Banking System (OBS)
    • Use case: UC23 - Transfer Money
    • Actor: User
    • MSS:
      1. User chooses to transfer money.
      2. OBS requests for details of the transfer.
      3. User enters the requested details.
      4. OBS requests for confirmation.
      5. OBS transfers the money and displays the new account balance.
      6. Use case ends.
    • Extensions:
      1. 3a. OBS detects an error in the entered data.
        1. 3a1. OBS requests for the correct data.
        2. 3a2. User enters new data.
        3. Steps 3a1-3a2 are repeated until the data entered are correct.
        4. Use case resumes from step 4.
      2. 3b. User requests to effect the transfer in a future date.
        1. 3b1. OBS requests for confirmation.
        2. 3b2. User confirms future transfer.
        3. Use case ends.
      3. *a. At any time, User chooses to cancel the transfer.
        1. *a1. OBS requests to confirm the cancellation.
        2. *a2. User confirms the cancellation.
        3. Use case ends.
      4. *b. At any time, 120 seconds lapse without any input from the User.
        1. *b1. OBS cancels the transfer.
        2. *b2. OBS informs the User of the cancellation.
        3. Use case ends.

    Note that the numbering style is not a universal rule but a widely used convention. Based on that convention,

    • either of the extensions marked 3a. and 3b. can happen just after step 3 of the MSS.
    • the extension marked as *a. can happen at any step (hence, the *).

    When separating extensions from the MSS, keep in mind that the MSS should be self-contained. That is, the MSS should give us a complete usage scenario.

    Also note that it is not useful to mention events such as power failures or system crashes as extensions because the system cannot function beyond such catastrophic failures.

    In use case diagrams you can use the << extend >> arrows to show extensions. Note the direction of the arrow is from the extension to the use case it extends and the arrow uses a dashed line.

    A use case can include another use case. Underlined text is commonly used to show an inclusion of a use case.

    📦 This use case includes two other use cases, one in step 1 and one in step 2.

    • Software System: LearnSys
    • Use case: UC01 - Conduct Survey
    • Actors: Staff, Student
    • MSS:
      1. Staff creates the survey (UC44).
      2. Student completes the survey (UC50).
      3. Staff views the survey results.
      4. Use case ends.

    Inclusions are useful,

    • when you don't want to clutter a use case with too many low-level steps.
    • when a set of steps is repeated in multiple use cases.

    We use a dotted arrow and a << include >> annotation to show use case inclusions in a use case diagram. Note how the arrow direction is different from the << extend >> arrows.

    Preconditions specify the specific state we expect the system to be in before the use case starts.

    • Software System: Online Banking System
    • Use case: UC23 - Transfer Money
    • Actor: User
    • Preconditions: User is logged in.
    • MSS:
      1. User chooses to transfer money.
      2. OBS requests for details for the transfer.
      3. ...

    Guarantees specify what the use case promises to give us at the end of its operation.

    • Software System: Online Banking System
    • Use case: UC23 - Transfer Money
    • Actor: User
    • Preconditions: User is logged in.
    • Guarantees:
      • Money will be deducted from the source account only if the transfer to the destination account is successful
      • The transfer will not result in the account balance going below the minimum balance required.
    • MSS:
      1. User chooses to transfer money.
      2. OBS requests for details for the transfer.
      3. ...

    Complete the following use case (MSS, extensions, etc.). Note that you should not blindly follow how the existing EZ-Link machine operates because it will prevent you from designing a better system. You should consider all possible extensions without complicating the use case too much.

    • System: EZ-Link machine
    • Use case: UC2 top-up EZ-Link card
    • Actor: EZ-Link card user
    • System: EZ-Link machine (those found at MRTs)
    • Use case: UC2 top-up EZ-Link card
    • Actor: EZ-Link card user
    • Preconditions: All hardware in working order.
    • Guarantees: MSS → the card will be topped-up.
    • MSS:
      1. User places the card on the reader.
      2. System displays card details and prompts for desired action.
      3. User selects top-up.
      4. System requests for top-up details (amount, payment option, receipt required?).
      5. User enters details.
      6. System processes cash payment (UC02) or NETS payment (UC03).
      7. System updates the card value.
      8. System indicates transaction as completed.
      9. If requested in step 5, system prints receipt.
      10. User removes the card.
      11. Use case ends.
    • Extensions:
      1. *a. User removed card or other hardware error detected.
        1. *a1. System indicates the transaction has been aborted.
        2. Use case ends.

    Notes:

    • We assume that the only way to cancel a transaction is by removing the card.
    • By not breaking step 4 into further steps, we avoid committing to a particular mechanism to enter data. For example, we are free to accept all data in one screen.
    • In step 5, we assume that the input mechanism does not allow any incorrect data.
    • System: EZ-Link machine
    • Use case: UC03 process NETS payment
    • Actor: EZ-Link card user
    • Preconditions: A transaction requiring payment is underway.
    • Guarantees: MSS → Transaction amount is transferred from user account to EZ-Link company account.
    • MSS:
      1. System requests to insert ATM card.
      2. User inserts the ATM card.
      3. System requests for PIN.
      4. User enters PIN.
      5. System reports success.
      6. Use case ends.
    • Extensions:
      1. 2a. Unacceptable ATM card (damaged or inserted wrong side up).
        1. ...
      2. 4a. Wrong PIN.
        1. ...
      3. 4b. Insufficient funds.
        1. ...
      4. *a. Connection to the NETS gateway is disrupted.
        1. ...

    Note: UC02 can be written along similar lines.

    Complete the following use case (MSS, extensions, etc.).

    • System: LearnSys (an online Learning Management System)
    • Use case: UC01 reply to post in the forum
    • Actor: Student
    • System: LearnSys
    • Use case: UC01 reply to post in the forum
    • Actor: Student
    • Preconditions: Student is logged in and has permission to post in the forum. The post to which the Student replies already exists.
    • MSS:
      1. Student chooses to reply to an existing post.
      2. LearnSys requests the user to enter post details.
      3. Student enters post details.
      4. Student submits the post.
      5. LearnSys displays the post.
      6. Use case ends.
    • Extensions:
      1. *a. Internet connection goes down.
        1. ...
      2. *b. LearnSys times out
        1. ...
      3. 3a. Student chooses to ‘preview’ the post.
        1. 3a1. LearnSys shows a preview.
        2. 3a2. User chooses to go back to editing.
        3. Use case resumes at step 3.
      4. 3b. Student chooses to attach picture/file
        1. ...
      5. 3c. Student chooses to save the post as a draft.
        1. 3c1. LearnSys confirms draft has been saved.
        2. Use case ends.
      6. 3d. Student chooses to abort the operation.
        1. ...
      7. 4a. The post being replied to is deleted by the owner while the reply is being entered.
        1. ...
      8. 4b. Unacceptable data entered.
        1. ...

    Which of these cannot appear as part of a use case description?

    • a. Use case identifier
    • b. Preconditions
    • c. Guarantees
    • d. References to another use case
    • e. Main Success Scenario
    • f. Performance requirements
    • g. Extensions
    • h. Inclusions

    (f)

    Explanation: Performance requirements are non-functional requirements. They are not captured in use cases.

    Identify problems with this use case description.

    • System: EZ-Link machine (those found at MRTs)
    • Use case: UC2 top-up EZ-Link card
    • Actor: EZ-Link card user
    • Preconditions: All hardware in working order.
    • Guarantees: If MSS completes at least until step 7, the card will be topped-up.
    • MSS:
      1. User places the card on the reader.
      2. System displays card details and prompts for desired action.
      3. User selects top-up.
      4. System requests for top-up details (amount, payment option, receipt required?).
      5. User enters details.
      6. System processes cash payment (UC02) or NETS payment (UC03).
      7. System updates the card value.
      8. System indicates transaction as completed.
      9. If requested in step 5, system prints receipt.
      10. User removes the card.
      11. Use case ends.
    • Extensions:
      1. *a. User removed card or other hardware error detected.
        1. *a1. System indicates the transaction has been aborted.
        2. Use case ends.
    • a. It does not consider ‘system crash’ scenario.
    • b. It does not contain enough UI details.
    • c. The extension given is in fact an inclusion.
    • d. No post conditions are given.
    • e. ‘Use case ends’ is duplicated.

    None.

    Explanation: Catastrophic failures such as ‘system crash’ need not be included in a use case. A use case is not supposed to contain UI details. Post conditions are optional. It is not a problem to have multiple exit points for a use case.

    Usage

    🏆 Can optimize the use of use cases

    You can use actor generalization in use case diagrams using a symbol similar to that of UML notation for inheritance.

    📦 In this example, actor Blogger can do all the use cases the actor Guest can do, as a result of the actor generalization relationship given in the diagram.

    💡 Do not over-complicate use case diagrams by trying to include everything possible. A use case diagram is a brief summary of the use cases that is used as a starting point. Details of the use cases can be given in the use case descriptions.

    Some include ‘System’ as an actor to indicate that something is done by the system itself without being initiated by a user or an external system.

    📦 The diagram below can be used to indicate that the system generates daily reports at midnight.

    However, others argue that only use cases providing value to an external user/system should be shown in the use case diagram. For example, they argue that ‘view daily report’ should be the use case and generate daily report is not to be shown in the use case diagram because it is simply something the system has to do to support the view daily report use case.

    We recommend that you follow the latter view (i.e. not to use System as a user). Limit use cases for modeling behaviors that involve an external actor.

    UML is not very specific about the text contents of a use case. Hence, there are many styles for writing use cases. For example, the steps can be written as a continuous paragraph. Use cases should be easy to read. Note that there is no strict rule about writing all details of all steps or a need to use all the elements of a use case.

    There are some advantages of documenting system requirements as use cases:

    • Because they use a simple notation and plain English descriptions, they are easy for users to understand and give feedback.
    • They decouple user intention from mechanism (note that use cases should not include UI-specific details), allowing the system designers more freedom to optimize how a functionality is provided to a user.
    • Identifying all possible extensions encourages us to consider all situations that a software product might face during its operation.
    • Separating typical scenarios from special cases encourages us to optimize the typical scenarios.

    One of the main disadvantages of use cases is that they are not good for capturing requirements that does not involve a user interacting with the system. Hence, they should not be used as the sole means to specify requirements.

    What are the advantages of using use cases (the textual form) for requirements modelling?

    • a. They can be fairly detailed but still natural enough for users for users to understand and give feedback.
    • b. The UI-independent nature of use case specification allows the system designers more freedom to decide how a functionality is provided to a user.
    • c. Extensions encourage us to consider all situations a software product might face during its operations.
    • d. They encourage us to identify and optimize the typical scenario of usage over exceptional usage scenarios.

    (a) (b) (c) (d)

    Which of these are correct?

    • a. Use case are not very suitable for capturing non-functional requirements.
    • b. Use case diagrams are less detailed than textual use cases.
    • c. Use cases are better than user stories.
    • d. Use cases can be expressed at different levels of abstraction.

    (a)(b)(d)

    Explanation: It is not correct to say one format is better than the other. It depends on the context.

    Requirements → Requirements →

    Non-Functional Requirements

    There are two kinds of requirements:

    1. Functional requirements specify what the system should do.
    2. Non-functional requirements specify the constraints under which system is developed and operated.

    📦 Some examples of non-functional requirement categories:

    • Data requirements e.g. size, volatility, persistency etc.,
    • Environment requirements e.g. technical environment in which system would operate or need to be compatible with.
    • Accessibility, Capacity, Compliance with regulations, Documentation, Disaster recovery, Efficiency, Extensibility, Fault tolerance, Interoperability, Maintainability, Privacy, Portability, Quality, Reliability, Response time, Robustness, Scalability, Security, Stability, Testability, and more ...
    • Business/domain rules: e.g. the size of the minefield cannot be smaller than five.
    • Constraints: e.g. the system should be backward compatible with data produced by earlier versions of the system; system testers are available only during the last month of the project; the total project cost should not exceed $1.5 million.
    • Technical requirements: e.g. the system should work on both 32-bit and 64-bit environments.
    • Performance requirements: e.g. the system should respond within two seconds.
    • Quality requirements: e.g. the system should be usable by a novice who has never carried out an online purchase.
    • Process requirements: e.g. the project is expected to adhere to a schedule that delivers a feature set every one month.
    • Notes about project scope: e.g. the product is not required to handle the printing of reports.
    • Any other noteworthy points: e.g. the game should not use images deemed offensive to those injured in real mine clearing activities.

    We should spend extra effort in digging NFRs out as early as possible because NFRs are easier to miss  e.g., stakeholders tend to think of functional requirements first and sometimes they are critical to the success of the software.  E.g. A web application that is too slow or that has low security is unlikely to succeed even if it has all the right functionality.

    Given below are some requirements of TEAMMATES (an online peer evaluation system for education). Which one of these are non-functional requirements?

    • a. The response to any use action should become visible within 5 seconds.
    • b. The application admin should be able to view a log of user activities.
    • c. The source code should be open source.
    • d. A course should be able to have up to 2000 students.
    • e. As a student user, I can view details of my team members so that I can know who they are.
    • f. The user interface should be intuitive enough for users who are not IT-savvy.
    • g. The product is offered as a free online service.

    (a)(c)(d)(f)(g)

    Explanation: (b) are (e) are functions available for a specific user types. Therefore, they are functional requirements. (a), (c), (d), (f) and (g) are either constraints on functionality or constraints on how the project is done, both of which are considered non-functional requirements.

    Requirements → Specifying Requirements → Glossary →

    What

    Glossary: A glossary serves to ensure that all stakeholders have a common understanding of the noteworthy terms, abbreviation, acronyms etc.

    📦 Here is a partial glossary from a variant of the Snakes and Ladders game:

    • Conditional square: A square that specifies a specific face value which a player has to throw before his/her piece can leave the square.
    • Normal square: a normal square does not have any conditions, snakes, or ladders in it.

    Requirements → Gathering Requirements →

    Product Surveys

    Studying existing products can unearth shortcomings of existing solutions that can be addressed by a new product. Product manuals and other forms of technical documentation of an existing system can be a good way to learn about how the existing solutions work.

    📦 When developing a game for a mobile device, a look at a similar PC game can give insight into the kind of features and interactions the mobile game can offer.

    Suggested length: Follow the existing user guide and developer guides in terms of the level of details.

    Submission:

    1. One team member: Set up the team org and team repo for your phase B team if you haven't done that already.

    Organization setup

    The instructions below are for setting up a GitHub organization for your team, which you should do at the start of Phase B.

    You can create your GitHub account after receiving your Phase B team ID. Here are the instructions (please follow the organization/repo name format closely because we use scripts to download your code. If the names are not as expected, our scripts will not work):

    • One team member (e.g. team leader) should create an organization with the following details:
    • Organization name : CS2103JAN2018-TEAM_ID. e.g.  CS2103JAN2018-W09-B3
    • Plan:  Open Source ($0/month)
    • After that, the same person can add members to the organization:
    • Create a team called developers to your organization.
    • Add your team members to the developers team.

    Repo setup

    Only one team member:

    1. Fork Address Book Level 4 to your team org.
    2. Rename the forked repo as main. This repo is to be used as the repo for your project.
    3. Ensure your team members have the desired level of access to your team repo

    All team members:

    1. Fork the main repo (created above) to your personal GitHub account.
    2. Clone the fork to your Computer.
    3. Set it up as an Intellij project (follow the instructions in the Developer Guide carefully).

    Note that some of our download scripts depend on the following folder paths. Please do not alter those paths in your project.

    • /src/main
    • /src/test
    • /docs
    1. Divide among yourselves who will update which parts of the Developer guide.
    2. Update the team repo. Recommended: follow the forking workflow.

    Project Management → Revision Control →

    Forking Flow

    In the forking workflow, the 'official' version of the software is kept in a remote repo designated as the 'main repo'. All team members fork the main repo create pull requests from their fork to the main repo.

    To illustrate how the workflow goes, let’s assume Jean wants to fix a bug in the code. Here are the steps:

    1. Jean creates a separate branch in her local repo and fixes the bug in that branch.
    2. Jean pushes the branch to her fork.
    3. Jean creates a pull request from that branch in her fork to the main repo.
    4. Other members review Jean’s pull request.
    5. If reviewers suggested any changes, Jean updates the PR accordingly.
    6. When reviewers are satisfied with the PR, one of the members (usually the team lead or a designated 'maintainer' of the main repo) merges the PR, which brings Jean’s code to the main repo.
    7. Other members, realizing there is new code in the upstream repo, sync their forks with the new upstream repo (i.e. the main repo). This is done by pulling the new code to their own local repo and pushing the updated code to their own fork.
    1. One member: create a PR from your team repo master branch to [nus-cs2103-AY1718S2/addressbook-level4] master branch. PR name: [v1.x][Team ID] Product Name e.g., [v1.x][T09-B2] Contact List Pro.  As you merge code to your team repo's master branch, this PR will auto-update to reflect how much your team's product has progressed (that's why we use v1.x instead of v1.0 in the PR title). In the PR description mention the other team members so that they get notified when the tutor adds comments to the PR.

    v1.0 Product

    Objective: To familiarize yourself with at least one component the code.

    Description: Divide the components among yourselves. Each member can do some small enhancements to their component(s) to learn the code of that component. Some suggested enhancements are given in the AddressBook-Level4 developer guide.

    ❗️ Before you start coding, please read our reuse policy given below, in particular, how to give credit when you reuse code from Internet or classmates:

    Reuse is encouraged. However, note that reuse has its own costs (such as the learning curve, additional complexity, usage restrictions, and unknown bugs). Furthermore, you will not be given credit for work done by others. Rather, you will be given credit for using work done by others.

    • You are allowed to reuse work from your classmates, subject to following conditions:
      • The work has been published by us or the authors.
      • You clearly give credit to the original author(s).
    • You are allowed to reuse work from external sources, subject to following conditions:
      • The work comes from a source of 'good standing' (such as an established open source project). This means you cannot reuse code written by an outside 'friend'.
      • You clearly give credit to the original author. Acknowledge use of third party resources clearly e.g. in the welcome message, splash screen (if any) or under the 'about' menu. If you are open about reuse, you are less likely to get into trouble if you unintentionally reused something copyrighted.
      • You do not violate the license under which the work has been released. Please  do not use 3rd-party images/audio in your software unless they have been specifically released to be used freely. Just because you found it in the Internet does not mean it is free for reuse.
      • Always get permission from us before you reuse third-party libraries. Please post your 'request to use 3rd party library' in our GitHub forum. That way, the whole class get to see what libraries are being used by others.

    Giving credit for reused work

    Given below are how to give credit for things you reuse from elsewhere. These requirements are specific to this module  i.e., not applicable outside the module (outside the module you should follow the rules specified by your employer and the license of the reused work)

    If you used a third party library:

    • Mention in the README.adoc (under the Acknowledgements section)
    • mention in the Project Portfolio Page if the library has a significant relevance to the features you implemented

    If you reused code snippets found on the Internet  e.g. from StackOverflow answers or
    referred code in another software or
    referred project code by current/past student:

    • If you read the code to understand the approach and implemented it yourself, mention it as a comment
      📦 Example:
      //Solution below adpated from https://stackoverflow.com/a/16252290
      {Your implmentation of the reused solution here ...}
      
    • If you copy-pasted a non-trivial code block (possibly with minor modifications  renaming, layout changes, changes to comments, etc.), also mark the code block as reused code (using Collate Tool Syntax)
      Format:
      //@@author {yourGithubUsername}-reused
      //{Info about the source...}
      
      {Reused code (possibly with minor modifications) here ...}
      
      //@@author
      
      📦 Example of reusing a code snipped (with minor modifications):
      persons = getList()
      //@@author johndoe-reused
      //Reused from https://stackoverflow.com/a/34646172 with minor modifications
      Collections.sort(persons, new Comparator<CustomData>() {
          @Override
          public int compare(CustomData lhs, CustomData rhs) {
              return lhs.customInt > rhs.customInt ? -1 : (lhs.customInt < rhs.customInt) ? 1 : 0;
          }
      });
      //@@author
      return persons;
      

    Submission: Create PRs from your own fork to your team repo. Get it merged by following your team's workflow.

    v1.1 [week 8]

    v1.1 Summary of Milestone

    Milestone Minimum acceptable performance to consider as 'reached'
    👤 Have modified in multiple components Minimal : Your enhancement touches components other than the ones you modified in v1.0 and you are able to demo it using your own computer
    On track : In addition, you have created a PR for the enhancement, it covers tests and documentation updates for the new feature, and the PR passes Travis checks
    Ahead : Your PR has been reviewed and merged.
    👥 All project documents updated as required At least there is a PR containing all required changes
    👥 v1.0 document updates are merged as stated
    👥 Any errors in org/repo set up fixed  (e.g. wrong repo name).
    Auto-publishing of docs is set up and working
    as stated

    v1.1 Product


    [An early version of the mobile phone]

    Objective: Move the product from v1.0 towards v2.0 in a small incremental step.

    Description:

    • Each member should add some enhancements that are in line with the vision for v2.0. We recommend this to be your minor enhancement, but it can also be an initial step in your major enhancement.

    👤 Individually, each student is expected to,

    1. Contribute one major enhancement to the product

      • Each enhancement should be stand-alone but,
        • should fit with the rest of the software (and the target user profile),
        • and should have the consent of the team members.

      Here are the allowed options for enhancing AddressBook:

      1. Add a new feature
      2. Enhance an existing features in a major way e.g. make the command syntax more user friendly and closer to natural language
      3. Modify the internal design in a major way e.g. change the architecture
      4. A major redesign of the GUI e.g. make it work like a chat application (note: chat is a form of CLI)
      5. Integrate with online services e.g. Google contacts, Facebook, GitHub, etc.

      Here are some examples of different major enhancements and the grade the student is likely to earn for the relevant parts of the project grade.

    2. Contribute one minor enhancement to the product:

      • In the initial stages of the project you are required to add one small generic enhancements in order to get familiar with the project.
      • Minor enhancements earn a minimal amount of marks. You are advised not to spend a lot of effort on the minor enhancement.
      • The minor enhancement must touch multiple components  so that it helps you to familiarize yourself wit the codebase.

      Here is a non-exhaustive list of minor enhancements:

      1. Support different themes for the Look & Feel  dark, light, etc.
      2. Support more fields  e.g. Birthday
      3. Load a different page instead of the default Google search page  e.g. Google Maps page or Twitter page
      4. Sort items
      5. Multiple panels  e.g. an additional panel to show recently accessed items
      6. Marking some items as favorites
      7. Ability to search by labels
      8. Ability to specify colors for labels

    3. Contribute to all aspects of the project: e.g. write backend code, frontend code, test code, user documentation, and developer documentation. If you limit yourself to certain aspects only, you will lose marks allocated for the aspects you did not do.
      In particular, you are required to divide work based on features rather than components:

      • By the end of this project (i.e. by v1.5) each team member is expected to have implemented one minor and one major enhancement/feature end-to-end, doing required changes in almost all components.  Reason: to force you to learn all components of the software, instead of limiting yourself to just one/few components.
      • Nevertheless, you are still expected to divide the components of the product among team members so that each team member is in charge of one or more components. While others will be modifying those components as necessary for the features they are implementing, your role as the in charge of a component is to guide others modifying that component  (reason: you are supposed to be the most knowledgeable about that component) and protect that component from degrading  e.g., you can review others' changes to your component and suggest possible changes.
    4. Do a share of team-tasks: These are the tasks that someone in the team has to do. Marks allocated to team-tasks will be divided among team members based on how much each member contributed to those tasks.

      Here is a non-exhaustive list of team-tasks:

      1. Necessary general code enhancements
        1. Work related to renaming the product
        2. Work related to changing the product icon
        3. Morphing the product into a different product
      2. Setting up the GitHub, Travis, AppVeyor, etc.
      3. Maintaining the issue tracker
      4. Release management
      5. Updating user/developer docs that are not specific to a feature  e.g. documenting the target user profile
      6. Incorporating more useful tools/libraries/frameworks into the product or the project workflow (e.g. automate more aspects of the project workflow using a GitHub plugin)

    5. Write ~0.5 KLoC of code, on average.

    Submission: Demo of the new functionality during the tutorial.

    v1.1 Documentation

    Update the following pages:

    • User Guide:
      Update the user guide to describe what the product would be like when it is at 2.0. Mark features not implemented yet as Coming in v2.0. You may use UI mockups where necessary.

    💡 It is highly recommended that you divide documentation work (in the User Guide and the Developer Guide) among team members based on enhancements/features each person would be adding  e.g., If you are the person planing to add a feature X, you should be the person to describe the feature X in the User Guide and in the Developer Guide. For features that are not planned to be implemented by v1.5, you can divide them based on who will be implementing them if the project were to continue until v2.0 (hypothetically).

    Reason: In the final project evaluation your documentation skills will be graded based on sections of the User/Developer Guide you have written.

    • About Us page:
      This page is used for module admin purposes. Please follow the format closely to avoid penalties.
      • Replace info of SE-EDU developers with info of your team, including a suitable photo as described here.
      • Including the name/photo of the supervisor/lecturer is optional.
      • The photo of a team member should be doc/images/githbub_username_in_lower_case.png e.g. docs/images/damithc.png.
    • The purpose of the profile photo is for the teaching team to identify you. Therefore, you should choose a recent individual photo showing your face clearly. Some examples can be seen in the 'Teaching team' page. Given below are some examples of good and bad profile photos.

    • If you are uncomfortable posting your photo due to security reasons, you can post a lower resolution image so that it is hard for someone to misused that image for fraudulent purposes. If you are concerned about privacy, you can request permission to omit your photo from the page by writing to prof.

    • Indicate the different roles played and responsibilities held by each team member. You can reassign these roles and responsibilities later in the project, if necessary.

    Roles indicate aspects you are in charge of and responsible for. E.g., if you are in charge of documentation, you are the person who should allocate which parts of the documentation is to be done by who, ensure the document is in right format, ensure consistency etc.

    Here are some example roles:

    • Team lead: Responsible for overall project coordination.
    • Documentation (short for ‘in charge of documentation’): Responsible for the quality of various project documents.
    • Testing: Ensures the testing of the project is done properly and on time.
    • Code quality: Looks after code quality, ensures adherence to coding standards, etc.
    • Deliverables and deadlines: Ensure project deliverables are done on time and in the right format.
    • Integration: In charge of versioning of the code, maintaining the code repository, integrating various parts of the software to create a whole.
    • Scheduling and tracking: In charge of defining, assigning, and tracking project tasks.
    • [Tool ABC] expert: e.g. Intellij expert, Git expert, etc. Helps other team member with matters related to the specific tool.
    • In charge of[Component XYZ]: e.g. In charge of Model, UI, Storage, etc. If you are in charge of a component, you are expected to know that component well, and review changes done to that component in v1.3-v1.5.

    You may define additional roles.

    Please make sure each of the important roles are assigned to one person in the team. It is OK to have a 'backup' for each role, but for each aspect there should be one person who is unequivocally the person responsible for it.

    • README.adoc page: Update it to match your project.
      • Add a UI mockup of your intended final product.
        Note that the image of the UI should be docs/images/Ui.png so that it can be downloaded by our scripts.
      • The original README.adoc file (which doubles as the landing page of your project website) is written to read like the introduction to an SE learning/teaching resource. You should restructure this page to look like the home page of a real product (not a school project) targeting real users  e.g. remove references to addressbook-level3, Learning Outcomes etc. mention target users, add a marketing blurb etc. On a related note, also remove Learning Outcomes link and related pages.
      • Acknowledge the original source of the code i.e. AddressBook-Level4 project created by SE-EDU initiative at https://github.com/se-edu/

    v1.2 [week 9]

    v1.2 Summary of Milestone

    Milestone Minimum acceptable performance to consider as 'reached'
    👤 Contributed code to the product some code merged
    👤 Described implementation details in the Developer Guide some text and some diagrams added to the developer guide (at least in a PR), comprising at least one page worth of content
    👥 v1.2 managed using GitHub features (issue tracker, milestones, etc.) A new version tagged v1.2 is in your repo. There is evidence of an attempt (even if not completely successful) to use GitHub features as described in [Admin » Appendix E: GitHub: Project Schedule Tracking].

    v1.2 Project Management

    Starting from this version, there are additional requirements to follow regarding how you use GitHub to manage your milestones, as described in [Admin » Appendix E: GitHub: Project Schedule Tracking].

    As before, you are recommended (but not required) to follow the forking workflow when evolving the product.

    Project Schedule Tracking

    In general, use the issue tracker (Milestones, Issues, PRs, Tags, Releases, and Labels) for assigning, scheduling, and tracking all noteworthy project tasks, including user stories. Update the issue tracker regularly to reflect the current status of the project. You can also use GitHub's new Projects feature to manage the project, but keep it linked to the issue tracker as much as you can.

    Using Issues:

    • Record each of the user stories you plan to deliver as an issue in the issue tracker. e.g. Title: As a user I can add a deadline
      Description: ... so that I can keep track of my deadlines

    • Assign the type.* and priority.* labels to those issues.

    • When you start implementing a story, break it down to tasks. Define reasonable sized, standalone tasks. A task should be able to done by one person, in a few hours. e.g.

      • 👍 Good: Update class diagram in the project manual for v1.5
      • 👎 Bad (reasons: not a one-person task, not small enough): Write the project manual
    • Write a descriptive title for the issue. e.g. Add support for the 'undo' command to the parser.

    • There is no need to break things into VERY small tasks. Keep them as big as possible, but they should be no bigger than what you are going to assign a single person to do within a week. eg.,

      • Implementing parser  : too big because it cannot be done by a single person in a week.
      • Implementing parser support for adding of floating tasks : appropriate size.
    • Do not track things taken for granted. e.g., push code to repo should not be a task to track. In the example given under the previous point, it is taken for granted that the owner will also (a) test the code and (b) push to the repo when it is ready. Those two need not be tracked as separate tasks.

    • Omit redundant details. In some cases, the summary/title is enough to describe the task. In that case, no need to repeat it in the description. There is no need for well-crafted and detailed descriptions for tasks. A minimal description is enough. Similarly, labels such as priority can be omitted if you think they don't help you.

    • Assign tasks to team members using the assignees field. At any point, there should be some ongoing tasks and some pending tasks against each team member.

    • Optionally, you can use status.ongoing label to indicate issues currently ongoing.

    Using Milestones:

    • Use GitHub milestones to indicate which issues are to be handled for which milestone by assigning issues to suitable milestones.

    • Set the deadlines for milestones (in GitHub). Your internal milestones can be set earlier than the deadlines we have set, to give you a buffer.

    • Note that you can change the milestone plan along the way as necessary.

    Wrapping up a Milestone:
    Here are the conditions to satisfy for a milestone to be considered properly wrapped up:

    • A working product tagged with the correct tag (e.g. v1.2) is pushed to the main repo.

    • All tests passing on Travis for the version tagged above.

    • Milestone updated to match the product i.e. all issues completed and PRs merged for the milestone should be assigned to the milestone.

    • Milestone closed. If there are incomplete issues or unmerged PRs in the milestone, move them to a future milestone.

    • Optionally, issues for the next milestone are assigned to team members (this is not compulsory to do before the tutorial, but we recommend you to do it soon after the tutorial).

    • Optionally, future milestones are revised based on what you experienced in the current milestone  e.g. if you could not finish all issues assigned to the current milestone, it is a sign that you overestimated how much you can do in a week, which means you might want to reduce the issues assigned to future milestones to match that observation.

    • Doing a 'release' on GitHub is optional for v1.1 and v1.2 but compulsory from v1.3.

    From v1.2 onwards each member is expected to contribute some code to each weekly milestone; only merged code is considered as contributions (Reason).
    If an enhancement is too big to complete in one week, here are some options:

    • [Preferred] Deliver it in smaller incremental steps e.g. deliver a basic version of the enhancement first.
    • Choose not to contribute to the weekly milestone. This should be fine as long as you don't miss more than two milestones.

    v1.2 Product

    Submission: Update code in GitHub.

    💡 If tests are causing too much pain ...

    Automated tests have benefits, but they can be a pain to write/maintain; GUI tests are especially hard to maintain because their behavior can sometimes depend on things such as the OS, resolution etc.

    If you find tests too big a burden, it is OK to get rid of some of the troublesome tests and rely more on manual testing instead. The less automated test coverage you have, the higher the risk of regressions; but it may be an acceptable trade-off under the circumstances if tests are slowing you down too much.

    Also note our expectation on test code.

    • There is no requirement for a minimum coverage level. Note that in a production environment you are often required to have at least 90% of the code covered by tests. In this project, it can be less. The less coverage you have, the higher the risk of regression bugs, which will cost marks if not fixed before the final submission.
    • You must write some tests so that we can evaluate your ability to write tests.
    • How much of each type of testing should you do? We expect you to decide. You learned different types of testing and what they try to achieve. Based on that, you should decide how much of each type is required. Similarly, you can decide to what extent you want to automate tests, depending on the benefits and the effort required.
    • Applying TDD is optional. If you plan to test something, it is better to apply TDD because TDD ensures that you write functional code in a testable way. If you do it the normal way, you often find that it is hard to test the functional code because the code has low testability.

    💡 We use a tool called Collate to extract out code written by each member in your final project submission. The tool requires you to annotate code with special tags to mark code written by you. Adding those annotations is usually done at v1.4 but you are welcome to start early.

    Collate is a tool for collating code written by different developers.

    Steps to use Collate:

    1. Download Collate-TUI.jar from the Collate Tool project
    2. Annotate your code to indicate who wrote which part of the code (instructions given below)
    3. Run the Collate tool to collate code written by each person into separate files (instructions given below)

    Annotating code to indicate authorship

    • Mark your code with a //@@author {yourGithubUsername}. Note the double @.
      The //@@author tag should appear only at the beginning of the code you wrote. The code up to the next //@@author tag or the end of the file (whichever comes first) will be considered as was written by that author. Here is a sample code file:

      //@@author johndoe
      method 1 ...
      method 2 ...
      //@@author sarahkhoo
      method 3 ...
      //@@author johndoe
      method 4 ...
      
    • If you don't know who wrote the code segment below yours, you may put an empty //@@author (i.e. no GitHub username) to indicate the end of the code segment you wrote. The author of code below yours can add the GitHub username to the empty tag later. Here is a sample code with an empty author tag:

      method 0 ...
      //@@author johndoe
      method 1 ...
      method 2 ...
      //@@author
      method 3 ...
      method 4 ...
      
    • The author tag syntax varies based on file type e.g. for java, css, fxml. Use the corresponding comment syntax for non-Java files.
      Here is an example code from an xml file.

      <!-- @@author sereneWong -->
      <textbox>
        <label>...</label>
        <input>...</input>
      </textbox>
      ...
      
    • Do not put the //@@author inside java header comments as only the content below that tag will be collated.
      👎⤵️

      /**
        * Returns true if ...
        * @@author johndoe
        */
      

      👍⤵️

      //@@author johndoe
      /**
        * Returns true if ...
        */
      

    What to and what not to annotate

    • Annotate both functional and test code but not documentation files.

    • Annotate only significant size code blocks that can be reviewed on its own  e.g., a class, a sequence of methods, a method.
      Claiming credit for code blocks smaller than a method is discouraged but allowed. If you do, do it sparingly and only claim meaningful blocks of code such as a block of statements, a loop, or an if-else statement%%.

      • If an enhancement required you to do tiny changes in many places, there is no need to collate all those tiny changes; you can describe those changes in the Project Portfolio page instead.
      • If a code block was touched by more than one person, either let the person who wrote most of it (e.g. more than 80%) take credit for the entire block, or leave it as 'unclaimed' (i.e., no author tags).
      • Related to the above point, if you claim a code block as your own, more than 80% of the code in that block should have been written by yourself. For example, no more than 20% of it can be code you reused from somewhere.
      • 💡 GitHub has a blame feature and a history feature that can help you determine who wrote a piece of code.
    • Do not try to boost the length of your collated files using dubious means such as duplicating the same code in multiple places. In particular, do not copy-paste test cases to create redundant tests. Even repetitive code blocks within test methods should be extracted out as utility methods to reduce code duplication.
      Individual members are responsible for making sure their own collated files contain the correct content.
      If you notice a team member claiming credit for code that he/she did not write or use other questionable tactics, you can email us (after the final submission) to let us know.

    • If you wrote a significant amount of code that was not used in the final product,

      • Create a folder called {project root}/unused
      • Move unused files (or copies of files containing unused code) to that folder
      • use //@@author {yourGithubUsername}-unused to mark unused code in those files (note the suffix unused) e.g.
      //@@author johndoe-unused
      method 1 ...
      method 2 ...
      

      Please put a comment in the code to explain why it was not used.

    • If you reused code from elsewhere, mark such code as //@@author {yourGithubUsername}-reused (note the suffix reused) e.g.

      //@@author johndoe-reused
      method 1 ...
      method 2 ...
      
    • For code generated by the IDE/framework, should not be annotated as your own.

    • Code you modified in minor ways e.g. adding a parameter. These can be left out of collated code but can be mentioned in the Project Portfolio page if you want to claim credit for them.

    Collating the annotated code

    You need to put the collated code in the following folders

    Code Type Folder
    functional code collated/functional
    test code collated/test
    unused code collated/unused

    Refer to Collate Tool's user guide to find how to run the tool over the annotated code.

    Given below are DOS sample commands you can put in a batch file and run it to collate the code.

    java -jar Collate-TUI.jar collate from src/main to collated/functional include java, fxml, css
    
    java -jar Collate-TUI.jar collate from src/test to collated/test include java
    
    java -jar Collate-TUI.jar collate from unused to collated/unused include java, fxml, css
    

    The output should be something like the structure given below.

    collated/
        functional/
            johndoe.md
            sarahkhoo.md
            ravikumar.md
            ravikumarreused.md
        test/
            johndoe.md
            sarahkhoo.md
            ravikumar.md
        unused/
            johndoe.md
    
    • After running the collate tool, you are recommended to look through the generated .md files to ensure all your code has been extracted correctly.

    • Push the *.md files created to a folder called /collated in your repo.

    v1.2 Documentation

    • User Guide: Update as necessary.

      • If a feature has been released in this version, replace the Coming in v2.0 annotation with a Since v1.2. Also replace UI mockups with actual screenshots.
      • If a feature design has changed, update the descriptions accordingly.
    • Developer Guide:

      • Each member should describe the implementation of at least one enhancement she has added (or planning to add).
        Expected length: 1+ page per person
      • The description can contain things such as,
        • How the feature is implemented.
        • Why it is implemented that way.
        • Alternatives considered.
      • The stated objective is to explain the implementation to a future developer, but a hidden objective is to show evidence that you can document deeply-technical content using prose, examples, diagrams, code snippets, etc. appropriately. To that end, you may also describe features that you plan to implement in the future, even beyond v1.5 (hypothetically).
      • For an example, see the description of the undo/redo feature implementation in the AddressBook-Level4 developer guide.

    v1.2 Demo

    Do an informal demo of the new feature during the tutorial. Each team member should demo their own work, using commit tagged as v1.2 in the master branch  i.e. only features included in the current release should be demoed.

    v1.3 [week 10]

    v1.3 Summary of Milestone

    Milestone Minimum acceptable performance to consider as 'reached'
    👤 Contributed code to v1.3 some code merged
    👥 v1.3 jar file released properly on GitHub as stated
    👥 Documentation not significantly behind v1.3 as stated
    👥 v1.3 milestone (and previous milestones) properly wrapped up on GitHub as explained in [Admin » Appendix E (Extract)] as stated

    Project Schedule Tracking

    In general, use the issue tracker (Milestones, Issues, PRs, Tags, Releases, and Labels) for assigning, scheduling, and tracking all noteworthy project tasks, including user stories. Update the issue tracker regularly to reflect the current status of the project. You can also use GitHub's new Projects feature to manage the project, but keep it linked to the issue tracker as much as you can.

    Using Issues:

    • Record each of the user stories you plan to deliver as an issue in the issue tracker. e.g. Title: As a user I can add a deadline
      Description: ... so that I can keep track of my deadlines

    • Assign the type.* and priority.* labels to those issues.

    • When you start implementing a story, break it down to tasks. Define reasonable sized, standalone tasks. A task should be able to done by one person, in a few hours. e.g.

      • 👍 Good: Update class diagram in the project manual for v1.5
      • 👎 Bad (reasons: not a one-person task, not small enough): Write the project manual
    • Write a descriptive title for the issue. e.g. Add support for the 'undo' command to the parser.

    • There is no need to break things into VERY small tasks. Keep them as big as possible, but they should be no bigger than what you are going to assign a single person to do within a week. eg.,

      • Implementing parser  : too big because it cannot be done by a single person in a week.
      • Implementing parser support for adding of floating tasks : appropriate size.
    • Do not track things taken for granted. e.g., push code to repo should not be a task to track. In the example given under the previous point, it is taken for granted that the owner will also (a) test the code and (b) push to the repo when it is ready. Those two need not be tracked as separate tasks.

    • Omit redundant details. In some cases, the summary/title is enough to describe the task. In that case, no need to repeat it in the description. There is no need for well-crafted and detailed descriptions for tasks. A minimal description is enough. Similarly, labels such as priority can be omitted if you think they don't help you.

    • Assign tasks to team members using the assignees field. At any point, there should be some ongoing tasks and some pending tasks against each team member.

    • Optionally, you can use status.ongoing label to indicate issues currently ongoing.

    Using Milestones:

    • Use GitHub milestones to indicate which issues are to be handled for which milestone by assigning issues to suitable milestones.

    • Set the deadlines for milestones (in GitHub). Your internal milestones can be set earlier than the deadlines we have set, to give you a buffer.

    • Note that you can change the milestone plan along the way as necessary.

    Wrapping up a Milestone:
    Here are the conditions to satisfy for a milestone to be considered properly wrapped up:

    • A working product tagged with the correct tag (e.g. v1.2) is pushed to the main repo.

    • All tests passing on Travis for the version tagged above.

    • Milestone updated to match the product i.e. all issues completed and PRs merged for the milestone should be assigned to the milestone.

    • Milestone closed. If there are incomplete issues or unmerged PRs in the milestone, move them to a future milestone.

    • Optionally, issues for the next milestone are assigned to team members (this is not compulsory to do before the tutorial, but we recommend you to do it soon after the tutorial).

    • Optionally, future milestones are revised based on what you experienced in the current milestone  e.g. if you could not finish all issues assigned to the current milestone, it is a sign that you overestimated how much you can do in a week, which means you might want to reduce the issues assigned to future milestones to match that observation.

    • Doing a 'release' on GitHub is optional for v1.1 and v1.2 but compulsory from v1.3.

    💡 If the project is too difficult for you to keep up with, there is an easier path

    As CS2103/T is a core module for Computing students, the project standards are set high enough to train students for a CS/SE career. However, some of you may not have gained enough pre-requisite skills (possibly because you don't plan for a CS/SE-related career, or for some other reason) in previous modules to be able to survive a code base such as AddressBook-Level4 (AB4). Based on your v1.0-1.2 experience, you should now be able to decide weather you are in that category.

    If you think you are in that category  (e.g. you haven't managed to merge any code to AB4 code base yet in spite of much trying) and you fear that you are not going to learn much by continuing to struggle in the AB4 code base, we are willing to let you go back to AB3 or AB2 code base and use that for your project instead. This decision can be made as a team or individually. We'll use the same criteria for grading your project either way, but naturally, work done in AB2/AB3 is going to earn significantly less marks than similar work done in AB4. If you want to take that option, please email us know before v1.3 deadline.

    v1.3 Project Management

    Starting from this version, you are required to, do a proper product release as described in the Developer Guide.

    💡 Ensure that each PR that adds an enhancement also updates the relevant parts of documents and tests. That way, your documentation/testing work will not pile up towards the end.

    As before, the milestone v1.3 must be wrapped up on GitHub. Remember to move all incomplete issues to a future milestone and close the milestone so that it no longer appears under open milestones.

    v1.3 Product

    Submission: Do a release on GitHub

    v1.3 Documentation

    • User Guide: Update where the document does not match the current product.
    • Developer Guide: Similar to User Guide.

    Submission: Must be included in the version tagged v1.3.

    v1.3 Demo

    Do an informal demo of the new features during the tutorial. Each person should demo their own contributions.

    Starting from this version, you should use the jar file (downloaded from GitHub release) for the demo, not the code loaded into the IDE.

    v1.4 [week 11]

    v1.4 Summary of Milestone

    Milestone Minimum acceptable performance to consider as 'reached'
    👤 Contributed code to v1.4 code merged
    👤 Code collated as stated
    👥 v1.4 jar file released properly on GitHub as stated
    👥 v1.4 milestone properly wrapped up on GitHub as stated
    👥 Documentation updated to match v1.4 at least the User Guide and the README.adoc is updated

    v1.4 Project Management

    You are required to collate code at this milestone.  Reason: You will be required to collated code at your final submission. As an early preparation for that, we require you to collate code once at v1.4 so that you can iron out any code collation glitches early.

    Collate is a tool for collating code written by different developers.

    Steps to use Collate:

    1. Download Collate-TUI.jar from the Collate Tool project
    2. Annotate your code to indicate who wrote which part of the code (instructions given below)
    3. Run the Collate tool to collate code written by each person into separate files (instructions given below)

    Annotating code to indicate authorship

    • Mark your code with a //@@author {yourGithubUsername}. Note the double @.
      The //@@author tag should appear only at the beginning of the code you wrote. The code up to the next //@@author tag or the end of the file (whichever comes first) will be considered as was written by that author. Here is a sample code file:

      //@@author johndoe
      method 1 ...
      method 2 ...
      //@@author sarahkhoo
      method 3 ...
      //@@author johndoe
      method 4 ...
      
    • If you don't know who wrote the code segment below yours, you may put an empty //@@author (i.e. no GitHub username) to indicate the end of the code segment you wrote. The author of code below yours can add the GitHub username to the empty tag later. Here is a sample code with an empty author tag:

      method 0 ...
      //@@author johndoe
      method 1 ...
      method 2 ...
      //@@author
      method 3 ...
      method 4 ...
      
    • The author tag syntax varies based on file type e.g. for java, css, fxml. Use the corresponding comment syntax for non-Java files.
      Here is an example code from an xml file.

      <!-- @@author sereneWong -->
      <textbox>
        <label>...</label>
        <input>...</input>
      </textbox>
      ...
      
    • Do not put the //@@author inside java header comments as only the content below that tag will be collated.
      👎⤵️

      /**
        * Returns true if ...
        * @@author johndoe
        */
      

      👍⤵️

      //@@author johndoe
      /**
        * Returns true if ...
        */
      

    What to and what not to annotate

    • Annotate both functional and test code but not documentation files.

    • Annotate only significant size code blocks that can be reviewed on its own  e.g., a class, a sequence of methods, a method.
      Claiming credit for code blocks smaller than a method is discouraged but allowed. If you do, do it sparingly and only claim meaningful blocks of code such as a block of statements, a loop, or an if-else statement%%.

      • If an enhancement required you to do tiny changes in many places, there is no need to collate all those tiny changes; you can describe those changes in the Project Portfolio page instead.
      • If a code block was touched by more than one person, either let the person who wrote most of it (e.g. more than 80%) take credit for the entire block, or leave it as 'unclaimed' (i.e., no author tags).
      • Related to the above point, if you claim a code block as your own, more than 80% of the code in that block should have been written by yourself. For example, no more than 20% of it can be code you reused from somewhere.
      • 💡 GitHub has a blame feature and a history feature that can help you determine who wrote a piece of code.
    • Do not try to boost the length of your collated files using dubious means such as duplicating the same code in multiple places. In particular, do not copy-paste test cases to create redundant tests. Even repetitive code blocks within test methods should be extracted out as utility methods to reduce code duplication.
      Individual members are responsible for making sure their own collated files contain the correct content.
      If you notice a team member claiming credit for code that he/she did not write or use other questionable tactics, you can email us (after the final submission) to let us know.

    • If you wrote a significant amount of code that was not used in the final product,

      • Create a folder called {project root}/unused
      • Move unused files (or copies of files containing unused code) to that folder
      • use //@@author {yourGithubUsername}-unused to mark unused code in those files (note the suffix unused) e.g.
      //@@author johndoe-unused
      method 1 ...
      method 2 ...
      

      Please put a comment in the code to explain why it was not used.

    • If you reused code from elsewhere, mark such code as //@@author {yourGithubUsername}-reused (note the suffix reused) e.g.

      //@@author johndoe-reused
      method 1 ...
      method 2 ...
      
    • For code generated by the IDE/framework, should not be annotated as your own.

    • Code you modified in minor ways e.g. adding a parameter. These can be left out of collated code but can be mentioned in the Project Portfolio page if you want to claim credit for them.

    Collating the annotated code

    You need to put the collated code in the following folders

    Code Type Folder
    functional code collated/functional
    test code collated/test
    unused code collated/unused

    Refer to Collate Tool's user guide to find how to run the tool over the annotated code.

    Given below are DOS sample commands you can put in a batch file and run it to collate the code.

    java -jar Collate-TUI.jar collate from src/main to collated/functional include java, fxml, css
    
    java -jar Collate-TUI.jar collate from src/test to collated/test include java
    
    java -jar Collate-TUI.jar collate from unused to collated/unused include java, fxml, css
    

    The output should be something like the structure given below.

    collated/
        functional/
            johndoe.md
            sarahkhoo.md
            ravikumar.md
            ravikumarreused.md
        test/
            johndoe.md
            sarahkhoo.md
            ravikumar.md
        unused/
            johndoe.md
    
    • After running the collate tool, you are recommended to look through the generated .md files to ensure all your code has been extracted correctly.

    • Push the *.md files created to a folder called /collated in your repo.

    v1.4 Product

    As before, move the product towards v2.0.

    Submission: Push the code (including the collated folder and files created above) to GitHub.

    v1.4 Documentation

    v1.4 user guide should be updated to match the current version of the product.  Reason: v1.4 will be subjected to a trial acceptance testing session

    • README page: Update to look like a real product (rather than a project for learning SE) if you haven't done so already. In particular,

      • Describe the profile of the target user
      • Remove irrelevant content such as Learning Outcomes
      • Update the Ui.png to match the current product
    • User Guide: This document will be used by acceptance testers. Update to match the current version. In particular,

      • Clearly indicate which features are not implemented yet  e.g. tag those features with a Coming in v2.0.
      • For those features already implemented, ensure their description match the exact behavior of the product  e.g. replace mockups with actual screenshots
    • Developer Guide: As before, update if necessary.

    • AboutUs page: Update to reflect current state of roles and responsibilities.

    Submission: Must be included in the version tagged v1.4.

    v1.4 Demo

    As before.

    v1.4 Testing

    Taking part in v1.4 is compulsory and counts for individual milestone.

    v1.4 is subjected to a round of peer testing.

    Objectives:

    • To train you to do manual testing, bug reporting, bug triaging, bug fixing, communicating with users, evaluating products etc.
    • To help you improve your product before the final submission.

    When, where:

    • To be done during Lecture 11 at lecture venue. Suggested duration: ~1 hour.

    During the session:

    • Each student will be assigned a product from another team to test.
    • Download the latest jar file from the team's GitHub page. Copy it to an empty folder.
    • Test the product based on the user guide. First, acceptance test it from the perspective of the target user profile. If there is any time left, you can switch to system testing mode.
    • Post bugs you find in a proxy issue tracker (details will be given).
      • Each bug should be a separate issue.
      • Even problems in the user guide  e.g. lack of explanations can be posted as issues.
      • Feel free to post other suggestions for improvements too  e.g. ways to improve the command format.
    • Do not use the session time to read bug reports your team is receiving.
    • Use descriptive titles for the issues. Give a good description of the bug/suggestion, including steps required to reproduce.
      • 💡 Be diplomatic when reporting bugs or suggesting improvements. For example, instead of criticising the current behavior, simply suggest alternatives to consider.

    Grading:

    • Considered for phase B personal milestone. In addition, issues you created can be include it in your project portfolio page to show how you contributed to another project.
    • There is no penalty for bugs reported in your product.

    Project Portfolio Page (PPP)

    At the end of the project each student is required to submit a Project Portfolio Page.

    • Objective:

      • For you to use  (e.g. in your resume) as a well-documented data point of your SE experience
      • For us to use as a data point to evaluate your,
        • contributions to the project
        • your documentation skills
    • What to include:

      • Main things to include:
        • links to collated code
        • features you implemented  (include relevant extracts from the user guide and the developer guide)
        • features you propose to implement in future  (include relevant extracts from the user guide and the developer guide if applicable)
          Note: the purpose of allowing you to include proposed features is to provide you more flexibility to show your documentation skills.  e.g. you can bring in a proposed feature just to give you an opportunity to use a UML diagram type not used by the actual features.
        • other significant contributions to the project  e.g. tweaks to existing features, setting up project tools
      • Other things you can include:
        • Evidence of helping others  e.g. responses you posted in our forum, bugs you reported in other team's products,
        • Evidence of technical leadership  e.g. offering features for others to reuse, evidence of those features being reused by others
      • If you plan to use the PPP in your Resume, you can also include your SE work outside of the module (will not be graded)
    • Format:

      • Page limit: If you have more content than the limit given below, shorten (or omit some content) so that you do not exceed the page limit. Having too much content in the PPP will be viewed unfavorably during grading. Note: the page limits given below are after converting to PDF format. The actual amount of content you require is actually less than what these numbers suggest because the HTML → PDF conversion adds a lot of spacing around content.
        Content Limit
        Description in point form 0.5-1
        Extracts from the User Guide 1-3
        Extracts from the Developer Guide 3-6
        Total 5-10
      • 📦 Follow the example in the AddressBook-Level4.
      • 💡 You can use the Asciidoc's include feature to include sections from the developer guide or the user guide in your PPP. Follow the example in the sample.
      • ❗️ It is assumed that all contents in the PPP were written primarily by you. If any section is written by someone else  e.g. someone else wrote described the feature in the User Guide but you implemented the feature, clearly state that the section was written by someone else  (e.g. Start of Extract [from: User Guide] written by Jane Doe).  Reason: Your writing skills will be evaluated based on the PPP

    Preparation:

    • Ensure you have access to a computer that is able to run module projects  e.g. has the right Java version.
    • Have a good screen grab tool with annotation features so that you can quickly take a screenshot of a bug, annotate it, and post in the issue tracker.
    • 💡 You can use Ctrl+V to paste a picture from the clipboard into a text box in GitHub issue tracker.

    After the session:

    • It is up to you to decide whether you will act on reported issues before the final submission v1.5. For some issues, the correct decision could be to reject or postpone.
    • You can post in the issue thread to communicate with the tester  e.g. to ask for more info, etc. However, the tester is not obliged to respond.
      • 💡 Do not argue with the issue reporter to try to convince that person that your way is correct/better. If at all, you can gently explain the rationale for the current behavior but do not waste time getting involved in long arguments. If you think the suggestion/bug is unreasonable, just thank the reporter for their view and close the issue.

    v1.5rc [week 12]

    rc = Release Candidate

    v1.5 Summary of Milestone

    Milestone Minimum acceptable performance to consider as 'reached'
    👤 Contributed code to v1.5rc some code merged
    👤 Project Portfolio Page merged at least 2 pages worth of content merged
    👥 Well-prepared for the demo pre-determined speaker order, completed demo within time limit
    👥 v1.5rc released properly on GitHub as stated
    👥 v1.5rc milestone wrapped up properly on GitHub as stated

    v1.5rc Project Management

    We strongly recommend you to freeze features after reaching this milestone. As this is a release candidate, it should have all the features you intend to release at v1.5. Adding major changes after this point is risky. The remaining time is better spent fixing problems discovered late or on fine-tuning the product.

    v1.5rc Product

    • As before, you can continue to add more enhancements.
    • Also, consider increasing code coverage by adding more tests if it is lower than the level you would like it to be. Take note of our expectation on test code.
    • After you have sufficient code coverage, fix remaining code quality problems and bring up the quality to your target level.
    • There is no requirement for a minimum coverage level. Note that in a production environment you are often required to have at least 90% of the code covered by tests. In this project, it can be less. The less coverage you have, the higher the risk of regression bugs, which will cost marks if not fixed before the final submission.
    • You must write some tests so that we can evaluate your ability to write tests.
    • How much of each type of testing should you do? We expect you to decide. You learned different types of testing and what they try to achieve. Based on that, you should decide how much of each type is required. Similarly, you can decide to what extent you want to automate tests, depending on the benefits and the effort required.
    • Applying TDD is optional. If you plan to test something, it is better to apply TDD because TDD ensures that you write functional code in a testable way. If you do it the normal way, you often find that it is hard to test the functional code because the code has low testability.
    • Ensure your code has at least some evidence of these (see here for more info)

      • logging
      • exceptions
      • assertions
      • defensive coding
    • Ensure there are no coding standard violations  e.g. all boolean variables/methods sounds like booleans. Checkstyle can prevent only some coding standard violations; others need to be checked manually.

    • Ensure SLAP is applied at a reasonable level. Long methods or deeply-nested code are symptoms of low-SLAP may be counted against your code quality.

    • Reduce code duplications  i.e. if there multiple blocks of code that vary only in minor ways, try to extract out similarities into one place, especially in test code.

    • In addition, tyr to apply as many of the code quality guidelines covered in the module as much as you can.

    Code Quality

    Introduction

    Basic

    🏆 Can explain the importance of code quality

    Always code as if the person who ends up maintaining your code will be a violent psychopath who knows where you live. -- Martin Golding

    Production code needs to be of high quality. Given how the world is becoming increasingly dependent of software, poor quality code is something we cannot afford to tolerate.

    Code being used in an actual product with actual users

    Guideline: Maximise Readability

    Introduction

    🏆 Can explain the importance of readability

    Programs should be written and polished until they acquire publication quality. --Niklaus Wirth

    Among various dimensions of code quality, such as run-time efficiency, security, and robustness, one of the most important is understandability. This is because in any non-trivial software project, code needs to be read, understood, and modified by other developers later on. Even if we do not intend to pass the code to someone else, code quality is still important because we all become 'strangers' to our own code someday.

    Example: The two code samples given below achieve the same functionality, but one is easier to read.

    int subsidy() {
        int subsidy;
        if (!age) {
            if (!sub) {
                if (!notFullTime) {
                    subsidy = 500;
                } else {
                    subsidy = 250;
                }
            } else {
                subsidy = 250;
            }
        } else {
            subsidy = -1;
        }
        return subsidy;
    }
    

    int calculateSubsidy() {
        int subsidy;
        if (isSenior) {
            subsidy = REJECT_SENIOR;
        } else if (isAlreadySubsidised) {
            subsidy = SUBSIDISED_SUBSIDY;
        } else if (isPartTime) {
            subsidy = FULLTIME_SUBSIDY * RATIO;
        } else {
            subsidy = FULLTIME_SUBSIDY;
        }
        return subsidy;
    }
    

    Basic

    🏆 Can follow basic guidelines for improving readability

    Be wary when a method is longer than the computer screen, and take corrective action when it goes beyond 30 LOC (lines of code). The bigger the haystack, the harder it is to find a needle.

    If you need more than 3 levels of indentation, you're screwed anyway, and should fix your program. --Linux 1.3.53 CodingStyle

    In particular, avoid arrowhead style code.

    Example:

    Avoid complicated expressions, especially those having many negations and nested parentheses. If you must evaluate complicated expressions, have it done in steps (i.e. calculate some intermediate values first and use them to calculate the final value).

    Example:

    return ((length < MAX_LENGTH) || (previousSize != length)) && (typeCode == URGENT);


    boolean isWithinSizeLimit = length < MAX_LENGTH;
    boolean isSameSize = previousSize != length;
    boolean isValidCode = isWithinSizeLimit || isSameSize;
    
    boolean isUrgent = typeCode == URGENT;
    
    return isValidCode && isUrgent;
    

    The competent programmer is fully aware of the strictly limited size of his own skull; therefore he approaches the programming task in full humility, and among other things he avoids clever tricks like the plague. -- Edsger Dijkstra

    When the code has a number that does not explain the meaning of the number, we call that a magic number (as in “the number appears as if by magic”).

    Example:

    return 3.14236; return PI
    return 9 return MAX_SIZE-1

    Using a named constant makes the code easier to understand because the name tells us more about the meaning of the number. Similarly, we can have ‘magic’ values of other data types.

    return “Error 1432”;  // A magic string!
    

    Make the code as explicit as possible, even if the language syntax allows them to be implicit. Here are some examples:

    • Use explicit type conversion instead of implicit type conversion.
    • Use parentheses/braces to show grouping even when they can be skipped.
    • Use enumerations when a certain variable can take only a small number of finite values. For example, instead of declaring the variable 'state' as an integer and using values 0,1,2 to denote the states 'starting', 'enabled', and 'disabled' respectively, declare 'state' as type SystemState and define an enumeration SystemState that has values 'STARTING', 'ENABLED', and 'DISABLED'.
    • When statements should follow a particular order, try to make it obvious (with appropriate naming, or at least comments). For example, if you name two functions 'taskA()' and 'taskB()', it is not obvious which one should be called first. Contrast this with naming the functions 'phaseOne()' and 'phaseTwo()' instead. This is especially important when statements in one function must be called before the other one.

    Intermediate

    🏆 Can follow intermediate guidelines for improving readability

    Lay out the code so that it adheres to the logical structure. The code should read like a story. Just like we use section breaks, chapters and paragraphs to organize a story, use classes, methods, indentation and line spacing in your code to group related segments of the code. For example, you can use blank lines to group related statements together. Sometimes, the correctness of your code does not depend on the order in which you perform certain intermediary steps. Nevertheless, this order may affect the clarity of the story you are trying to tell. Choose the order that makes the story most readable.

    Avoid things that would make the reader go ‘huh?’, such as,

    • unused parameters in the method signature
    • similar things look different
    • different things that look similar
    • multiple statements in the same line
    • data flow anomalies such as, pre-assigning values to variables and modifying it without any use of the pre-assigned value

    As the old adage goes, "keep it simple, stupid” (KISS). Do not try to write ‘clever’ code. For example, do not dismiss the brute-force yet simple solution in favor of a complicated one because of some ‘supposed benefits’ such as 'better reusability' unless you have a strong justification.

    Debugging is twice as hard as writing the code in the first place. Therefore, if you write the code as cleverly as possible, you are, by definition, not smart enough to debug it. --Brian W. Kernighan

    Programs must be written for people to read, and only incidentally for machines to execute. --Abelson and Sussman

    Optimizing code prematurely has several drawbacks:

    • We may not know which parts are the real performance bottlenecks. This is especially the case when the code undergoes transformations (e.g. compiling, minifying, transpiling, etc.) before it becomes an executable. Ideally, you should use a profiler tool to identify the actual bottlenecks of the code first, and optimize only those parts.
    • Optimizing can complicate the code, affecting correctness and understandability
    • Hand-optimized code can be harder for the compiler to optimize (the simpler the code, the easier for the compiler to optimize it). In many cases a compiler can do a better job of optimizing the runtime code if you don't get in the way by trying to hand-optimize the source code.

    A popular saying in the industry is make it work, make it right, make it fast which means in most cases getting the code to perform correctly should take priority over optimizing it. If the code doesn't work correctly, it has no value on matter how fast/efficient it it.

    Premature optimization is the root of all evil in programming. --Donald Knuth

    Note that there are cases where optimizing takes priority over other things e.g. when writing code for resource-constrained environments. This guideline simply a caution that you should optimize only when it is really needed.

    Avoid varying the level of abstraction within a code fragment. Note: The Productive Programmer (by Neal Ford) calls this the SLAP principle i.e. Single Level of Abstraction Per method.

    Example:

    readData();
    salary = basic*rise+1000;
    tax = (taxable?salary*0.07:0);
    displayResult();
    

    readData();
    processData();
    displayResult();
    

    Design → Design Fundamentals → Abstraction →

    What

    Abstraction is a technique for dealing with complexity. It works by establishing a level of complexity (or an aspect) we are interested in, and suppressing the more complex details below that level (or irrelevant to that aspect).

    Most programs are written to solve complex problems involving large amounts of intricate details. It is impossible to deal with all these details at the same time. The guiding principle of abstraction stipulates that we capture only details that are relevant to the current perspective or the task at hand.

    Ignoring lower level data items and thinking in terms of bigger entities is called data abstraction.

    📦 Within a certain software component, we might deal with a user data type, while ignoring the details contained in the user data item such as name, and date of birth. These details have been ‘abstracted away’ as they do not affect the task of that software component.

    Control abstraction abstracts away details of the actual control flow to focus on tasks at a simplified level.

    📦 print(“Hello”) is an abstraction of the actual output mechanism within the computer.

    For example,

    Abstraction can be applied repeatedly to obtain progressively higher levels of abstractions.

    📦 An example of different levels of data abstraction: a File is a data item that is at a higher level than an array and an array is at a higher level than a bit.

    📦 An example of different levels of control abstraction: execute(Game) is at a higher level than print(Char) which is at a higher than an Assembly language instruction MOV.

    Putting all details in one place can create lengthy methods, but it is preferred over creating many small methods because it makes the code easier to understand.

    False

    Explanation: If you are using abstraction properly, you DON’T need to see all details to understand something. The whole point of using abstraction is to be able to understand things without knowing as little details as possible. This is why we recommend single level of abstraction per method and top-down coding.

    What are the drawbacks of trying to optimize code too soon?

    • a. We may not know which parts are the real performance bottleneck
    • b. When we optimize code manually, it becomes harder for the compiler to optimize
    • c. Optimizing can complicate code
    • d. Optimizing can lead to more error-prone code

    a, b, c, d

    This is a common saying among programmers

    b

    Advanced

    🏆 Can follow advanced guidelines for improving readability

    The happy path (i.e. the execution path taken when everything goes well) should be clear and prominent in your code. Restructure the code to make the happy path unindented as much as possible. It is the ‘unusual’ cases that should be indented. Someone reading the code should not get distracted by alternative paths taken when error conditions happen. One technique that could help in this regard is the use of guard clauses.

    Example:

    if (!isUnusualCase) {  //detecting an unusual condition
        if (!isErrorCase) {
            start();    //main path
            process();
            cleanup();
            exit();
        } else {
            handleError();
        }
    } else {
        handleUnusualCase(); //handling that unusual condition
    }
    

    In the code above,

    • Unusual condition detection is separated from their handling.
    • Main path is nested deeply.

    if (isUnusualCase) { //Guard Clause
        handleUnusualCase();
        return;
    }
    
    if (isErrorCase) { //Guard Clause
        handleError();
        return;
    }
    
    start();
    process();
    cleanup();
    exit();
    

    In contrast, the above code

    • deals with unusual conditions as soon as they are detected so that the reader doesn't have to remember them for long.
    • keeps the main path un-indented.

    Guideline: Follow a Standard

    Introduction

    🏆 Can explain the need for following a standard

    One essential way to improve code quality is to follow a consistent style. That is why software engineers follow a strict coding standard (aka style guide).

    The aim of a coding standard is to make the entire code base look like it was written by one person. A coding standard is usually specific to a programming language and specifies guidelines such as the location of opening and closing braces, indentation styles and naming styles (e.g. whether to use Hungarian style, Pascal casing, Camel casing, etc.). It is important that the whole team/company use the same coding standard and that standard is not generally inconsistent with typical industry practices. If a company's coding standards is very different from what is used typically in the industry, new recruits will take longer to get used to the company's coding style.

    IDEs can help to enforce some parts of a coding standard e.g. indentation rules.

    What is the recommended approach regarding coding standards?

    c

    What is the aim of using a coding standard? How does it help?

    Basic

    🏆 Can follow simple mechanical style rules

    Go through the provided Java coding standard and learn the basic style rules.

    Intermediate

    🏆 Can follow intermediate style rules

    Go through the provided Java coding standard and learn the intermediate style rules.

    According to the given Java coding standard, which one of these is not a good name?

    b

    Explanation: checkWeight is an action. Naming variables as actions makes the code harder to follow. isWeightValid may be a better name.

    Guideline: Name Well

    Introduction

    🏆 Can explain the need for good names in code

    Proper naming improves the readability. It also reduces bugs caused by ambiguities regarding the intent of a variable or a method.

    There are only two hard things in Computer Science: cache invalidation and naming things. -- Phil Karlton

    Basic

    🏆 Can follow basic guidelines for naming

    Use nouns for classes/variables and verbs for methods/functions.

    Examples:

    Name for a
    Class CheckLimit LimitChecker
    method result() calculate()

    Distinguish clearly between single valued and multivalued variables.

    Examples:

    Person student
    ArrayList<Person> students

    Use correct spelling in names. Avoid 'texting-style' spelling. Avoid foreign language words, slang, and names that are only meaningful within specific contexts/times e.g. terms from private jokes, a TV show currently popular in your country

    Intermediate

    🏆 Can follow intermediate guidelines for naming

    A name is not just for differentiation; it should explain the named entity to the reader accurately and at a sufficient level of detail.

    Examples:

    processInput() (what 'process'?) removeWhiteSpaceFromInput()
    flag isValidInput
    temp

    If the name has multiple words, they should be in a sensible order.

    Examples:

    bySizeOrder() orderBySize()

    Imagine going to the doctor's and saying "My eye1 is swollen"! Don’t use numbers or case to distinguish names.

    Examples:

    value1, value2 value, Value originalValue, finalValue

    While it is preferable not to have lengthy names, names that are 'too short' are even worse. If you must abbreviate or use acronyms, do it consistently. Explain their full meaning at an obvious location.

    Related things should be named similarly, while unrelated things should NOT.

    Example: Consider these variables

    • colorBlack : hex value for color black
    • colorWhite : hex value for color white
    • colorBlue : number of times blue is used
    • hexForRed : : hex value for color red

    This is misleading because colorBlue is named similar to colorWhite and colorBlack but has a different purpose while hexForRed is named differently but has very similar purpose to the first two variables. The following is better:

    • hexForBlack hexForWhite hexForRed
    • blueColorCount

    Avoid misleading or ambiguous names (e.g. those with multiple meanings), similar sounding names, hard-to-pronounce ones (e.g. avoid ambiguities like "is that a lowercase L, capital I or number 1?", or "is that number 0 or letter O?"), almost similar names.

    Examples:

    Reason
    phase0 phaseZero Is that zero or letter O?
    rwrLgtDirn rowerLegitDirection Hard to pronounce
    right left wrong rightDirection leftDirection wrongResponse right is for 'correct' or 'opposite of 'left'?
    redBooks readBooks redColorBooks booksRead red and read (past tense) sounds the same
    FiletMignon egg If the requirement is just a name of a food, egg is a much easier to type/say choice than FiletMignon

    Guideline: Avoid Unsafe Shortcuts

    Introduction

    🏆 Can explain the need for avoiding error-prone shortcuts

    It is safer to use language constructs in the way they are meant to be used, even if the language allows shortcuts. Some such coding practices are common sources of bugs. Know them and avoid them.

    Basic

    🏆 Can follow basic guidelines for avoiding unsafe shortcuts

    Always include a default branch in case statements.

    Furthermore, use it for the intended default action and not just to execute the last option. If there is no default action, you can use the 'default' branch to detect errors (i.e. if execution reached the default branch, throw an exception). This also applies to the final else of an if-else construct. That is, the final else should mean 'everything else', and not the final option. Do not use else when an if condition can be explicitly specified, unless there is absolutely no other possibility.

    if (red) print "red";
    else print "blue";
    

    if (red) print "red";
    else if (blue) print "blue";
    else error("incorrect input");
    
    • Use one variable for one purpose. Do not reuse a variable for a different purpose other than its intended one, just because the data type is the same.
    • Do not reuse formal parameters as local variables inside the method.

    double computeRectangleArea(double length, double width) {
        length = length * width;
        return length;
    }


    double computeRectangleArea(double length, double width) {
        double area;
        area = length * width;
        return area;
    }
    

    Never write an empty catch statement. At least give a comment to explain why the catch block is left empty.

    We all feel reluctant to delete code we have painstakingly written, even if we have no use for that code any more ("I spent a lot of time writing that code; what if we need it again?"). Consider all code as baggage you have to carry; get rid of unused code the moment it becomes redundant. If you need that code again, simply recover it from the revision control tool you are using. Deleting code you wrote previously is a sign that you are improving.

    Which of these are unsafe coding practices?

    • a. case statements without a default clause

    • b. Omitting braces when a code block has only one statement

      e.g writing this

      if(isProper)
          return PROPER_AMOUNT;
      

      instead of

      if(isProper){
          return PROPER_AMOUNT;
      }
      
    • c. Using a variable just to explain what’s going on

      e.g.writing this

      boolean isProper = notNull && notEmpty;
      return isProper;
      

      instead of

      return notNull && notEmpty;
      

    a, b.

    Reason why [c] is not a bad practice: The extra variable helps to make the code more understandable because it makes the intent of the formula clearer.

    Intermediate

    🏆 Can follow intermediate guidelines for avoiding unsafe shortcuts

    Minimize global variables. Global variables may be the most convenient way to pass information around, but they do create implicit links between code segments that use the global variable. Avoid them as much as possible.

    Define variables in the least possible scope. For example, if the variable is used only within the if block of the conditional statement, it should be declared inside that if block.

    The most powerful technique for minimizing the scope of a local variable is to declare it where it is first used. -- Effective Java, by Joshua Bloch

    📎 Resources:

    Code duplication, especially when you copy-paste-modify code, often indicates a poor quality implementation. While it may not be possible to have zero duplication, always think twice before duplicating code; most often there is a better alternative.

    This guideline is closely related to the DRY Principle .

    Supplmentary → Principles →

    DRY Principle

    DRY (Don't Repeat Yourself) Principle: Every piece of knowledge must have a single, unambiguous, authoritative representation within a system The Pragmatic Programmer, by Andy Hunt and Dave Thomas

    This principle guards against duplication of information.

    📦 The functionality implemented twice is a violation of the DRY principle even if the two implementations are different.

    📦 The value a system-wide timeout being defined in multiple places is a violation of DRY.

    Guideline: Comment Minimally, but Sufficiently

    Introduction

    🏆 Can explain the need for commenting minimally but sufficiently

    Good code is its own best documentation. As you’re about to add a comment, ask yourself, ‘How can I improve the code so that this comment isn’t needed?’ Improve the code and then document it to make it even clearer. --Steve McConnell, Author of Clean Code

    Some think commenting heavily increases the 'code quality'. This is not so. Avoid writing comments to explain bad code. Improve the code to make it self-explanatory.

    Basic

    🏆 Can follow basic guidelines for writing code comments

    If the code is self-explanatory, refrain from repeating the description in a comment just for the sake of 'good documentation'.

    // increment x
    x++;
    
    //trim the input
    trimInput();
    

    Do not write comments as if they are private notes to self. Instead, write them well enough to be understood by another programmer. One type of comments that is almost always useful is the header comment that you write for a class or an operation to explain its purpose.

    Reason: this comment will only make sense to the person who wrote it

    // a quick trim function used to fix bug I detected overnight
    void trimInput(){
        ....
    }
    

    /** Trims the input of leading and trailing spaces */
    void trimInput(){
        ....
    }
    

    Intermediate

    🏆 Can follow intermediate guidelines for writing code comments

    Comments should explain what and why aspect of the code, rather than the how aspect.

    👍 What : The specification of what the code supposed to do. The reader can compare such comments to the implementation to verify if the implementation is correct

    📦 Example: This method is possibly buggy because the implementation does not seem to match the comment. In this case the comment could help the reader to detect the bug.

    /** Removes all spaces from the {@code input} */
    void compact(String input){
        input.trim();
    }
    

    👍 Why : The rationale for the current implementation.

    📦 Example: Without this comment, the reader will not know the reason for calling this method.

    // Remove spaces to comply with IE23.5 formatting rules
    compact(input);
    

    👎 How : The explanation for how the code works. This should already be apparent from the code, if the code is self-explanatory. Adding comments to explain the same thing is redundant.

    📦 Example:

    Reason: Comment explains how the code works.

    // return true if both left end and right end are correct or the size has not incremented
    return (left && right) || (input.size() == size);
    

    Reason: Code refactored to be self-explanatory. Comment no longer needed.

    
    boolean isSameSize = (input.size() == size) ;
    return (isLeftEndCorrect && isRightEndCorrect) || isSameSize;
    

    In general, comments should describe,

    • a. WHAT the code does
    • b. WHY the code does something
    • c. HOW the code does something

    a, b

    Explanation: How the code does something should be apparent from the code itself. However, comments can help the reader in describing WHAT and WHY aspects of the code.

    Submission: as before.

    v1.5rc Documentation

    Update to match the product.

    Each member must create a Project Portfolio page to describe your contribution to the project.

    Project Portfolio Page (PPP)

    At the end of the project each student is required to submit a Project Portfolio Page.

    • Objective:

      • For you to use  (e.g. in your resume) as a well-documented data point of your SE experience
      • For us to use as a data point to evaluate your,
        • contributions to the project
        • your documentation skills
    • What to include:

      • Main things to include:
        • links to collated code
        • features you implemented  (include relevant extracts from the user guide and the developer guide)
        • features you propose to implement in future  (include relevant extracts from the user guide and the developer guide if applicable)
          Note: the purpose of allowing you to include proposed features is to provide you more flexibility to show your documentation skills.  e.g. you can bring in a proposed feature just to give you an opportunity to use a UML diagram type not used by the actual features.
        • other significant contributions to the project  e.g. tweaks to existing features, setting up project tools
      • Other things you can include:
        • Evidence of helping others  e.g. responses you posted in our forum, bugs you reported in other team's products,
        • Evidence of technical leadership  e.g. offering features for others to reuse, evidence of those features being reused by others
      • If you plan to use the PPP in your Resume, you can also include your SE work outside of the module (will not be graded)
    • Format:

      • Page limit: If you have more content than the limit given below, shorten (or omit some content) so that you do not exceed the page limit. Having too much content in the PPP will be viewed unfavorably during grading. Note: the page limits given below are after converting to PDF format. The actual amount of content you require is actually less than what these numbers suggest because the HTML → PDF conversion adds a lot of spacing around content.
        Content Limit
        Description in point form 0.5-1
        Extracts from the User Guide 1-3
        Extracts from the Developer Guide 3-6
        Total 5-10
      • 📦 Follow the example in the AddressBook-Level4.
      • 💡 You can use the Asciidoc's include feature to include sections from the developer guide or the user guide in your PPP. Follow the example in the sample.
      • ❗️ It is assumed that all contents in the PPP were written primarily by you. If any section is written by someone else  e.g. someone else wrote described the feature in the User Guide but you implemented the feature, clearly state that the section was written by someone else  (e.g. Start of Extract [from: User Guide] written by Jane Doe).  Reason: Your writing skills will be evaluated based on the PPP

    Submission: Must be included in the version tagged v1.5rc.

    v1.5rc Demo

    • Objective: to serve as a rehearsal for the final project demo at v1.5
    • Follow final demo instructions as much as possible.
    • Cover all features, not just the ones added in the recent iteration.
    • It should be a 'well prepared' demo. You should know in advance exactly what you'll do in the demo.
    • Duration: Strictly (teamSize x 3) + 1 minutes  e.g. 13 minutes for a 4-person team. Exceeding this limit will be penalized. The extra minute is for the first speaker to give an overview of the product.

    • Target audience: Assume you are giving a demo to a higher-level manager of your company, to brief him/her on the current capabilities of the product. This is the first time they are seeing the new product you developed but they are familiar with the AddressBook-level4 (AB4) product.

    • Scope:

      • Each person should demo the enhancements they added. However, it's ok for one member to do all the typing.
      • Subjected to the constraint mentioned in the previous point, as far as possible, organize the demo to present a cohesive picture of the product as a whole, presented in a logical order.  Remember to explain the profile of the target user profile and value proposition early in the demo.
      • It is recommended you showcase how the feature improves the user’s life rather than simply describe each feature.
      • No need to cover design/implementation details as the manager is not interested in those details.
      • Mention features you inherited from AB4 only if they are needed to explain your new features.  Reason: existing features will not earn you marks, and the audience is already familiar with AB4 features.
    • Structure:

      • Demo the product using the same executable you submitted, on your own laptop, using the TV.
      • It can be a sitting down demo: You'll be demonstrating the features using the TV while sitting down. But you may stand around the TV if you prefer that way.
      • It will be uninterrupted demo: The audience members will not interrupt you during the demo. That means you should finish within the given time.
      • The app should be populated with a significant amount of realistic data at the start.  e.g at least 20 contacts.
      • Dress code : The level of formality is up to you, but it is recommended that the whole team dress at the same level.
    • Optimizing the time:

      • Spend as much time as possible on demonstrating the actual product. Not recommended to use slides (if you do, use them sparingly) or videos or lengthy narrations.
        Avoid skits, re-enactments, dramatizations etc. This is not a sales pitch or an informercial. While you need to show how a user use the product to get value, but you don’t need to act like an imaginary user. For example, [Instead of this]Jim get’s a call from boss. "Ring ring", "hello", "oh hi Jim, can we postpone the meeting?" "Sure". Jim hang up and curses the boss under his breath. Now he starts typing ..etc. [do this] If Jim needs to postpone the meeting, he can type …
        It’s not that dramatization is bad or we don’t like it. We simply don’t have enough time for it.
        Note that CS2101 demo requirements may differ. Different context → Different requirements.
      • Rehearse the steps well and ensure you can do a smooth demo. Poor quality demos can affect your grade.
      • Don’t waste time repeating things the target audience already knows. e.g. no need to say things like "We are students from NUS, SoC".
      • Bring sufficient amount of sample data and know how to load them to the system. You should not plan to type all the sample data during the demo itself. On the other hand, trying to demo a product using just 1-2 sample data creates a bad impression too.
      • Plan the demo to be in sync with the impression you want to create. For example, if you are trying to convince that the product is easy to use, show the easiest way to perform a task before you show the full command with all the bells and whistles.
      • Limit the demo to CLI inputs only. There is no point explaining GUI inputs because they don't earn marks.

    v1.5 [week 13]

    • ❗️ Penalty for late submission: -1 mark for each hour delayed, up to 3 hours. Even a 1-second delay is considered late, irrespective of the reason. Penalty for delays beyond 3 hours are determined on a case by case basis.
      • For submissions done via IVLE, the submission time is the timestamp shown by IVLE.
      • When determining the late submission penalty, we take the latest submission even if the same exact file was submitted earlier. Do not submit the same file multiple times if you want to avoid unnecessary late submission penalties.
    • The whole team is penalized for problems in team submissions. Only the respective student is penalized for problems in individual submissions.
    • ❗️ Please follow submission instructions closely. Any non-compliance will be penalized. e.g. wrong file name, team member photos not suitable, etc.
    • For pdf submissions, ensure the file is usable and hyperlinks in the file are correct. Problems in documents are considered bugs too  e.g. broken links, outdated diagrams/instructions etc..
    • Do not update the repo during the 14 days after the deadline. Get our permission first if you need to update the repo during that one-week freeze period. You can continue to evolve your repo after that.

    Summary of submissions:

    Team/Individual Item Name format Upload to
    👥 Source code tag as v1.5 GitHub
    👥 Jar file [team][product name].jar
    e.g. [T09-B1][ContactsPlus].jar
    IVLE
    👥 User Guide [TEAM_ID][Project Name]UserGuide.pdf
    e.g.[T09-B1][Contacts Plus]UserGuide.pdf
    IVLE
    👥 Developer Guide [TEAM_ID][Project Name]DeveloperGuide.pdf
    e.g. [T09-B1][Contacts Plus]DeveloperGuide.pdf
    IVLE
    👥 README.adoc, Ui.png, AboutUs.adoc GitHub
    👤 Project Portfolio Page [TEAM_ID][Your Name]Portfolio.pdf
    e.g.[T09-B1][John Doe]Portfolio.pdf
    IVLE
    👤 Collated files GitHub

    v1.5 Product

    This is as a ‘production release’. It should be at least ‘near production quality’.

    Submission:

    • Source code: Push the code to GitHub and tag with the version number. Source code (including collated .md files; please ensure the collated .md files are up to date; any updates to collated code files after the deadline will be considered a later submission) Note that the quality of the code in these collated code files accounts for a significant component of your final score, graded individually.
    • Executable: See summary of submissions above

    Deadline: Week 12 Sunday 23.59.

    Grading:

    v1.5 Documentation

    Submission:

    First, update following pages on GitHub:

    • User Guide, Developer Guide: Ensure these two docs match the product precisely, as these docs will be used by peer testers (and any inaccuracy in the content will be considered bugs).
      • ❗️ in particular, update the appendix named Instructions for Manual Testing of the Developer Guide to include testing instructions to cover all your major and minor enhancements. There is no need to add testing instructions for existing features if you did not touch them.
        💡 What to include in the appendix Instructions for Manual Testing? This appendix is meant to give some guidance to the tester to chart a path through the features, and provided some important test inputs the tester can copy-paste into the app. There is no need to give a long list of test cases including all possible variations. It is upto the tester to come up with those variations. However, if the instructions are inaccurate or deliberately misses/mis-states information to make testing harder  i.e. annoys the tester, the tester can report it as a bug  (because flaws in developer docs are considered as bugs).
    • README : Ensure the Ui.png matches the current product
    • AboutUs : Ensure the following:
      • Contains a link to each person's Project Portfolio page
      • Team member names match full names used by IVLE
    • Project Portfolio Pages of each member

    Next, convert the following documents to pdf (AB4 dev guide has some instructions on converting project docs to pdf) and upload to IVLE. See summary of submissions above for the file name format for each.

    • User Guide
    • Developer Guide
    • Project Portfolio Pages

    Deadline: Same as v1.5 product.

    Grading:

    v1.5 Demo

    • Venue: Same as the tutorial venue unless informed otherwise.
    • Schedule: Your demo timing is same as your tutorial time in week 13.
      Starting times: Team B1: 00 minutes, B2: 15 minutes, B3: 30 minutes, B4: 45 minutes
      At least some team members need to arrive 15 minutes ahead of the allocated time to set up your computer.
      There is an automatic penalty if you are not ready to start on time.
      Wait outside the venue until you are called in.
    • Duration: Strictly (teamSize x 3) + 1 minutes  e.g. 13 minutes for a 4-person team. Exceeding this limit will be penalized. The extra minute is for the first speaker to give an overview of the product.

    • Target audience: Assume you are giving a demo to a higher-level manager of your company, to brief him/her on the current capabilities of the product. This is the first time they are seeing the new product you developed but they are familiar with the AddressBook-level4 (AB4) product.

    • Scope:

      • Each person should demo the enhancements they added. However, it's ok for one member to do all the typing.
      • Subjected to the constraint mentioned in the previous point, as far as possible, organize the demo to present a cohesive picture of the product as a whole, presented in a logical order.  Remember to explain the profile of the target user profile and value proposition early in the demo.
      • It is recommended you showcase how the feature improves the user’s life rather than simply describe each feature.
      • No need to cover design/implementation details as the manager is not interested in those details.
      • Mention features you inherited from AB4 only if they are needed to explain your new features.  Reason: existing features will not earn you marks, and the audience is already familiar with AB4 features.
    • Structure:

      • Demo the product using the same executable you submitted, on your own laptop, using the TV.
      • It can be a sitting down demo: You'll be demonstrating the features using the TV while sitting down. But you may stand around the TV if you prefer that way.
      • It will be uninterrupted demo: The audience members will not interrupt you during the demo. That means you should finish within the given time.
      • The app should be populated with a significant amount of realistic data at the start.  e.g at least 20 contacts.
      • Dress code : The level of formality is up to you, but it is recommended that the whole team dress at the same level.
    • Optimizing the time:

      • Spend as much time as possible on demonstrating the actual product. Not recommended to use slides (if you do, use them sparingly) or videos or lengthy narrations.
        Avoid skits, re-enactments, dramatizations etc. This is not a sales pitch or an informercial. While you need to show how a user use the product to get value, but you don’t need to act like an imaginary user. For example, [Instead of this]Jim get’s a call from boss. "Ring ring", "hello", "oh hi Jim, can we postpone the meeting?" "Sure". Jim hang up and curses the boss under his breath. Now he starts typing ..etc. [do this] If Jim needs to postpone the meeting, he can type …
        It’s not that dramatization is bad or we don’t like it. We simply don’t have enough time for it.
        Note that CS2101 demo requirements may differ. Different context → Different requirements.
      • Rehearse the steps well and ensure you can do a smooth demo. Poor quality demos can affect your grade.
      • Don’t waste time repeating things the target audience already knows. e.g. no need to say things like "We are students from NUS, SoC".
      • Bring sufficient amount of sample data and know how to load them to the system. You should not plan to type all the sample data during the demo itself. On the other hand, trying to demo a product using just 1-2 sample data creates a bad impression too.
      • Plan the demo to be in sync with the impression you want to create. For example, if you are trying to convince that the product is easy to use, show the easiest way to perform a task before you show the full command with all the bells and whistles.
      • Limit the demo to CLI inputs only. There is no point explaining GUI inputs because they don't earn marks.

    Grading:

    v1.5 Practical Exam

    Compulsory. Graded (accounting for the QA component score (up to 10 marks)).

    Objectives:

    • Evaluate your,
      • manual testing skills
      • product evaluation skills
      • effort estimation skills
    • Peer-evaluate your
      • product design 👥
      • implementation effort 👤
      • documentation quality 👤

    Time/venue: week 13 lecture slot, lecture theatre

    Preparation:

    • Ensure you have access to a computer that is able to run module projects  e.g. has the right Java version.
    • Have a good screen grab tool with annotation features so that you can quickly take a screenshot of a bug, annotate it, and post in the issue tracker.
    • 💡 You can use Ctrl+V to paste a picture from the clipboard into a text box in GitHub issue tracker.

    During:

    1. **Take note of your team to test **. Team ID will be given to you by the teaching team (distributed via IVLE gradebook).
    2. Download from IVLE all files submitted by the team  (i.e. jar file, User Guide, Developer Guide, and Project Portfolio Pages) into an empty folder.
    3. [~40 minutes] Test the product and report bugs
      • Launch the jar file. Test it.
      • You can use Developer Guide (Appendix named Instructions for Manual Testing) and the User Guide in your testing.
      • No need to test features that are driven by GUI inputs (e.g. buttons, menus, etc.)  Reason: Only CLI-driven features can earn credit, as per given project constraints. Some features might have both a GUI-driven and CLI-driven ways to invoke them, in which case test only the CLI-driven way of invoking it.
      • The testing instructions in the Developer Guide can provide you some guidance but if you follow those instructions strictly, you are unlikely to find many bugs. You can deviate from the instructions to probe areas that are more likely to have bugs.
      • You can do acceptance testing as well as system testing.
      • Omit feature that existed in AB4. Instead, test features the team has added.
      • Report bugs in the [practical exam issue tracker](URL will be given) not in the team's repo.
        • Issue title format: [Team ID] Issue description  e.g. [561] Empty name crashes app
      • Report bugs only. Do not post suggestions. These are considered bugs:
        • Behavior differs from the User Guide (or Developer Guide)
        • A legitimate user behavior is not handled  e.g. incorrect commands, extra parameters
        • Behavior is not specified and differs from normal expectations  e.g. error message does not match the error
      • Write good quality bug reports; ❗️ poor quality or incorrect bug reports will not earn credit.
        • Use a descriptive title
        • Give a good description of the bug with steps to reproduce and screenshots
        • 🔍 Note that we will anonymize bug reports before revealing it to the receiving team.
      • Assign a severity to the bug report:

    Bug Severity labels:

    • severity.Low : A flaw that is unlikely to affect normal operations of the product. Appears only in very rare situations and causes a minor inconvenience only.
    • severity.Medium : A flaw that causes occasional inconvenience to some users but they can continue to use the product.
    • severity.High : A flaw that affects most users and causes major problems for users. i.e., makes the product almost unusable for most users.
    1. [~40 minutes] Evaluate the following aspects. Note down your evaluation in a hard copy (as a backup). Submit via TEAMMATES.

      • A. Cohesiveness of product features [👥]: Do the major features fit together and match the stated target user and the value proposition?

        • low: One of these
          • target user is too general  i.e. not narrower than AB4
          • target user and value proposition is not clear from the user guide OR
          • features don't seem to match for the most part
        • medium: Some features match but some don't
        • high: all features match but the features are not very high value to the target user
        • excellent: the product is very attractive to the target user. i.e. and almost all new features are of high-value to the target user.
        • unable to judge: you are unable to judge this aspect for some reason
      • B. Quality of user docs [👤]: Evaluate based on the parts of the user guide written by the person, as reproduced in the project portfolio. Evaluate from an end-user perspective.

        • low: Hard to understand, often inaccurate or missing important information
        • medium:
        • high: Mostly easy to follow. Only a few areas for improvements.
        • excellent: Easy to follow and accurate. Just enough information, visuals, examples etc. (not too much either).
        • unable to judge: less than 1 page worth of UG content written by the student
      • C. Amount of work [👤]: Evaluate the amount of work on a scale of 0 to 30

        • Consider this PR (history command) as 5 units of effort which means this PR (undo/redo command) is about 15 points of effort. Given that 30 points matches an effort twice as that needed for the undo/redo feature (which was given as an example of an A grade project), we expect most students to be have efforts lower than 20.
        • Count all implementation/testing/documentation work as mentioned in that person's portfolio page.
        • ❗️ Do not give a high value just to be nice. If your estimate is wildly inaccurate, it means you are unable to estimate the effort required to implement a feature in a project that you are supposed to know well at this point. You will lose marks if that is the case.
        • When estimating effort, ignore features that are driven by GUI inputs.
      • D. Depth of feature (major feature) [👤]: Evaluate the major feature done by the student for difficulty, depth, and completeness. Note: examples given below assumes AB4 did not have commandsedit undo redo

        • low : an easy feature  e.g. make the existing find command case insensitive
        • medium : moderately difficult feature, barely acceptable implementation  e.g. an edit command that requires the user to type all fields, even the ones that are not being edited
        • high: one of the below
          • A moderately difficult feature but fully implemented  e.g. an edit command that allows editing any field
          • A difficult feature with a reasonable implementation but some aspects are not covered  undo/redo command that only allows a single undo/redo
        • excellent: A difficult feature, all reasonable aspects are fully implemented  undo/redo command that allows multiple undo/redo
        • outstanding: A difficult feature, implemented as good as it can be under the circumstances.  undo/redo command that even allows undoing non-mutating commands such as select, allows selectively undo specific commands in the history, etc.
        • unable to judge: you are unable to judge this aspect for some reason
      • E. Quality of developer docs [👤]: Evaluate based on the developer docs cited/reproduced in the respective project portfolio page. Evaluate from the perspective of a new developer trying to understand how the features are implemented.

        • low: One of these
          • Very small amount of content (i.e., 0.5 - 1 page)
          • Hardly any use to the reader (i.e., content doesn't make much sense or redundant)
          • Uses ad-hoc diagrams where UML diagrams could have been used instead
          • Multiple notation errors in UML diagrams
        • medium: Some diagrams, some descriptions, but does not help the reader that much  e.g. overly complicated diagrams
        • high: Enough diagrams (at lest two kinds of UML diagrams used) and enough descriptions (about 2 pages worth) but explanations are not always easy to follow.
        • excellent: Easy to follow. Just enough information (not too much). Minimum repetition of content/diagrams. Good use of diagrams to complement text descriptions. Easy to understand diagrams with just enough details rather than very complicated diagrams that are hard to understand.
        • unable to judge: One of these
          • no content at all
          • less than 0.5 pages worth of content
          • other problems in the document  e.g. looks like included wrong content

    Bug Review Period:

    There will be a review period for you to respond to the [bug reports](URL will be given) you received.

    Duration: The review period will start around 1 day after the PE (exact time to be announced) and will last until the following Wednesday midnight.

    Bug reviewing is recommended to be done as a team as some of the decisions need team consensus.

    Instructions for Reviewing Bug Reports

    • First, don't freak out if there are lot of bug reports. Many can be duplicates and some can be false positives. In any case, we anticipate that all of these products will have some bugs and our penalty for bugs is not harsh. Furthermore, it depends on the severity of the bug. Some bug may not even be penalized.

    • Do not edit the subject or the description. Do not close bug reports. Your response (if any) should be added as a comment.

    • If the bug is reported multiple times, mark all copies EXCEPT one as duplicates using the duplicate tag. In addition, use this technique to indicate which issue they are duplicates of. Duplicates can be omitted from processing steps given below.

    • If a bug seems to be for a different product (i.e. wrongly assigned to your team), let us know (email prof).

    • Decide if it is a real bug and apply ONLY one of these labels.

    Response Labels:

    • response.Accepted : You accept it as a bug.
    • response.Rejected : What tester thought as a bug is in fact expected behavior. ❗️ The penalty for rejecting a bug using an unjustifiable explanation is higher than the penalty if the same bug was accepted. You can also reject bugs that you inherited from AB4.
    • response.CannotReproduce : You are unable to reproduce the behavior reported in the bug after multiple tries.
    • response.IssueUnclear : The issue description is not clear.
    • If applicable, decide the type of bug:

    Bug Type Labels:

    • type-FunctionalityBug : the bug is a flaw in how the product works
    • type-DocumentationBug : the bug is in the documentation
    • Suggest a severity for the bug:

    Bug Severity labels:

    • severity.Low : A flaw that is unlikely to affect normal operations of the product. Appears only in very rare situations and causes a minor inconvenience only.
    • severity.Medium : A flaw that causes occasional inconvenience to some users but they can continue to use the product.
    • severity.High : A flaw that affects most users and causes major problems for users. i.e., makes the product almost unusable for most users.
    • Decide who should fix the bug. Use the Assignees field to assign the issue to that person(s). There is no need to actually fix the bug though. It's simply an indication/acceptance of responsibility. If there is no assignee and we are unable to determine a suitable assignee ourselves, we'll have no choice but to distribute the penalty for that bug (if any) among all team members.

    • Add an explanatory comment explaining your choice of labels and assignees.

    Grading:

    • Your performance in the practical exam will be considered for your final grade (under the QA category and under Implementation category, about 10 marks in total).
    • You will be graded based on many bugs in the product you tested and how far off your evaluation/estimates are from the evaluator consensus.  Explanation: we understand that you have limited expertise in this area; hence, we penalize only if your inputs don't seem be be based on a sincere effort to test/evaluate.
    • The bugs found in your product by others will affect your v1.5 marks. You will be given a chance to reject false-positive bug reports.

    Project Assessment

    Note that project grading is not competitive (not bell curved). CS2103T projects will be assessed separately from CS2103 projects. This is to account for the perceived difference in workload. Given below is the marking scheme.

    Total: 50 marks (👤 40 individual marks + 👥 10 team marks)

    Evaluates: How well do your features fit together to form a cohesive product (not how many features or how big the features are)?

    Based on: user guide and the product demo. The quality of the demo will be factored in as well.

    ❗️ ‘Half-baked’ (i.e. not production quality) or 'ill-fitting' (feature does not go well with the other features) features will not earn marks at all. It may be better to remove such features before submission.

    Evaluates:

    A. Code quality/quantity:

    How good your implementation is, in terms of the quality and the quantity of the code you have written yourself.

    Based on: an inspection of the collated code (submitted in your /collated/*.md files).

    • Ensure your code has at least some evidence of these (see here for more info)

      • logging
      • exceptions
      • assertions
      • defensive coding
    • Ensure there are no coding standard violations  e.g. all boolean variables/methods sounds like booleans. Checkstyle can prevent only some coding standard violations; others need to be checked manually.

    • Ensure SLAP is applied at a reasonable level. Long methods or deeply-nested code are symptoms of low-SLAP may be counted against your code quality.

    • Reduce code duplications  i.e. if there multiple blocks of code that vary only in minor ways, try to extract out similarities into one place, especially in test code.

    • In addition, tyr to apply as many of the code quality guidelines covered in the module as much as you can.

    B. Depth and completeness of the major feature

    Evaluates: How good is your Quality Assurance?

    Based on: 1. your test code 2. our own manual testing 3. your performance in the v1.5 Practical Exam, 4. bugs found during PE.

    v1.5 Practical Exam

    Compulsory. Graded (accounting for the QA component score (up to 10 marks)).

    Objectives:

    • Evaluate your,
      • manual testing skills
      • product evaluation skills
      • effort estimation skills
    • Peer-evaluate your
      • product design 👥
      • implementation effort 👤
      • documentation quality 👤

    Time/venue: week 13 lecture slot, lecture theatre

    Preparation:

    • Ensure you have access to a computer that is able to run module projects  e.g. has the right Java version.
    • Have a good screen grab tool with annotation features so that you can quickly take a screenshot of a bug, annotate it, and post in the issue tracker.
    • 💡 You can use Ctrl+V to paste a picture from the clipboard into a text box in GitHub issue tracker.

    During:

    1. **Take note of your team to test **. Team ID will be given to you by the teaching team (distributed via IVLE gradebook).
    2. Download from IVLE all files submitted by the team  (i.e. jar file, User Guide, Developer Guide, and Project Portfolio Pages) into an empty folder.
    3. [~40 minutes] Test the product and report bugs
      • Launch the jar file. Test it.
      • You can use Developer Guide (Appendix named Instructions for Manual Testing) and the User Guide in your testing.
      • No need to test features that are driven by GUI inputs (e.g. buttons, menus, etc.)  Reason: Only CLI-driven features can earn credit, as per given project constraints. Some features might have both a GUI-driven and CLI-driven ways to invoke them, in which case test only the CLI-driven way of invoking it.
      • The testing instructions in the Developer Guide can provide you some guidance but if you follow those instructions strictly, you are unlikely to find many bugs. You can deviate from the instructions to probe areas that are more likely to have bugs.
      • You can do acceptance testing as well as system testing.
      • Omit feature that existed in AB4. Instead, test features the team has added.
      • Report bugs in the [practical exam issue tracker](URL will be given) not in the team's repo.
        • Issue title format: [Team ID] Issue description  e.g. [561] Empty name crashes app
      • Report bugs only. Do not post suggestions. These are considered bugs:
        • Behavior differs from the User Guide (or Developer Guide)
        • A legitimate user behavior is not handled  e.g. incorrect commands, extra parameters
        • Behavior is not specified and differs from normal expectations  e.g. error message does not match the error
      • Write good quality bug reports; ❗️ poor quality or incorrect bug reports will not earn credit.
        • Use a descriptive title
        • Give a good description of the bug with steps to reproduce and screenshots
        • 🔍 Note that we will anonymize bug reports before revealing it to the receiving team.
      • Assign a severity to the bug report:

    Bug Severity labels:

    • severity.Low : A flaw that is unlikely to affect normal operations of the product. Appears only in very rare situations and causes a minor inconvenience only.
    • severity.Medium : A flaw that causes occasional inconvenience to some users but they can continue to use the product.
    • severity.High : A flaw that affects most users and causes major problems for users. i.e., makes the product almost unusable for most users.
    1. [~40 minutes] Evaluate the following aspects. Note down your evaluation in a hard copy (as a backup). Submit via TEAMMATES.

      • A. Cohesiveness of product features [👥]: Do the major features fit together and match the stated target user and the value proposition?

        • low: One of these
          • target user is too general  i.e. not narrower than AB4
          • target user and value proposition is not clear from the user guide OR
          • features don't seem to match for the most part
        • medium: Some features match but some don't
        • high: all features match but the features are not very high value to the target user
        • excellent: the product is very attractive to the target user. i.e. and almost all new features are of high-value to the target user.
        • unable to judge: you are unable to judge this aspect for some reason
      • B. Quality of user docs [👤]: Evaluate based on the parts of the user guide written by the person, as reproduced in the project portfolio. Evaluate from an end-user perspective.

        • low: Hard to understand, often inaccurate or missing important information
        • medium:
        • high: Mostly easy to follow. Only a few areas for improvements.
        • excellent: Easy to follow and accurate. Just enough information, visuals, examples etc. (not too much either).
        • unable to judge: less than 1 page worth of UG content written by the student
      • C. Amount of work [👤]: Evaluate the amount of work on a scale of 0 to 30

        • Consider this PR (history command) as 5 units of effort which means this PR (undo/redo command) is about 15 points of effort. Given that 30 points matches an effort twice as that needed for the undo/redo feature (which was given as an example of an A grade project), we expect most students to be have efforts lower than 20.
        • Count all implementation/testing/documentation work as mentioned in that person's portfolio page.
        • ❗️ Do not give a high value just to be nice. If your estimate is wildly inaccurate, it means you are unable to estimate the effort required to implement a feature in a project that you are supposed to know well at this point. You will lose marks if that is the case.
        • When estimating effort, ignore features that are driven by GUI inputs.
      • D. Depth of feature (major feature) [👤]: Evaluate the major feature done by the student for difficulty, depth, and completeness. Note: examples given below assumes AB4 did not have commandsedit undo redo

        • low : an easy feature  e.g. make the existing find command case insensitive
        • medium : moderately difficult feature, barely acceptable implementation  e.g. an edit command that requires the user to type all fields, even the ones that are not being edited
        • high: one of the below
          • A moderately difficult feature but fully implemented  e.g. an edit command that allows editing any field
          • A difficult feature with a reasonable implementation but some aspects are not covered  undo/redo command that only allows a single undo/redo
        • excellent: A difficult feature, all reasonable aspects are fully implemented  undo/redo command that allows multiple undo/redo
        • outstanding: A difficult feature, implemented as good as it can be under the circumstances.  undo/redo command that even allows undoing non-mutating commands such as select, allows selectively undo specific commands in the history, etc.
        • unable to judge: you are unable to judge this aspect for some reason
      • E. Quality of developer docs [👤]: Evaluate based on the developer docs cited/reproduced in the respective project portfolio page. Evaluate from the perspective of a new developer trying to understand how the features are implemented.

        • low: One of these
          • Very small amount of content (i.e., 0.5 - 1 page)
          • Hardly any use to the reader (i.e., content doesn't make much sense or redundant)
          • Uses ad-hoc diagrams where UML diagrams could have been used instead
          • Multiple notation errors in UML diagrams
        • medium: Some diagrams, some descriptions, but does not help the reader that much  e.g. overly complicated diagrams
        • high: Enough diagrams (at lest two kinds of UML diagrams used) and enough descriptions (about 2 pages worth) but explanations are not always easy to follow.
        • excellent: Easy to follow. Just enough information (not too much). Minimum repetition of content/diagrams. Good use of diagrams to complement text descriptions. Easy to understand diagrams with just enough details rather than very complicated diagrams that are hard to understand.
        • unable to judge: One of these
          • no content at all
          • less than 0.5 pages worth of content
          • other problems in the document  e.g. looks like included wrong content

    Bug Review Period:

    There will be a review period for you to respond to the [bug reports](URL will be given) you received.

    Duration: The review period will start around 1 day after the PE (exact time to be announced) and will last until the following Wednesday midnight.

    Bug reviewing is recommended to be done as a team as some of the decisions need team consensus.

    Instructions for Reviewing Bug Reports

    • First, don't freak out if there are lot of bug reports. Many can be duplicates and some can be false positives. In any case, we anticipate that all of these products will have some bugs and our penalty for bugs is not harsh. Furthermore, it depends on the severity of the bug. Some bug may not even be penalized.

    • Do not edit the subject or the description. Do not close bug reports. Your response (if any) should be added as a comment.

    • If the bug is reported multiple times, mark all copies EXCEPT one as duplicates using the duplicate tag. In addition, use this technique to indicate which issue they are duplicates of. Duplicates can be omitted from processing steps given below.

    • If a bug seems to be for a different product (i.e. wrongly assigned to your team), let us know (email prof).

    • Decide if it is a real bug and apply ONLY one of these labels.

    Response Labels:

    • response.Accepted : You accept it as a bug.
    • response.Rejected : What tester thought as a bug is in fact expected behavior. ❗️ The penalty for rejecting a bug using an unjustifiable explanation is higher than the penalty if the same bug was accepted. You can also reject bugs that you inherited from AB4.
    • response.CannotReproduce : You are unable to reproduce the behavior reported in the bug after multiple tries.
    • response.IssueUnclear : The issue description is not clear.
    • If applicable, decide the type of bug:

    Bug Type Labels:

    • type-FunctionalityBug : the bug is a flaw in how the product works
    • type-DocumentationBug : the bug is in the documentation
    • Suggest a severity for the bug:

    Bug Severity labels:

    • severity.Low : A flaw that is unlikely to affect normal operations of the product. Appears only in very rare situations and causes a minor inconvenience only.
    • severity.Medium : A flaw that causes occasional inconvenience to some users but they can continue to use the product.
    • severity.High : A flaw that affects most users and causes major problems for users. i.e., makes the product almost unusable for most users.
    • Decide who should fix the bug. Use the Assignees field to assign the issue to that person(s). There is no need to actually fix the bug though. It's simply an indication/acceptance of responsibility. If there is no assignee and we are unable to determine a suitable assignee ourselves, we'll have no choice but to distribute the penalty for that bug (if any) among all team members.

    • Add an explanatory comment explaining your choice of labels and assignees.

    Grading:

    • Your performance in the practical exam will be considered for your final grade (under the QA category and under Implementation category, about 10 marks in total).
    • You will be graded based on many bugs in the product you tested and how far off your evaluation/estimates are from the evaluator consensus.  Explanation: we understand that you have limited expertise in this area; hence, we penalize only if your inputs don't seem be be based on a sincere effort to test/evaluate.
    • The bugs found in your product by others will affect your v1.5 marks. You will be given a chance to reject false-positive bug reports.
    • There is no requirement for a minimum coverage level. Note that in a production environment you are often required to have at least 90% of the code covered by tests. In this project, it can be less. The less coverage you have, the higher the risk of regression bugs, which will cost marks if not fixed before the final submission.
    • You must write some tests so that we can evaluate your ability to write tests.
    • How much of each type of testing should you do? We expect you to decide. You learned different types of testing and what they try to achieve. Based on that, you should decide how much of each type is required. Similarly, you can decide to what extent you want to automate tests, depending on the benefits and the effort required.
    • Applying TDD is optional. If you plan to test something, it is better to apply TDD because TDD ensures that you write functional code in a testable way. If you do it the normal way, you often find that it is hard to test the functional code because the code has low testability.

    Evaluates: How well does your user guide achieves its objectives?

    Based on: the relevant sections of your project portfolio. Criteria considered:

    • Explanation should be clear and written to match the audience.
    • Good use of visuals to complement text.

    A. Process:

    Evaluates: How well you did in project management related aspects of the project, as an individual and as a team

    Based on: Supervisor observations of weekly milestones and GitHub data. Marks will be deducted if,

    • if you missed more than two individual milestones  out of the six milestones v1.0 - v1.5rc (only the team member loses marks)
    • if your team missed more than two team milestones  out of the six milestones v1.0 - v1.5rc (all team members lose marks)

    Milestones need to be reached before the start of the tutorial. If you reach the milestone during the tutorial, it will be considered as missed.

    Other criteria:

    • Good use of GitHub milestones
    • Good use of GitHub release mechanism
    • Good version control, based on the repo
    • Reasonable attempt to use the forking workflow
    • Good task definition, assignment and tracking, based on the issue tracker
    • Good use of buffers (opposite: everything at the last minute)
    • Project done iteratively and incrementally (opposite: doing most of the work in one big burst)

    B. Team-based tasks:

    Evaluates: how much you contributed to common team-based tasks

    Based on: peer evaluations and tutor observations

    Here is a non-exhaustive list of team-tasks:

    1. Necessary general code enhancements
      1. Work related to renaming the product
      2. Work related to changing the product icon
      3. Morphing the product into a different product
    2. Setting up the GitHub, Travis, AppVeyor, etc.
    3. Maintaining the issue tracker
    4. Release management
    5. Updating user/developer docs that are not specific to a feature  e.g. documenting the target user profile
    6. Incorporating more useful tools/libraries/frameworks into the product or the project workflow (e.g. automate more aspects of the project workflow using a GitHub plugin)

    Supervision

    The tutor's main job is to observe, facilitate self/peer learning, evaluate, and give feedback.

    Tutorial time is the main avenue for meeting your tutor. In addition, you can meet the tutor before/after the tutorial, or any other time, as many times you need, subject to availability in his/her schedule.

    Note that it is not the tutor’s job to chase you down and give help. It is up to you to get as much feedback from the as you need. You are free to request more feedback from the tutor as necessary. Similarly, it is not the job of the project supervisor to lead your project to success.

    Your Phase B tutor will also be your project supervisor.

    Forming Teams


    [Picture: The team that was at the top of early Google]

    The two teams:
    You will be in two different teams at different times of the semester.

    • Weeks 1 - 5: Phase A team
    • Weeks 6 - 13: Phase B team (i.e. Project team)

    Phase A (Weeks 1 - 5) is the period for strengthening individual competencies. By working with different classmates during this period you get to know and learn from more classmates. The project is done in Phase B. That means your Phase B team is also your project team.

    There cannot be any overlap between your 2 teams. For example, any member from your Phase A team cannot be a member of your Phase B team.

    When to form teams

    • CS2103T: Your Phase A team will be formed by CS2101 side in week 1. Your Phase B team (applicable to CS2101 too) will be formed by CS2103T side in week 5.
    • CS2103: Form Phase A teams in week 3. Form Phase B team in week 5.

    Team size: The default team size is four.

    Team ID: This will be given to you after forming teams in each Phase . It has the form TUTORIAL_ID-PHASE+TEAM_NUMBER e.g, W14-A2 means you are in tutorial W14 (i.e., Wed 1400-1500), Phase A, team 2.

    Our tutorial IDs are different from CORS. Format: W09 means Wednesday 0900 and so on.

    Module Tutorial ID (ID in CORS) Time Venue Tutors (contact details)
    CS2103T (CS) W09 (T4) Wed 0900 COM1-B103 (ALL) TBD
    CS2103 W10 (10) Wed 1000 COM1-B103 (ALL) TBD
    CS2103T (CS) W11 (T6) Wed 1100 COM1-B103 (ALL) TBD
    CS2103T (CS) W13 (T1) Wed 1300 COM1-B103 (ALL) TBD
    CS2103T (CS) W14 (T2) Wed 1400 COM1-B103 (ALL) TBD
    CS2103T (CS) W15 (T3) Wed 1500 COM1-B103 (ALL) TBD
    CS2103T (CEG) T09 (C01) Thu 0900 COM1-B103 (ALL) TBD
    CS2103 T11 (2) Thu 1100 COM1-B103 (ALL) TBD
    CS2103 T15 (4) Thu 1500 COM1-B103 (ALL) TBD
    CS2103 T16 (5) Thu 1600 COM1-B103 (ALL) TBD
    CS2103T (CS) F09 (T7) Fri 0900 COM1-B103 (ALL) TBD
    CS2103 F11 (9) Fri 1100 COM1-B103 (ALL) TBD
    CS2103 F12 (11) Fri 1200 COM1-B103 (ALL) TBD
    CS2103T (CS) F14 (T5) Fri 1400 COM1-B103 (ALL) TBD

    *ALL: Active Learning Room

    Team composition

    We allow some freedom in choosing team members, subject to these constraints:

    • All team members should be in the same tutorial. Delay forming teams until your place in a tutorial is confirmed. We do not allow changing tutorials to team up with your preferred team mates.

    • Teams of single nationality are not allowed  Rationale: to train you to work in multicultural teams. However, we allow same nationality teams if the only language common among all team members is English. e.g. an all-Singaporean team that include both Chinese and Malay students.

    • No more than one exchange students per team Rationale: to increase interaction between exchange students and NUS students.

    • Also note that we may modify teams when circumstances call for it. There is no avenue for you to object. Staying with your preferred team is not guaranteed.

    Peer Evaluations

    We use the TEAMMATES online peer evaluation system to conduct several rounds of peer-evaluations. All peer evaluations will be taken into account when determining your participation marks. The system also allows you to give anonymous feedback to your teammates.

    Extra Requirements: [considered for participation marks]

    • ❗️ Submitting peer evaluations is compulsory. If you routinely miss submitting peer evaluations, you forfeit your participation marks.
    • 💡 TEAMMATES normally allows students to access it without using Google login. In this module, we encourage you to login to TEAMMATES using your Google account and complete your profile with a suitable profile photo.  Reason:CS2103 is a big class. This profile helps us to remember you better, even after the module is over.
    • The purpose of the profile photo is for the teaching team to identify you. Therefore, you should choose a recent individual photo showing your face clearly. Some examples can be seen in the 'Teaching team' page. Given below are some examples of good and bad profile photos.

    • If you are uncomfortable posting your photo due to security reasons, you can post a lower resolution image so that it is hard for someone to misused that image for fraudulent purposes. If you are concerned about privacy, you can request permission to omit your photo from the page by writing to prof.

    Giving constructive feedback to others is a valuable skill for software engineers. It is also an intended learning outcome of this module. Half-hearted/trivial feedback will not earn participation marks.

    Here are some things to keep in mind:

    • Assume you are giving feedback to a colleague, not a friend. Keep the tone of your feedback reasonably professional. Do not use offensive language or slang.
    • The feedback should be honest and consistent. Giving positive qualitative feedback (e.g. Thanks for all the hard work! and negative ratings (e.g. Equal share - 40%) to the same team member is not being honest.
    • State your expectations early. All too often students give positive/neutral feedback early (hoping that the team member will improve later) and trash the team member in the final evaluation (because the he/she did not improve as expected). However, this could be confusing to the recipient. It is better to give negative feedback early so that the team member gets a clear signal that he/she needs to improve.

    The final peer evaluation (in week 13) is graded. In that peer-evaluation you will be asked to evaluate the work of your team members. The quality and accuracy of your evaluation will affect your grade and your evaluations will be considered as a data point in determining the grade of the team members.

    Tools

    Collaboration platform: You are required to use GitHub as the hosting and collaboration platform of your project (i.e., to hold the Code repository, Issue Tracker, etc.). See Appendix E for more info on how to setup and use GitHub for your project.

    Communication: Keeping a record of communications among your team can help you, and us, in many ways. We encourage you to do at least some of the project communication in written medium (e.g., GitHub Issue Tracker) to practice how to communicate technical things in written form.

    • Instead of the IVLE forum, we encourage you to post your questions/suggestions in this github/nus-cs2103-AY1718S2/forum.
    • Alternatively, you can post in our slack channel https://nus-cs2103-ay1718s2.slack.com. We encourage you all to join the slack channel (you'll need to use an email address ending in @nus.edu.sg, @comp.nus.edu.sg, @u.nus.edu.sg or @u.nus.edu to join this channel).
    • Note that slack is useful for quick chats while issue tracker is useful for longer-running conversations.
    • You are encouraged to use channels with a wider audience (common channel in slack, GitHub issue tracker) for module-related communication as much as possible, rather than private channels such as private slack/FB messages or direct emails. Rationale: more classmates can benefit from the discussions.

    IDE: You are recommended to use Intellij IDEA for module-related programming work. You may use the community edition (free) or the ultimate edition (free for students). While the use of Intellij is not compulsory, note that module materials are optimized for Intellij. Use other IDEs at your own risk.

    Revision control: You are required to use Git. Other revision control software are not allowed.
    The recommended GUI client for Git is SourceTree (which comes bundled with Git), but you may use any other, or none.

    Collating code: To extract out code written by each person, we use a custom-built tool called Collate.

    Collate is a tool for collating code written by different developers.

    Steps to use Collate:

    1. Download Collate-TUI.jar from the Collate Tool project
    2. Annotate your code to indicate who wrote which part of the code (instructions given below)
    3. Run the Collate tool to collate code written by each person into separate files (instructions given below)

    Annotating code to indicate authorship

    • Mark your code with a //@@author {yourGithubUsername}. Note the double @.
      The //@@author tag should appear only at the beginning of the code you wrote. The code up to the next //@@author tag or the end of the file (whichever comes first) will be considered as was written by that author. Here is a sample code file:

      //@@author johndoe
      method 1 ...
      method 2 ...
      //@@author sarahkhoo
      method 3 ...
      //@@author johndoe
      method 4 ...
      
    • If you don't know who wrote the code segment below yours, you may put an empty //@@author (i.e. no GitHub username) to indicate the end of the code segment you wrote. The author of code below yours can add the GitHub username to the empty tag later. Here is a sample code with an empty author tag:

      method 0 ...
      //@@author johndoe
      method 1 ...
      method 2 ...
      //@@author
      method 3 ...
      method 4 ...
      
    • The author tag syntax varies based on file type e.g. for java, css, fxml. Use the corresponding comment syntax for non-Java files.
      Here is an example code from an xml file.

      <!-- @@author sereneWong -->
      <textbox>
        <label>...</label>
        <input>...</input>
      </textbox>
      ...
      
    • Do not put the //@@author inside java header comments as only the content below that tag will be collated.
      👎⤵️

      /**
        * Returns true if ...
        * @@author johndoe
        */
      

      👍⤵️

      //@@author johndoe
      /**
        * Returns true if ...
        */
      

    What to and what not to annotate

    • Annotate both functional and test code but not documentation files.

    • Annotate only significant size code blocks that can be reviewed on its own  e.g., a class, a sequence of methods, a method.
      Claiming credit for code blocks smaller than a method is discouraged but allowed. If you do, do it sparingly and only claim meaningful blocks of code such as a block of statements, a loop, or an if-else statement%%.

      • If an enhancement required you to do tiny changes in many places, there is no need to collate all those tiny changes; you can describe those changes in the Project Portfolio page instead.
      • If a code block was touched by more than one person, either let the person who wrote most of it (e.g. more than 80%) take credit for the entire block, or leave it as 'unclaimed' (i.e., no author tags).
      • Related to the above point, if you claim a code block as your own, more than 80% of the code in that block should have been written by yourself. For example, no more than 20% of it can be code you reused from somewhere.
      • 💡 GitHub has a blame feature and a history feature that can help you determine who wrote a piece of code.
    • Do not try to boost the length of your collated files using dubious means such as duplicating the same code in multiple places. In particular, do not copy-paste test cases to create redundant tests. Even repetitive code blocks within test methods should be extracted out as utility methods to reduce code duplication.
      Individual members are responsible for making sure their own collated files contain the correct content.
      If you notice a team member claiming credit for code that he/she did not write or use other questionable tactics, you can email us (after the final submission) to let us know.

    • If you wrote a significant amount of code that was not used in the final product,

      • Create a folder called {project root}/unused
      • Move unused files (or copies of files containing unused code) to that folder
      • use //@@author {yourGithubUsername}-unused to mark unused code in those files (note the suffix unused) e.g.
      //@@author johndoe-unused
      method 1 ...
      method 2 ...
      

      Please put a comment in the code to explain why it was not used.

    • If you reused code from elsewhere, mark such code as //@@author {yourGithubUsername}-reused (note the suffix reused) e.g.

      //@@author johndoe-reused
      method 1 ...
      method 2 ...
      
    • For code generated by the IDE/framework, should not be annotated as your own.

    • Code you modified in minor ways e.g. adding a parameter. These can be left out of collated code but can be mentioned in the Project Portfolio page if you want to claim credit for them.

    Collating the annotated code

    You need to put the collated code in the following folders

    Code Type Folder
    functional code collated/functional
    test code collated/test
    unused code collated/unused

    Refer to Collate Tool's user guide to find how to run the tool over the annotated code.

    Given below are DOS sample commands you can put in a batch file and run it to collate the code.

    java -jar Collate-TUI.jar collate from src/main to collated/functional include java, fxml, css
    
    java -jar Collate-TUI.jar collate from src/test to collated/test include java
    
    java -jar Collate-TUI.jar collate from unused to collated/unused include java, fxml, css
    

    The output should be something like the structure given below.

    collated/
        functional/
            johndoe.md
            sarahkhoo.md
            ravikumar.md
            ravikumarreused.md
        test/
            johndoe.md
            sarahkhoo.md
            ravikumar.md
        unused/
            johndoe.md
    
    • After running the collate tool, you are recommended to look through the generated .md files to ensure all your code has been extracted correctly.

    • Push the *.md files created to a folder called /collated in your repo.

    Grade Breakdown

    Participation marks for each phase is given on a 'all or nothing' basis  i.e., you get either 5 or 0 marks.

    To get the full marks allocated for participation you should meet a minimal bar on all the following criteria, evaluated based on peer evaluations and tutor observations. We will also take into account data recorded in other systems e.g. GitHub, IVLE.

    • Professional Communication :

      • Communicates sufficiently and professionally. e.g. Does not use offensive language or excessive slang in project communications.
      • Responds to communication from team members in a timely manner (e.g. within 24 hours).
    • Punctuality: Does not cause others to waste time or slow down project progress by frequent tardiness.

    • Dependability: Promises what can be done, and delivers what was promised.

    • Effort: Puts in sufficient effort to, and tries their best to, keep up with the module/project pace. Seeks help from others when necessary.

    • Quality: Does not deliver work products that seem to be below the student's competence level i.e. tries their best to make the work product as high quality as possible within her competency level.

    • Meticulousness:

      • Rarely overlooks submission requirements.
      • Rarely misses compulsory module activities such as completing the TEAMMATES profile or peer review.
    • Teamwork: How willing are you to act as part of a team, contribute to team-level tasks, adhere to team decisions, etc.

    ❗️ you will lose all participation marks if,

    • if you receive multiple Below Average/Poor ratings for any of the criteria above, or,
    • if you miss more than one compulsory tasks  (e.g. submitting peer evaluations, taking part in peer testing, compulsory LOs)

    The following criteria will be assessed but considered only for pushing a student's grade from A to A+ and recruiting future tutors/interns.

    • Technical Competency: Able to gain competency in all the required tools and techniques.
    • Mentoring skills: Helps others when possible. Able to mentor others well.
    • Communication skills: Able to communicate (written and spoken) well. Takes initiative in discussions.

    There is no midterm.

    The final exam has two parts:

    • Part 1: MCQ questions (30 minutes, 25 marks)
    • Part 2: Essay questions (1 hour 30 minutes, 55 marks)

    Both papers will be given to you at the start but you need to answer Part 1 first (i.e. MCQ paper). It will be collected 30 minutes after the exam start time (even if arrived late for the exam). You are free to start part 2 early if you finish Part 1 early.

    Final Exam: Part 1 (MCQ)

    Each MCQ question gives you a statement to evaluate.

    📦 An example statement

    Testing is a Q&A activity

    The meaning of answer options are
    A. True
    B. False

    All questions carry equal marks. There is no penalty for wrong answer.

    The exam paper has 50 questions.

    Note that you have slightly more than ½ minute for each question, which means you need to go through the questions fairly quickly.

    Given the fast pace required by the paper, to be fair to all students, you will not be allowed to clarify doubts about questions (in Part 1) by talking to invigilators.

    Questions in Part 1 are confidential. You are not allowed to reveal Part 1 content to anyone after the exam. All pages of the assessment paper are to be returned at the end of the exam.

    You will be given OCR forms to indicate your answers for Part 1.

    The paper is open-book: you may bring any printed or written materials to the exam in hard copy format. However, given the fast pace required by Part 1, you will not have time left to refer notes during that part of the exam.

    💡 Mark the OCR form as you go, rather than planning to transfer your answers to the OCR form near the end.  Reason: Given there are 50 questions, it will be hard to estimate how much time you need to mass-transfer all answers to OCR forms.

    💡 We have tried to avoid deliberately misleading/tricky questions. If a question seems to take a very long time to figure out, you are probably over-thinking it.

    Final Exam: Part 2 (Essay)

    Unlike in part 1, you can ask invigilators for clarifications if you found a question to be unclear in part 2.

    Yes, you may use pencils when answering part 2.

    [Sample paper] [ Answers to the sample paper]

    Note that project grading is not competitive (not bell curved). CS2103T projects will be assessed separately from CS2103 projects. This is to account for the perceived difference in workload. Given below is the marking scheme.

    Total: 50 marks (👤 40 individual marks + 👥 10 team marks)

    Evaluates: How well do your features fit together to form a cohesive product (not how many features or how big the features are)?

    Based on: user guide and the product demo. The quality of the demo will be factored in as well.

    ❗️ ‘Half-baked’ (i.e. not production quality) or 'ill-fitting' (feature does not go well with the other features) features will not earn marks at all. It may be better to remove such features before submission.

    Evaluates:

    A. Code quality/quantity:

    How good your implementation is, in terms of the quality and the quantity of the code you have written yourself.

    Based on: an inspection of the collated code (submitted in your /collated/*.md files).

    • Ensure your code has at least some evidence of these (see here for more info)

      • logging
      • exceptions
      • assertions
      • defensive coding
    • Ensure there are no coding standard violations  e.g. all boolean variables/methods sounds like booleans. Checkstyle can prevent only some coding standard violations; others need to be checked manually.

    • Ensure SLAP is applied at a reasonable level. Long methods or deeply-nested code are symptoms of low-SLAP may be counted against your code quality.

    • Reduce code duplications  i.e. if there multiple blocks of code that vary only in minor ways, try to extract out similarities into one place, especially in test code.

    • In addition, tyr to apply as many of the code quality guidelines covered in the module as much as you can.

    B. Depth and completeness of the major feature

    Evaluates: How good is your Quality Assurance?

    Based on: 1. your test code 2. our own manual testing 3. your performance in the v1.5 Practical Exam, 4. bugs found during PE.

    v1.5 Practical Exam

    Compulsory. Graded (accounting for the QA component score (up to 10 marks)).

    Objectives:

    • Evaluate your,
      • manual testing skills
      • product evaluation skills
      • effort estimation skills
    • Peer-evaluate your
      • product design 👥
      • implementation effort 👤
      • documentation quality 👤

    Time/venue: week 13 lecture slot, lecture theatre

    Preparation:

    • Ensure you have access to a computer that is able to run module projects  e.g. has the right Java version.
    • Have a good screen grab tool with annotation features so that you can quickly take a screenshot of a bug, annotate it, and post in the issue tracker.
    • 💡 You can use Ctrl+V to paste a picture from the clipboard into a text box in GitHub issue tracker.

    During:

    1. **Take note of your team to test **. Team ID will be given to you by the teaching team (distributed via IVLE gradebook).
    2. Download from IVLE all files submitted by the team  (i.e. jar file, User Guide, Developer Guide, and Project Portfolio Pages) into an empty folder.
    3. [~40 minutes] Test the product and report bugs
      • Launch the jar file. Test it.
      • You can use Developer Guide (Appendix named Instructions for Manual Testing) and the User Guide in your testing.
      • No need to test features that are driven by GUI inputs (e.g. buttons, menus, etc.)  Reason: Only CLI-driven features can earn credit, as per given project constraints. Some features might have both a GUI-driven and CLI-driven ways to invoke them, in which case test only the CLI-driven way of invoking it.
      • The testing instructions in the Developer Guide can provide you some guidance but if you follow those instructions strictly, you are unlikely to find many bugs. You can deviate from the instructions to probe areas that are more likely to have bugs.
      • You can do acceptance testing as well as system testing.
      • Omit feature that existed in AB4. Instead, test features the team has added.
      • Report bugs in the [practical exam issue tracker](URL will be given) not in the team's repo.
        • Issue title format: [Team ID] Issue description  e.g. [561] Empty name crashes app
      • Report bugs only. Do not post suggestions. These are considered bugs:
        • Behavior differs from the User Guide (or Developer Guide)
        • A legitimate user behavior is not handled  e.g. incorrect commands, extra parameters
        • Behavior is not specified and differs from normal expectations  e.g. error message does not match the error
      • Write good quality bug reports; ❗️ poor quality or incorrect bug reports will not earn credit.
        • Use a descriptive title
        • Give a good description of the bug with steps to reproduce and screenshots
        • 🔍 Note that we will anonymize bug reports before revealing it to the receiving team.
      • Assign a severity to the bug report:

    Bug Severity labels:

    • severity.Low : A flaw that is unlikely to affect normal operations of the product. Appears only in very rare situations and causes a minor inconvenience only.
    • severity.Medium : A flaw that causes occasional inconvenience to some users but they can continue to use the product.
    • severity.High : A flaw that affects most users and causes major problems for users. i.e., makes the product almost unusable for most users.
    1. [~40 minutes] Evaluate the following aspects. Note down your evaluation in a hard copy (as a backup). Submit via TEAMMATES.

      • A. Cohesiveness of product features [👥]: Do the major features fit together and match the stated target user and the value proposition?

        • low: One of these
          • target user is too general  i.e. not narrower than AB4
          • target user and value proposition is not clear from the user guide OR
          • features don't seem to match for the most part
        • medium: Some features match but some don't
        • high: all features match but the features are not very high value to the target user
        • excellent: the product is very attractive to the target user. i.e. and almost all new features are of high-value to the target user.
        • unable to judge: you are unable to judge this aspect for some reason
      • B. Quality of user docs [👤]: Evaluate based on the parts of the user guide written by the person, as reproduced in the project portfolio. Evaluate from an end-user perspective.

        • low: Hard to understand, often inaccurate or missing important information
        • medium:
        • high: Mostly easy to follow. Only a few areas for improvements.
        • excellent: Easy to follow and accurate. Just enough information, visuals, examples etc. (not too much either).
        • unable to judge: less than 1 page worth of UG content written by the student
      • C. Amount of work [👤]: Evaluate the amount of work on a scale of 0 to 30

        • Consider this PR (history command) as 5 units of effort which means this PR (undo/redo command) is about 15 points of effort. Given that 30 points matches an effort twice as that needed for the undo/redo feature (which was given as an example of an A grade project), we expect most students to be have efforts lower than 20.
        • Count all implementation/testing/documentation work as mentioned in that person's portfolio page.
        • ❗️ Do not give a high value just to be nice. If your estimate is wildly inaccurate, it means you are unable to estimate the effort required to implement a feature in a project that you are supposed to know well at this point. You will lose marks if that is the case.
        • When estimating effort, ignore features that are driven by GUI inputs.
      • D. Depth of feature (major feature) [👤]: Evaluate the major feature done by the student for difficulty, depth, and completeness. Note: examples given below assumes AB4 did not have commandsedit undo redo

        • low : an easy feature  e.g. make the existing find command case insensitive
        • medium : moderately difficult feature, barely acceptable implementation  e.g. an edit command that requires the user to type all fields, even the ones that are not being edited
        • high: one of the below
          • A moderately difficult feature but fully implemented  e.g. an edit command that allows editing any field
          • A difficult feature with a reasonable implementation but some aspects are not covered  undo/redo command that only allows a single undo/redo
        • excellent: A difficult feature, all reasonable aspects are fully implemented  undo/redo command that allows multiple undo/redo
        • outstanding: A difficult feature, implemented as good as it can be under the circumstances.  undo/redo command that even allows undoing non-mutating commands such as select, allows selectively undo specific commands in the history, etc.
        • unable to judge: you are unable to judge this aspect for some reason
      • E. Quality of developer docs [👤]: Evaluate based on the developer docs cited/reproduced in the respective project portfolio page. Evaluate from the perspective of a new developer trying to understand how the features are implemented.

        • low: One of these
          • Very small amount of content (i.e., 0.5 - 1 page)
          • Hardly any use to the reader (i.e., content doesn't make much sense or redundant)
          • Uses ad-hoc diagrams where UML diagrams could have been used instead
          • Multiple notation errors in UML diagrams
        • medium: Some diagrams, some descriptions, but does not help the reader that much  e.g. overly complicated diagrams
        • high: Enough diagrams (at lest two kinds of UML diagrams used) and enough descriptions (about 2 pages worth) but explanations are not always easy to follow.
        • excellent: Easy to follow. Just enough information (not too much). Minimum repetition of content/diagrams. Good use of diagrams to complement text descriptions. Easy to understand diagrams with just enough details rather than very complicated diagrams that are hard to understand.
        • unable to judge: One of these
          • no content at all
          • less than 0.5 pages worth of content
          • other problems in the document  e.g. looks like included wrong content

    Bug Review Period:

    There will be a review period for you to respond to the [bug reports](URL will be given) you received.

    Duration: The review period will start around 1 day after the PE (exact time to be announced) and will last until the following Wednesday midnight.

    Bug reviewing is recommended to be done as a team as some of the decisions need team consensus.

    Instructions for Reviewing Bug Reports

    • First, don't freak out if there are lot of bug reports. Many can be duplicates and some can be false positives. In any case, we anticipate that all of these products will have some bugs and our penalty for bugs is not harsh. Furthermore, it depends on the severity of the bug. Some bug may not even be penalized.

    • Do not edit the subject or the description. Do not close bug reports. Your response (if any) should be added as a comment.

    • If the bug is reported multiple times, mark all copies EXCEPT one as duplicates using the duplicate tag. In addition, use this technique to indicate which issue they are duplicates of. Duplicates can be omitted from processing steps given below.

    • If a bug seems to be for a different product (i.e. wrongly assigned to your team), let us know (email prof).

    • Decide if it is a real bug and apply ONLY one of these labels.

    Response Labels:

    • response.Accepted : You accept it as a bug.
    • response.Rejected : What tester thought as a bug is in fact expected behavior. ❗️ The penalty for rejecting a bug using an unjustifiable explanation is higher than the penalty if the same bug was accepted. You can also reject bugs that you inherited from AB4.
    • response.CannotReproduce : You are unable to reproduce the behavior reported in the bug after multiple tries.
    • response.IssueUnclear : The issue description is not clear.
    • If applicable, decide the type of bug:

    Bug Type Labels:

    • type-FunctionalityBug : the bug is a flaw in how the product works
    • type-DocumentationBug : the bug is in the documentation
    • Suggest a severity for the bug:

    Bug Severity labels:

    • severity.Low : A flaw that is unlikely to affect normal operations of the product. Appears only in very rare situations and causes a minor inconvenience only.
    • severity.Medium : A flaw that causes occasional inconvenience to some users but they can continue to use the product.
    • severity.High : A flaw that affects most users and causes major problems for users. i.e., makes the product almost unusable for most users.
    • Decide who should fix the bug. Use the Assignees field to assign the issue to that person(s). There is no need to actually fix the bug though. It's simply an indication/acceptance of responsibility. If there is no assignee and we are unable to determine a suitable assignee ourselves, we'll have no choice but to distribute the penalty for that bug (if any) among all team members.

    • Add an explanatory comment explaining your choice of labels and assignees.

    Grading:

    • Your performance in the practical exam will be considered for your final grade (under the QA category and under Implementation category, about 10 marks in total).
    • You will be graded based on many bugs in the product you tested and how far off your evaluation/estimates are from the evaluator consensus.  Explanation: we understand that you have limited expertise in this area; hence, we penalize only if your inputs don't seem be be based on a sincere effort to test/evaluate.
    • The bugs found in your product by others will affect your v1.5 marks. You will be given a chance to reject false-positive bug reports.
    • There is no requirement for a minimum coverage level. Note that in a production environment you are often required to have at least 90% of the code covered by tests. In this project, it can be less. The less coverage you have, the higher the risk of regression bugs, which will cost marks if not fixed before the final submission.
    • You must write some tests so that we can evaluate your ability to write tests.
    • How much of each type of testing should you do? We expect you to decide. You learned different types of testing and what they try to achieve. Based on that, you should decide how much of each type is required. Similarly, you can decide to what extent you want to automate tests, depending on the benefits and the effort required.
    • Applying TDD is optional. If you plan to test something, it is better to apply TDD because TDD ensures that you write functional code in a testable way. If you do it the normal way, you often find that it is hard to test the functional code because the code has low testability.

    Evaluates: How well does your user guide achieves its objectives?

    Based on: the relevant sections of your project portfolio. Criteria considered:

    • Explanation should be clear and written to match the audience.
    • Good use of visuals to complement text.

    A. Process:

    Evaluates: How well you did in project management related aspects of the project, as an individual and as a team

    Based on: Supervisor observations of weekly milestones and GitHub data. Marks will be deducted if,

    • if you missed more than two individual milestones  out of the six milestones v1.0 - v1.5rc (only the team member loses marks)
    • if your team missed more than two team milestones  out of the six milestones v1.0 - v1.5rc (all team members lose marks)

    Milestones need to be reached before the start of the tutorial. If you reach the milestone during the tutorial, it will be considered as missed.

    Other criteria:

    • Good use of GitHub milestones
    • Good use of GitHub release mechanism
    • Good version control, based on the repo
    • Reasonable attempt to use the forking workflow
    • Good task definition, assignment and tracking, based on the issue tracker
    • Good use of buffers (opposite: everything at the last minute)
    • Project done iteratively and incrementally (opposite: doing most of the work in one big burst)

    B. Team-based tasks:

    Evaluates: how much you contributed to common team-based tasks

    Based on: peer evaluations and tutor observations

    Here is a non-exhaustive list of team-tasks:

    1. Necessary general code enhancements
      1. Work related to renaming the product
      2. Work related to changing the product icon
      3. Morphing the product into a different product
    2. Setting up the GitHub, Travis, AppVeyor, etc.
    3. Maintaining the issue tracker
    4. Release management
    5. Updating user/developer docs that are not specific to a feature  e.g. documenting the target user profile
    6. Incorporating more useful tools/libraries/frameworks into the product or the project workflow (e.g. automate more aspects of the project workflow using a GitHub plugin)

    Exams

    There is no midterm.

    The final exam has two parts:

    • Part 1: MCQ questions (30 minutes, 25 marks)
    • Part 2: Essay questions (1 hour 30 minutes, 55 marks)

    Both papers will be given to you at the start but you need to answer Part 1 first (i.e. MCQ paper). It will be collected 30 minutes after the exam start time (even if arrived late for the exam). You are free to start part 2 early if you finish Part 1 early.

    Final Exam: Part 1 (MCQ)

    Each MCQ question gives you a statement to evaluate.

    📦 An example statement

    Testing is a Q&A activity

    The meaning of answer options are
    A. True
    B. False

    All questions carry equal marks. There is no penalty for wrong answer.

    The exam paper has 50 questions.

    Note that you have slightly more than ½ minute for each question, which means you need to go through the questions fairly quickly.

    Given the fast pace required by the paper, to be fair to all students, you will not be allowed to clarify doubts about questions (in Part 1) by talking to invigilators.

    Questions in Part 1 are confidential. You are not allowed to reveal Part 1 content to anyone after the exam. All pages of the assessment paper are to be returned at the end of the exam.

    You will be given OCR forms to indicate your answers for Part 1.

    The paper is open-book: you may bring any printed or written materials to the exam in hard copy format. However, given the fast pace required by Part 1, you will not have time left to refer notes during that part of the exam.

    💡 Mark the OCR form as you go, rather than planning to transfer your answers to the OCR form near the end.  Reason: Given there are 50 questions, it will be hard to estimate how much time you need to mass-transfer all answers to OCR forms.

    💡 We have tried to avoid deliberately misleading/tricky questions. If a question seems to take a very long time to figure out, you are probably over-thinking it.

    Final Exam: Part 2 (Essay)

    Unlike in part 1, you can ask invigilators for clarifications if you found a question to be unclear in part 2.

    Yes, you may use pencils when answering part 2.

    [Sample paper] [ Answers to the sample paper]

    Participation Marks

    Participation marks for each phase is given on a 'all or nothing' basis  i.e., you get either 5 or 0 marks.

    To get the full marks allocated for participation you should meet a minimal bar on all the following criteria, evaluated based on peer evaluations and tutor observations. We will also take into account data recorded in other systems e.g. GitHub, IVLE.

    • Professional Communication :

      • Communicates sufficiently and professionally. e.g. Does not use offensive language or excessive slang in project communications.
      • Responds to communication from team members in a timely manner (e.g. within 24 hours).
    • Punctuality: Does not cause others to waste time or slow down project progress by frequent tardiness.

    • Dependability: Promises what can be done, and delivers what was promised.

    • Effort: Puts in sufficient effort to, and tries their best to, keep up with the module/project pace. Seeks help from others when necessary.

    • Quality: Does not deliver work products that seem to be below the student's competence level i.e. tries their best to make the work product as high quality as possible within her competency level.

    • Meticulousness:

      • Rarely overlooks submission requirements.
      • Rarely misses compulsory module activities such as completing the TEAMMATES profile or peer review.
    • Teamwork: How willing are you to act as part of a team, contribute to team-level tasks, adhere to team decisions, etc.

    ❗️ you will lose all participation marks if,

    • if you receive multiple Below Average/Poor ratings for any of the criteria above, or,
    • if you miss more than one compulsory tasks  (e.g. submitting peer evaluations, taking part in peer testing, compulsory LOs)

    The following criteria will be assessed but considered only for pushing a student's grade from A to A+ and recruiting future tutors/interns.

    • Technical Competency: Able to gain competency in all the required tools and techniques.
    • Mentoring skills: Helps others when possible. Able to mentor others well.
    • Communication skills: Able to communicate (written and spoken) well. Takes initiative in discussions.

    Appendix A: Module Principles

    These are some of the main principles underlying the module structure.

    The product is you, NOT what you build.

    The software product you build is a side effect only. You are the product of this module. This means,

    • We may not take the most efficient route to building the software product. We take the route that allows you to learn the most.
    • Building a software product that is unique, creative, and shiny is not our priority (although we try to do a bit of that too). Learning to take pride in, and discovering the joy of, high quality software engineering work is our priority.

    Following from that, we evaluate you on not just how much you've done, but also, how well you've done those things. Here are some of the aspects in which we focus on:

    We appreciate ...

    But we value more ...

    Ability to deal with low-level details

    Ability to abstract over details, generalize, see the big picture

    A drive to learn latest and greatest technologies

    Ability to make the best of given tools

    Ability to find problems that interest you and solve them

    Ability to solve the given problem to the best of your ability

    Ability to burn the midnight oil to meet a deadline

    Ability to schedule work so that the need for 'last minute heroics' is minimal

    Preference to do things you like or things you are good at

    Ability to buckle down and deliver on important things that you don't necessarily like or aren't good at

    Ability to deliver desired end results

    Ability to deliver in a way that shows how well you delivered (i.e. visibility of your work)

    We learn together, NOT compete against each other.

    You are not in a competition. Our grading is not forced on a bell curve.

    Learn from each other. That is why we open-source your submissions.

    Teach each other, even those in other teams. Those who do it well can become tutors next time.

    Continuously engage, NOT last minute heroics.

    We want to train you to do software engineering in a steady and repeatable manner that does not require 'last minute heroics'.

    In this module, last minute heroics will not earn you a good project grade, and last minute mugging will not earn you a good exam grade.

    Where you reach at the end matters, NOT what you knew at the beginning.

    When you start the module, some others in the class may appear to know a lot more than you. Don't let that worry you. The final grade depends on what you know at the end, not what you knew to begin with. All marks allocated to intermediate deliverables are within the reach of everyone in the class irrespective of their prior knowledge.

    Appendix B: Module Policies

    Policy on following instructions

    When working with others, especially in a large class such as CS2103,  it is very important that you adhere to standards, policies, and instructions imposed on everyone. Not doing so creates unnecessary headaches for everyone and puts your work attitude in a negative light. That is why we penalize repeated violations of instructions. On the other hand we do understand that humans are liable to make mistakes. That is why we only penalize repeated or frequent mistakes.

    Policy on grading smaller/larger teams

    As most of the work is graded individually, team sizes of 3, 4, or 5 is not expected to affect your grade. While managing larger teams is harder, larger teams have more collective know-how, which can cancel each other.

    Policy on project work distribution

    As most of the work is graded individually, it is OK to do less or more than equal share in your project team.

    👤 Individually, each student is expected to,

    1. Contribute one major enhancement to the product

      • Each enhancement should be stand-alone but,
        • should fit with the rest of the software (and the target user profile),
        • and should have the consent of the team members.

      Here are the allowed options for enhancing AddressBook:

      1. Add a new feature
      2. Enhance an existing features in a major way e.g. make the command syntax more user friendly and closer to natural language
      3. Modify the internal design in a major way e.g. change the architecture
      4. A major redesign of the GUI e.g. make it work like a chat application (note: chat is a form of CLI)
      5. Integrate with online services e.g. Google contacts, Facebook, GitHub, etc.

      Here are some examples of different major enhancements and the grade the student is likely to earn for the relevant parts of the project grade.

    2. Contribute one minor enhancement to the product:

      • In the initial stages of the project you are required to add one small generic enhancements in order to get familiar with the project.
      • Minor enhancements earn a minimal amount of marks. You are advised not to spend a lot of effort on the minor enhancement.
      • The minor enhancement must touch multiple components  so that it helps you to familiarize yourself wit the codebase.

      Here is a non-exhaustive list of minor enhancements:

      1. Support different themes for the Look & Feel  dark, light, etc.
      2. Support more fields  e.g. Birthday
      3. Load a different page instead of the default Google search page  e.g. Google Maps page or Twitter page
      4. Sort items
      5. Multiple panels  e.g. an additional panel to show recently accessed items
      6. Marking some items as favorites
      7. Ability to search by labels
      8. Ability to specify colors for labels

    3. Contribute to all aspects of the project: e.g. write backend code, frontend code, test code, user documentation, and developer documentation. If you limit yourself to certain aspects only, you will lose marks allocated for the aspects you did not do.
      In particular, you are required to divide work based on features rather than components:

      • By the end of this project (i.e. by v1.5) each team member is expected to have implemented one minor and one major enhancement/feature end-to-end, doing required changes in almost all components.  Reason: to force you to learn all components of the software, instead of limiting yourself to just one/few components.
      • Nevertheless, you are still expected to divide the components of the product among team members so that each team member is in charge of one or more components. While others will be modifying those components as necessary for the features they are implementing, your role as the in charge of a component is to guide others modifying that component  (reason: you are supposed to be the most knowledgeable about that component) and protect that component from degrading  e.g., you can review others' changes to your component and suggest possible changes.
    4. Do a share of team-tasks: These are the tasks that someone in the team has to do. Marks allocated to team-tasks will be divided among team members based on how much each member contributed to those tasks.

      Here is a non-exhaustive list of team-tasks:

      1. Necessary general code enhancements
        1. Work related to renaming the product
        2. Work related to changing the product icon
        3. Morphing the product into a different product
      2. Setting up the GitHub, Travis, AppVeyor, etc.
      3. Maintaining the issue tracker
      4. Release management
      5. Updating user/developer docs that are not specific to a feature  e.g. documenting the target user profile
      6. Incorporating more useful tools/libraries/frameworks into the product or the project workflow (e.g. automate more aspects of the project workflow using a GitHub plugin)

    5. Write ~0.5 KLoC of code, on average.

    Policy on absence due to valid reasons (e.g. MC, LOA, University events)

    There is no need to inform us. If you miss a lecture/tutorial for a valid reason, just do your best to catch up. We'll be happy to help if required. An occasional absence or two is not expected to affect your participation marks. 
    Only if you fail to earn full marks for participation we will consider giving an alternative avenue to earn marks missed due to the absences.

    Policy on email response time

    Normally, the prof will respond within 24 hours if it was an email sent to the prof or a forum post directed at the prof. If you don't get a response within that time, please feel free to remind the prof. It is likely that the prof did not notice your post or the email got stuck somewhere.

    Similarly we expect you to check email regularly and respond to emails written to you personally (not mass email) promptly.

    Not responding to a personal email is a major breach of professional etiquette (and general civility). Imagine how pissed off you would be if you met the prof along the corridor, said 'Hi prof, good morning' and the prof walked away without saying anything back. Not responding to a personal email is just as bad. Always take a few seconds to at least acknowledge such emails.  It doesn't take long to type "Noted. Thanks" and hit 'send'.

    The promptness of a reply is even more important when the email is requesting you for something that you cannot provide. Imagine you wrote to the prof requesting a reference letter and the prof did not respond at all because he/she did not want to give you one; You'll be quite frustrated because you wouldn't know whether to look for another prof or wait longer for a response. Saying 'No' is fine and in fact a necessary part of professional life; but saying nothing is not acceptable. If you didn't reply, the sender will not even know whether you received the email.

    Policy on tech help

    Do not expect your project tutor to code or debug for you. We strongly discourage tutors from giving technical help directly to their own teams because we want to train you in troubleshooting tech problems yourselves. Allowing direct tech help from tutors transfers the troubleshooting responsibility to tutors.

    It is ok to ask for help from classmates even for assignments, even from other teams, as long as you don't copy from others and submit as your own. It doesn't matter who is helping you as long as you are learning from it.

    We encourage you to give tech help to each other, but do it in a way that the other person learns from it.


    We want to move you away from 'hand holding' and make you learn how to solve problems on your own. This is a vital survival skill in the industry and it needs practice.

    Whether it is a technical problem (e.g. error when using the IDE) or a doubt about a concept (e.g. what is the difference between scripted testing and exploratory testing?)  we the teaching team are happy to work with you when you look for a solution/answer, but we do not do it for you. We discourage unconditional direct help from tutors because we want you to learn to help yourself. Yes, we believe in ‘tough love’😝.

    The question you should always ask yourself is, 'how do I solve this problem if the lecturer/tutors are not around to help me?'

    Note: This guide is mostly about getting tech help, but it also applies to getting clarifications on module topics too. e.g. what is the difference between refactoring and rewriting?

    What not to do:

    When faced with a technical problem or a doubt about a concept, don'f fire off an email lecturer/tutor immediately after you encounter a problem or a doubt, unless it is something only the lecturer/tutor is supposed to know. Instead, here are some things you can do:

    • Check what is given: Check if the problem/concept has been discussed in the lectures, text book, or the list of resources given to you. Yes it is easier for you to write an email to the tutor/lecturer instead, but that shouldn't be your default behavior. We know that sometimes it is difficult to find stuff in the resources we have provided. But you should try first.

    • Search: It is very likely the answer already exists somewhere in the cyberspace. Almost every programming-related question has been answered in places like stackoverflow. Don't give an opportunity for someone to ask you to STFW.
      Pay attention to the error message you encounter. Sometimes it also contains hints as to how to fix the problem. Even if not, a web search on the error message is a good starting point.  

    • Ask peers:

      Ask your team members.

      Ask classmates using the module forum or the slack channel. Even if you figured out one way to solve a problem, discussing it on a public forum might lead you to better ways of solving it, and will help other classmates who are facing similar problems too. If you are really shy to ask questions in the forum, you may use this form to submit your question anonymously which we will then post in the forum.


      Rubber duck debugging is an informal term used in software engineering to refer to a method of debugging code. The name is a reference to a story in the book The Pragmatic Programmer in which a programmer would carry around a rubber duck and debug his code by forcing himself to explain it, line-by-line, to the duck.

      [for more, see wikipedia entry]

    • Ask the world using programming forums such as stackoverflow.

      Here are some tips for posting help request:

      • PLEASE search for existing answers before you post your question in those public forums; You don't want to appear as a 'clueless' or 'too lazy to do your research' person in a public forum.

      • Learn to isolate the problem. "My code doesn't work" isn't going to help even if you post the whole code online. Others don't have time to go through all of your code. Isolate the part that doesn't work and strip it down to the bare minimum that is enough reproduce the error. Sometimes, this process actually helps you to figure out the problem yourself. If not, at least it increases the chance of someone else being able to help you.

        💡 How to isolate problematic code? Delete code (one bit at a time) that is confirmed as not related to the problem. Do that until you can still reproduce the problem with the least amount of code remaining.

      • Generalize the problem. "How to write tasks to a text file using Java" is too specific to what you are working on. You are more likely to find help if you post a thread called (or search for) "How to write to a file using Java".

      • Explain well. Conversations via online forums take time. If you post everything that is relevant to your problem, your chances of getting an answer in the first try is higher. If others have to ask you more questions before they can help you, it will take longer. But this doesn't mean you dump too much information into the thread either.

        💡 Know what these stand for: RTFM, STFW, GIYF

    • Talk to the lecturer before or after the lecture. The lecturer will be at the lecture venue from 30 minutes before the start of the lecture.

    • Request our help: Failing all above, you can always request for help by emailing the lecturer.

    Resources

    Policy on publishing submissions

    The source code are publicly available and are available for reuse by others without any restrictions. 
    Is publishing submissions unfair to the team? We don't think so. If you were the first to think of something your peers are willing to adopt later, that means you are already ahead of them and they are unlikely to earn more marks by adopting your ideas.

    Policy on plagiarism

    We encourage sharing, but you should share with everyone in the class, not just a selected group. That is,

    • You are not allowed to share individual assignments with classmates directly.
    • You are not allowed to share project-related things with other teams directly.

    You can even reuse each other's work subject to the 'reuse policy' given below.

    If you submit code (or adopt ideas) taken from elsewhere, you need to comply with our reuse policy.

    Detection:

    • Detecting plagiarism in code is quite easy. You are not fooling anyone by reordering code or renaming methods/variables.
    • As all your work is publicly visible on GitHub, sooner or later somebody will notice the plagiarism.

    Penalties:

    • For submissions not affecting marks: We make a record of cases of plagiarism but we do not take further action. Such plagiarism does not disadvantage other students. Therefore, we prefer to spend all available resources on helping honest students to do better rather than to chase after dishonest students. If you think you gain something by plagiarizing, go ahead and do it. It's your choice and it's your loss.
    • For the final project/exam: Any case of claiming others' work as yours will be reported to the university for disciplinary action.

    Policy on reuse

    Reuse is encouraged. However, note that reuse has its own costs (such as the learning curve, additional complexity, usage restrictions, and unknown bugs). Furthermore, you will not be given credit for work done by others. Rather, you will be given credit for using work done by others.

    • You are allowed to reuse work from your classmates, subject to following conditions:
      • The work has been published by us or the authors.
      • You clearly give credit to the original author(s).
    • You are allowed to reuse work from external sources, subject to following conditions:
      • The work comes from a source of 'good standing' (such as an established open source project). This means you cannot reuse code written by an outside 'friend'.
      • You clearly give credit to the original author. Acknowledge use of third party resources clearly e.g. in the welcome message, splash screen (if any) or under the 'about' menu. If you are open about reuse, you are less likely to get into trouble if you unintentionally reused something copyrighted.
      • You do not violate the license under which the work has been released. Please  do not use 3rd-party images/audio in your software unless they have been specifically released to be used freely. Just because you found it in the Internet does not mean it is free for reuse.
      • Always get permission from us before you reuse third-party libraries. Please post your 'request to use 3rd party library' in our GitHub forum. That way, the whole class get to see what libraries are being used by others.

    Giving credit for reused work

    Given below are how to give credit for things you reuse from elsewhere. These requirements are specific to this module  i.e., not applicable outside the module (outside the module you should follow the rules specified by your employer and the license of the reused work)

    If you used a third party library:

    • Mention in the README.adoc (under the Acknowledgements section)
    • mention in the Project Portfolio Page if the library has a significant relevance to the features you implemented

    If you reused code snippets found on the Internet  e.g. from StackOverflow answers or
    referred code in another software or
    referred project code by current/past student:

    • If you read the code to understand the approach and implemented it yourself, mention it as a comment
      📦 Example:
      //Solution below adpated from https://stackoverflow.com/a/16252290
      {Your implmentation of the reused solution here ...}
      
    • If you copy-pasted a non-trivial code block (possibly with minor modifications  renaming, layout changes, changes to comments, etc.), also mark the code block as reused code (using Collate Tool Syntax)
      Format:
      //@@author {yourGithubUsername}-reused
      //{Info about the source...}
      
      {Reused code (possibly with minor modifications) here ...}
      
      //@@author
      
      📦 Example of reusing a code snipped (with minor modifications):
      persons = getList()
      //@@author johndoe-reused
      //Reused from https://stackoverflow.com/a/34646172 with minor modifications
      Collections.sort(persons, new Comparator<CustomData>() {
          @Override
          public int compare(CustomData lhs, CustomData rhs) {
              return lhs.customInt > rhs.customInt ? -1 : (lhs.customInt < rhs.customInt) ? 1 : 0;
          }
      });
      //@@author
      return persons;
      

    Collate is a tool for collating code written by different developers.

    Steps to use Collate:

    1. Download Collate-TUI.jar from the Collate Tool project
    2. Annotate your code to indicate who wrote which part of the code (instructions given below)
    3. Run the Collate tool to collate code written by each person into separate files (instructions given below)

    Annotating code to indicate authorship

    • Mark your code with a //@@author {yourGithubUsername}. Note the double @.
      The //@@author tag should appear only at the beginning of the code you wrote. The code up to the next //@@author tag or the end of the file (whichever comes first) will be considered as was written by that author. Here is a sample code file:

      //@@author johndoe
      method 1 ...
      method 2 ...
      //@@author sarahkhoo
      method 3 ...
      //@@author johndoe
      method 4 ...
      
    • If you don't know who wrote the code segment below yours, you may put an empty //@@author (i.e. no GitHub username) to indicate the end of the code segment you wrote. The author of code below yours can add the GitHub username to the empty tag later. Here is a sample code with an empty author tag:

      method 0 ...
      //@@author johndoe
      method 1 ...
      method 2 ...
      //@@author
      method 3 ...
      method 4 ...
      
    • The author tag syntax varies based on file type e.g. for java, css, fxml. Use the corresponding comment syntax for non-Java files.
      Here is an example code from an xml file.

      <!-- @@author sereneWong -->
      <textbox>
        <label>...</label>
        <input>...</input>
      </textbox>
      ...
      
    • Do not put the //@@author inside java header comments as only the content below that tag will be collated.
      👎⤵️

      /**
        * Returns true if ...
        * @@author johndoe
        */
      

      👍⤵️

      //@@author johndoe
      /**
        * Returns true if ...
        */
      

    What to and what not to annotate

    • Annotate both functional and test code but not documentation files.

    • Annotate only significant size code blocks that can be reviewed on its own  e.g., a class, a sequence of methods, a method.
      Claiming credit for code blocks smaller than a method is discouraged but allowed. If you do, do it sparingly and only claim meaningful blocks of code such as a block of statements, a loop, or an if-else statement%%.

      • If an enhancement required you to do tiny changes in many places, there is no need to collate all those tiny changes; you can describe those changes in the Project Portfolio page instead.
      • If a code block was touched by more than one person, either let the person who wrote most of it (e.g. more than 80%) take credit for the entire block, or leave it as 'unclaimed' (i.e., no author tags).
      • Related to the above point, if you claim a code block as your own, more than 80% of the code in that block should have been written by yourself. For example, no more than 20% of it can be code you reused from somewhere.
      • 💡 GitHub has a blame feature and a history feature that can help you determine who wrote a piece of code.
    • Do not try to boost the length of your collated files using dubious means such as duplicating the same code in multiple places. In particular, do not copy-paste test cases to create redundant tests. Even repetitive code blocks within test methods should be extracted out as utility methods to reduce code duplication.
      Individual members are responsible for making sure their own collated files contain the correct content.
      If you notice a team member claiming credit for code that he/she did not write or use other questionable tactics, you can email us (after the final submission) to let us know.

    • If you wrote a significant amount of code that was not used in the final product,

      • Create a folder called {project root}/unused
      • Move unused files (or copies of files containing unused code) to that folder
      • use //@@author {yourGithubUsername}-unused to mark unused code in those files (note the suffix unused) e.g.
      //@@author johndoe-unused
      method 1 ...
      method 2 ...
      

      Please put a comment in the code to explain why it was not used.

    • If you reused code from elsewhere, mark such code as //@@author {yourGithubUsername}-reused (note the suffix reused) e.g.

      //@@author johndoe-reused
      method 1 ...
      method 2 ...
      
    • For code generated by the IDE/framework, should not be annotated as your own.

    • Code you modified in minor ways e.g. adding a parameter. These can be left out of collated code but can be mentioned in the Project Portfolio page if you want to claim credit for them.

    Collating the annotated code

    You need to put the collated code in the following folders

    Code Type Folder
    functional code collated/functional
    test code collated/test
    unused code collated/unused

    Refer to Collate Tool's user guide to find how to run the tool over the annotated code.

    Given below are DOS sample commands you can put in a batch file and run it to collate the code.

    java -jar Collate-TUI.jar collate from src/main to collated/functional include java, fxml, css
    
    java -jar Collate-TUI.jar collate from src/test to collated/test include java
    
    java -jar Collate-TUI.jar collate from unused to collated/unused include java, fxml, css
    

    The output should be something like the structure given below.

    collated/
        functional/
            johndoe.md
            sarahkhoo.md
            ravikumar.md
            ravikumarreused.md
        test/
            johndoe.md
            sarahkhoo.md
            ravikumar.md
        unused/
            johndoe.md
    
    • After running the collate tool, you are recommended to look through the generated .md files to ensure all your code has been extracted correctly.

    • Push the *.md files created to a folder called /collated in your repo.

    Project Portfolio Page (PPP)

    At the end of the project each student is required to submit a Project Portfolio Page.

    • Objective:

      • For you to use  (e.g. in your resume) as a well-documented data point of your SE experience
      • For us to use as a data point to evaluate your,
        • contributions to the project
        • your documentation skills
    • What to include:

      • Main things to include:
        • links to collated code
        • features you implemented  (include relevant extracts from the user guide and the developer guide)
        • features you propose to implement in future  (include relevant extracts from the user guide and the developer guide if applicable)
          Note: the purpose of allowing you to include proposed features is to provide you more flexibility to show your documentation skills.  e.g. you can bring in a proposed feature just to give you an opportunity to use a UML diagram type not used by the actual features.
        • other significant contributions to the project  e.g. tweaks to existing features, setting up project tools
      • Other things you can include:
        • Evidence of helping others  e.g. responses you posted in our forum, bugs you reported in other team's products,
        • Evidence of technical leadership  e.g. offering features for others to reuse, evidence of those features being reused by others
      • If you plan to use the PPP in your Resume, you can also include your SE work outside of the module (will not be graded)
    • Format:

      • Page limit: If you have more content than the limit given below, shorten (or omit some content) so that you do not exceed the page limit. Having too much content in the PPP will be viewed unfavorably during grading. Note: the page limits given below are after converting to PDF format. The actual amount of content you require is actually less than what these numbers suggest because the HTML → PDF conversion adds a lot of spacing around content.
        Content Limit
        Description in point form 0.5-1
        Extracts from the User Guide 1-3
        Extracts from the Developer Guide 3-6
        Total 5-10
      • 📦 Follow the example in the AddressBook-Level4.
      • 💡 You can use the Asciidoc's include feature to include sections from the developer guide or the user guide in your PPP. Follow the example in the sample.
      • ❗️ It is assumed that all contents in the PPP were written primarily by you. If any section is written by someone else  e.g. someone else wrote described the feature in the User Guide but you implemented the feature, clearly state that the section was written by someone else  (e.g. Start of Extract [from: User Guide] written by Jane Doe).  Reason: Your writing skills will be evaluated based on the PPP

    Policy on help from outsiders

    In general, you are not allowed to involve outsiders in your project except your team members and the teaching team. However, It is OK to give your product to others for the purpose of getting voluntary user feedback. It is also OK to learn from others as long as they don't do your project work themselves.

    Policy on suggested length for submissions

    We don't usually give a strict page limit for documents such as User Guide and the Developer Guide. You need to decide yourself how long the document should be based on the purpose and the intended audience. You can determine the level of details required based on the samples we provide.

    Appendix C: Frequently Asked Questions

    Where is everything?

    The Schedule page is the one page you need to refer weekly. Although there is a lot of content in the Admin page and the Textbook page -- which you are welcome to read in those respective pages -- the same content is also embedded in the relevant weeks of the Schedule page. In sum, the Schedule page organizes the content chronologically while the other two pages has some of the same content but organized by topic.

    What are the differences between CS2103 and CS2103T?

    Same lectures, same exam. Separate tutorials, separate project grading. Unless specified otherwise, whatever is stated for one module applies to the other.

    Why the workload is so high?

    CS2103/T prepares you for many higher-level project modules (CS3216/7, CS3201/2, CS3281/2, CG3002, etc.), each requiring a slightly different skill set. It is also the only SE course some of you do before going for industry internships. Therefore, we have to cover many essential SE concepts/skills and also provide enough exercises for you to practice those skills. This is also why we don't have time to go very deep into any of the topics.

    Remember, everything you learn here is going to be useful in a SE-related career.

    Also, consider this a gradual introduction to 'heavy' modules; most project modules you do after this are going to be much heavier 😛

    How to reduce the workload? You can omit Learning Outcomes rated ⭐️⭐️⭐️⭐️ They are counted for CS2103R and for A+ grades only.

    How do I get CS2103R credit for optional LOs?

    General info on R modules are here.

    To get CS2103R credit you should,

    • Achieve most of the 3-⭐️ LOs and some of the 4-⭐️ LOs during the semester.
    • Inform prof your interest to do CS2103 at the end of the semester.
    • Achieve the missed 3-⭐️ and 4-⭐️ LOs during the vacation.
    • Register for CS2103R in the subsequent semester.

    What are the extra requirements to get an A+?

    In CS2103/T, A+ is not given simply based on the final score. To get an A+ you should,

    • score enough to get an A
    • be considered technically competent by peers and tutor (based on peer evaluations and tutor observations)
    • be considered helpful by peers (based on peer evaluations and tutor observations)
      • In particular, you are encouraged to be active on the slack channel and our forum and give your inputs to ongoing discussions so that other students can benefit from your relatively higher expertise that makes you deserve an A+.
      • Whenever you can, go out of your way to review PRs created by other class members (as part of weekly LOs), even if they are not in your team.
    • achieve most of the 3-⭐️ LOs and some of the 4-⭐️ LOs.

    Why so much bean counting?

    Sometimes, small things matter in big ways. e.g., all other things being equal, a job may be offered to the candidate who has the neater looking CV although both have the same qualifications. This may be unfair, but that's how the world works. Students forget this harsh reality when they are in the protected environment of the school and tend to get sloppy with their work habits. That is why we reward all positive behavior, even small ones (e.g., following precise submission instructions, arriving on time etc.).

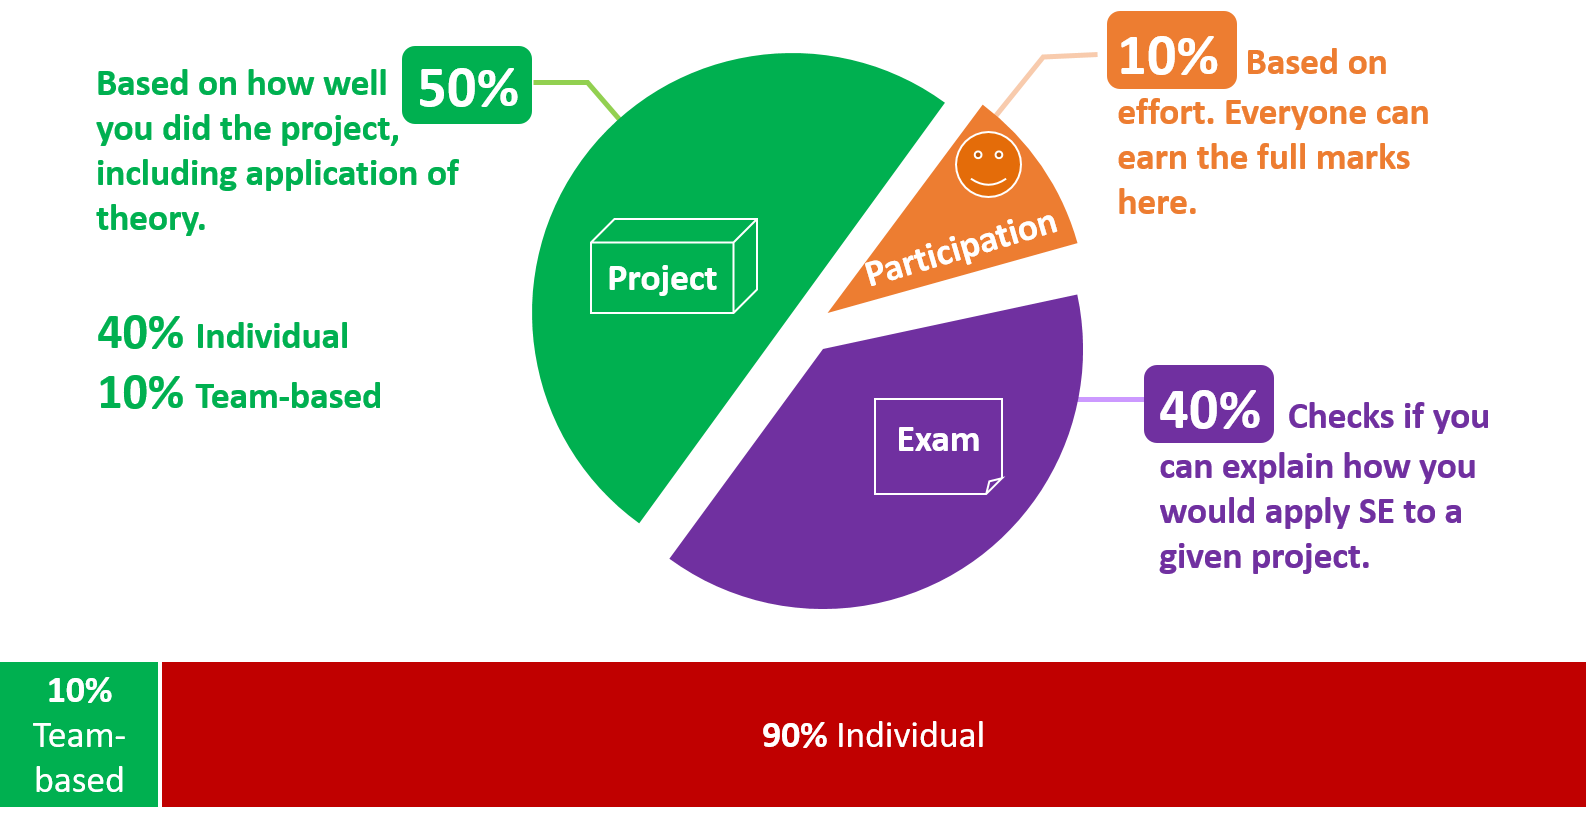
    But unlike the real world, we are forgiving. That is why you can still earn full 10 marks of the participation marks even if you miss a few things here and there.

    Related article: This Is The Personality Trait That Most Often Predicts Success (this is why we reward things like punctuality).

    Why you force me to visit a separate website instead of using IVLE?

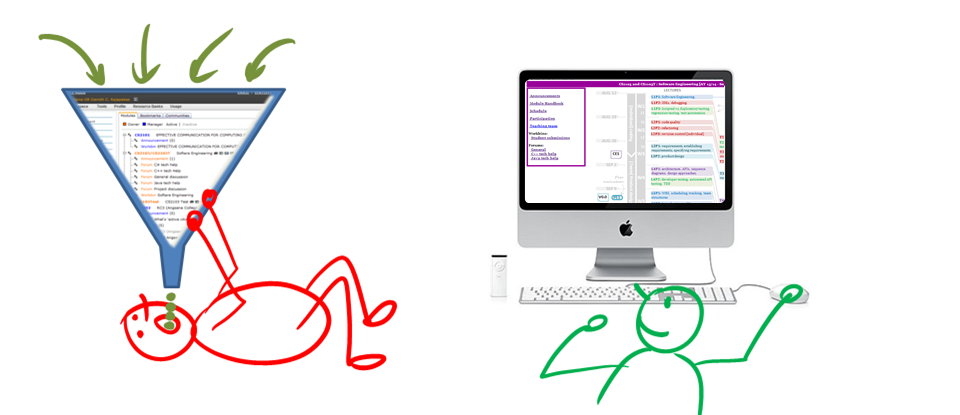
    We have a separate website because some of the module information does not fit into the structure imposed by IVLE.

    On a related note, keep in mind that 'hunting and gathering' of relevant information is one of the skills you need to survive 'in the wild'. Do not always expect all relevant materials to appear 'magically' in some kind of 'work bin'.

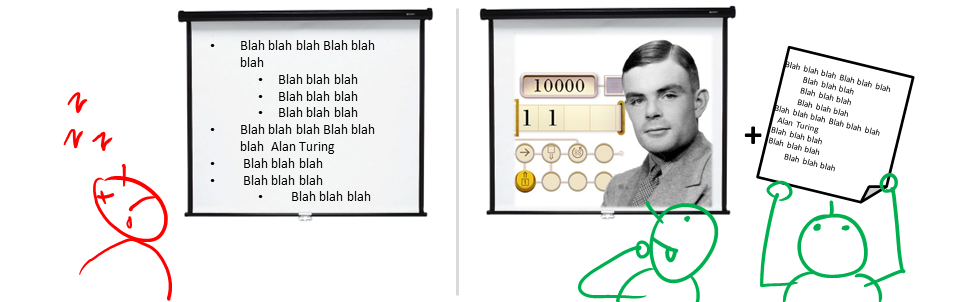
    Why slides are not detailed?

    Slides are not meant to be documents to print and study for exams. Their purpose is to support the lecture delivery and keep you engaged during the lecture. That's why our slides are less detailed and more visual.

    Why so much self-study?

    Self-study is a critical survival skill in SE industry. Lectures will show you the way, but absorbing content is to be done at your own pace, by yourself. In this module, we still tell you what content to study and also pass most of the content to you. After you graduate, you have to decide what to study and find your own content too.

    What if I don't carry around a laptop?

    If you do not have a laptop or prefer not to bring the laptop, it is up to you to show your work to the tutor in some way (e.g. by connecting to your home PC remotely), without requiring extra time/effort from the tutor or team members.

    Reason: As you enjoy the benefits of not bring the laptop; you (not others) should bear the cost too.

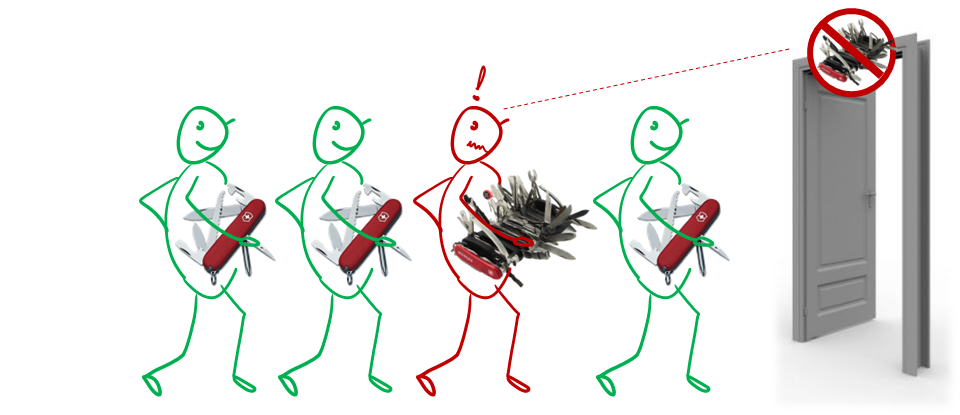
    Why very narrow project scope?

    Defining your own unique project is more fun.

    But, wider scope → more diverse projects → harder for us to go deep into your project. The collective know-how we (i.e., students and the teaching team) have built up about SE issues related to the project become shallow and stretched too thinly. It also affects fairness of grading.

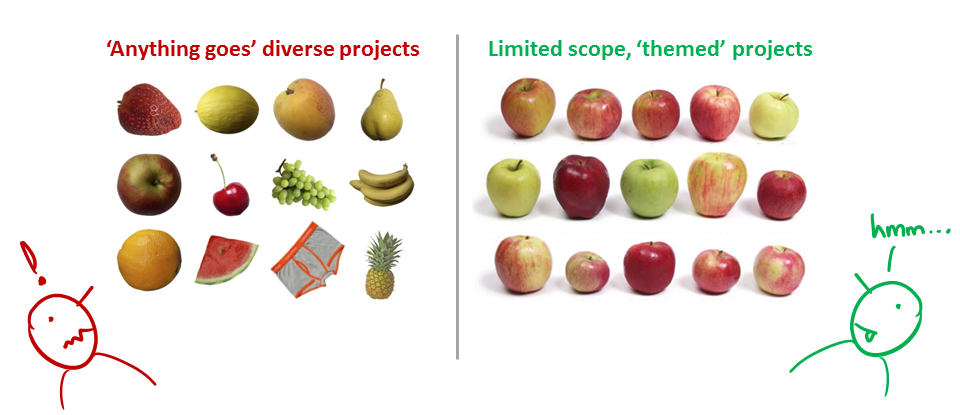
    That is why a strictly-defined project is more suitable for a first course in SE that focuses on nuts-and-bolts of SE. After learning those fundamentals, in higher level project modules you can focus more on the creative side of software projects without being dragged down by nuts-and-bolts SE issues (because you already know how to deal with them). However, we would like to allow some room for creativity too. That is why we let you build products that are slight variations of a given theme.

    Also note: The freedom to do 'anything' is not a necessary condition for creativity. Do not mistake being different for being creative. In fact, the more constrained you are, the more you need creativity to stand out.

    Why project requirements are so vague?

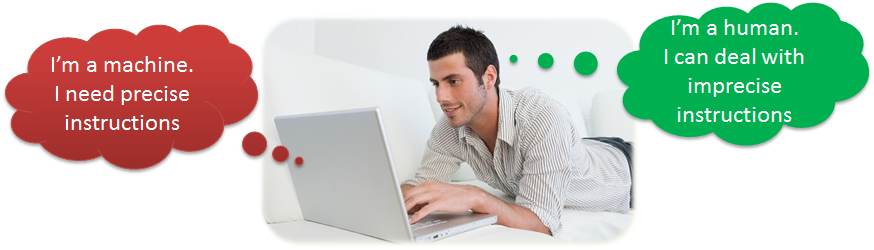
    "You tell me exactly what to do - I do that - you pay me (in grades)" is a model for contract work, not for learning. Being able to survive in imprecise, uncertain, volatile problem contexts is precisely what we are trying to teach you.

    For example, the best way to communicate something often depends on what is being communicated. That is why we don't specify the precise content for project documents. Instead, we aim to refine project documents iteratively. We believe the learning experience will be richer if we let you decide the best way to present your project information rather than just following our instructions blindly. For example, in real-life projects you are rarely told which diagrams to draw; that is a decision you have to make yourself.

    Why I'm not allowed to use my favorite tool/framework/language etc.?

    We have chosen a basic set of tools after considering ease of learning, availability, typical-ness, popularity, migration path to other tools, etc. There are many reasons for limiting your choices:

    Pedagogical reasons:

    • Sometimes 'good enough', not necessarily the best, tools are a better fit for beginners: Most bleeding edge, most specialized, or most sophisticated tools are not suitable for a beginner course. After mastering our toolset, you will find it easy to upgrade to such high-end tools by yourself. We do expect you to eventually (after this module) migrate to better tools and, having learned more than one tool, to attain a more general understanding about a family of tools.
    • We want you to learn to thrive under given conditions: As a professional Software Engineer, you must learn to be productive in any given tool environment, rather than insist on using your preferred tools. It is usually in small companies doing less important work that you get to chose your own toolset. Bigger companies working on mature products often impose some choices on developers, such as the project management tool, code repository, IDE, language etc. For example, Google used SVN as their revision control software until very recently, long after SVN fell out of popularity among developers. Sometimes this is due to cost reasons (tool licensing cost), and sometimes due to legacy reasons (because the tool is already entrenched in their code base).
      While programming in school is often a solo sport, programming in the industry is a team sport. As we are training you to become professional software engineers, it is important to get over the psychological hurdle of needing to satisfy individual preferences and get used to making the best of a given environment.

    Practical reasons:

    • Some of the LOs are tightly coupled to tools. Allowing more tools means tutors need to learn more tools, which increases their workload.
    • We provide learning resources for tools. e.g. 'Git guides'. Allowing more tools means we need to produce more resources.
    • When all students use the same tool, the collective expertise of the tool is more, increasing the opportunities for you to learn from each others.

    Meanwhile, feel free to share with peers your experience of using other tools.

    Why so many submissions?

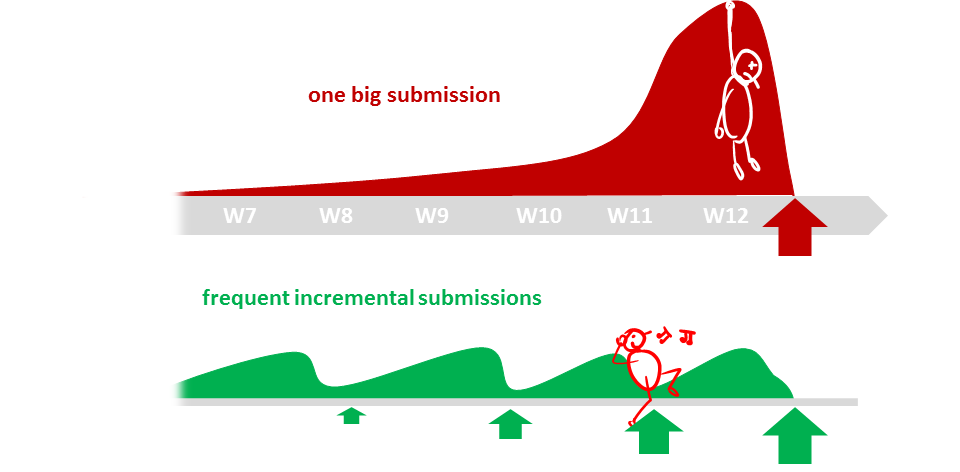
    The high number of submissions is not meant to increase workload but to spread it across the semester. Learning theory and applying them should be done in parallel to maximize the learning effect. That can happen only if we spread theory and 'application of theory' (i.e., project work) evenly across the semester.

    Why aren't we allowed to build a new product from scratch?

    There are many reasons. One of them is that most of you will be working with existing software in your first few years of the career while hardly any school projects train you to work with existing code bases. We decided to bite the bullet and use CS2103/T to train you to work in existing code bases.

    Why submission requirements differ between CS2103T and CS2101?

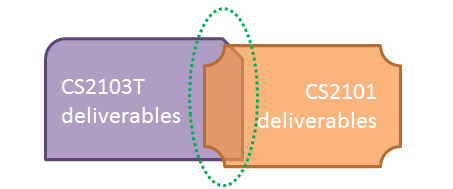
    They do, and they should.

    CS2103T communication requirements are limited to a very narrow scope (i.e., communicate about the product to users and developers). CS2101 aims to teach you technical communication in a much wider context. While you may be able to reuse some of the stuff across the two modules, submissions are not intended to be exactly the same.

    Appendix D: How to get help in CS2103/T


    We want to move you away from 'hand holding' and make you learn how to solve problems on your own. This is a vital survival skill in the industry and it needs practice.

    Whether it is a technical problem (e.g. error when using the IDE) or a doubt about a concept (e.g. what is the difference between scripted testing and exploratory testing?)  we the teaching team are happy to work with you when you look for a solution/answer, but we do not do it for you. We discourage unconditional direct help from tutors because we want you to learn to help yourself. Yes, we believe in ‘tough love’😝.

    The question you should always ask yourself is, 'how do I solve this problem if the lecturer/tutors are not around to help me?'

    Note: This guide is mostly about getting tech help, but it also applies to getting clarifications on module topics too. e.g. what is the difference between refactoring and rewriting?

    What not to do:

    When faced with a technical problem or a doubt about a concept, don'f fire off an email lecturer/tutor immediately after you encounter a problem or a doubt, unless it is something only the lecturer/tutor is supposed to know. Instead, here are some things you can do:

    • Check what is given: Check if the problem/concept has been discussed in the lectures, text book, or the list of resources given to you. Yes it is easier for you to write an email to the tutor/lecturer instead, but that shouldn't be your default behavior. We know that sometimes it is difficult to find stuff in the resources we have provided. But you should try first.

    • Search: It is very likely the answer already exists somewhere in the cyberspace. Almost every programming-related question has been answered in places like stackoverflow. Don't give an opportunity for someone to ask you to STFW.
      Pay attention to the error message you encounter. Sometimes it also contains hints as to how to fix the problem. Even if not, a web search on the error message is a good starting point.  

    • Ask peers:

      Ask your team members.

      Ask classmates using the module forum or the slack channel. Even if you figured out one way to solve a problem, discussing it on a public forum might lead you to better ways of solving it, and will help other classmates who are facing similar problems too. If you are really shy to ask questions in the forum, you may use this form to submit your question anonymously which we will then post in the forum.


      Rubber duck debugging is an informal term used in software engineering to refer to a method of debugging code. The name is a reference to a story in the book The Pragmatic Programmer in which a programmer would carry around a rubber duck and debug his code by forcing himself to explain it, line-by-line, to the duck.

      [for more, see wikipedia entry]

    • Ask the world using programming forums such as stackoverflow.

      Here are some tips for posting help request:

      • PLEASE search for existing answers before you post your question in those public forums; You don't want to appear as a 'clueless' or 'too lazy to do your research' person in a public forum.

      • Learn to isolate the problem. "My code doesn't work" isn't going to help even if you post the whole code online. Others don't have time to go through all of your code. Isolate the part that doesn't work and strip it down to the bare minimum that is enough reproduce the error. Sometimes, this process actually helps you to figure out the problem yourself. If not, at least it increases the chance of someone else being able to help you.

        💡 How to isolate problematic code? Delete code (one bit at a time) that is confirmed as not related to the problem. Do that until you can still reproduce the problem with the least amount of code remaining.

      • Generalize the problem. "How to write tasks to a text file using Java" is too specific to what you are working on. You are more likely to find help if you post a thread called (or search for) "How to write to a file using Java".

      • Explain well. Conversations via online forums take time. If you post everything that is relevant to your problem, your chances of getting an answer in the first try is higher. If others have to ask you more questions before they can help you, it will take longer. But this doesn't mean you dump too much information into the thread either.

        💡 Know what these stand for: RTFM, STFW, GIYF

    • Talk to the lecturer before or after the lecture. The lecturer will be at the lecture venue from 30 minutes before the start of the lecture.

    • Request our help: Failing all above, you can always request for help by emailing the lecturer.

    Resources

    Appendix E: Using GitHub Project Hosting

    Create a GitHub profile

    Create a personal GitHub account if you don't have one yet.

    1. You are advised to choose a sensible GitHub username as you are likely to use it for years to come in professional contexts.
    2. Strongly recommended: Complete your GitHub profile. In particular,
      • Specify your full name.
      • Upload a suitable profile photo (i.e. a recent photo of your face).

    The GitHub profile is useful for the tutors and classmates to identify you. If you are reluctant to share your info in your long-term GitHub account, you can remove those details after the module is over or create a separate GitHub account just for the module.

    • The purpose of the profile photo is for the teaching team to identify you. Therefore, you should choose a recent individual photo showing your face clearly. Some examples can be seen in the 'Teaching team' page. Given below are some examples of good and bad profile photos.

    • If you are uncomfortable posting your photo due to security reasons, you can post a lower resolution image so that it is hard for someone to misused that image for fraudulent purposes. If you are concerned about privacy, you can request permission to omit your photo from the page by writing to prof.

    Setting Git Username to Match GitHub Username

    We use various tools to analyze your code. For us to be able to identify your commits, you should use the GitHub username as your Git username as well. If there is a mismatch, or if you use multiple user names for Git, our tools might miss some of your work and as a result you might not get credit for some of your work.

    In each Computer you use for coding, after installing Git, you should set the Git username as follows.

    1. Open a command window that can run Git commands (e.g., Git bash window)
    2. Run the command git config --global user.name YOUR_GITHUB_USERNAME
      e.g., git config --global user.name JohnDoe
      ( Note: if you are using git for other projects, you may want to remove the --global flag and run the command only for cs2103 related repos)

    More info about setting Git username is here.

    Submitting Pull Requests as evidence of an LO

    1. Fork the repo to your personal GitHub account, if you haven't done so already.

    2. Create a branch named after the LO IDe.g. W2.2b
      Remember to switch to master branch before creating the new branch.

    3. Commit your changes to that branch. Push to your fork.

    4. Create a Pull Request against the master branch of the repo
      https://github.com/nus-cs2103-AY1718S2/{repo_name}
      e.g. https://github.com/nus-cs2103-AY1718S2/addressbook-level1
      (do not create PRs against the upstream repo at se-edu org)

      PR name should be: [LO_ID][TEAM_ID]Your Name
      e.g. If you are in team 1 of tutorial W09 (i.e. Wednesday 9am), [W2.2b][W09-A1]James Yong. Your Team ID can be found in this page. Note that our tutorial IDs are different from those shown in CORS/IVLE. Our tutorial IDs are given in the panel below.

    Our tutorial IDs are different from CORS. Format: W09 means Wednesday 0900 and so on.

    Module Tutorial ID (ID in CORS) Time Venue Tutors (contact details)
    CS2103T (CS) W09 (T4) Wed 0900 COM1-B103 (ALL) TBD
    CS2103 W10 (10) Wed 1000 COM1-B103 (ALL) TBD
    CS2103T (CS) W11 (T6) Wed 1100 COM1-B103 (ALL) TBD
    CS2103T (CS) W13 (T1) Wed 1300 COM1-B103 (ALL) TBD
    CS2103T (CS) W14 (T2) Wed 1400 COM1-B103 (ALL) TBD
    CS2103T (CS) W15 (T3) Wed 1500 COM1-B103 (ALL) TBD
    CS2103T (CEG) T09 (C01) Thu 0900 COM1-B103 (ALL) TBD
    CS2103 T11 (2) Thu 1100 COM1-B103 (ALL) TBD
    CS2103 T15 (4) Thu 1500 COM1-B103 (ALL) TBD
    CS2103 T16 (5) Thu 1600 COM1-B103 (ALL) TBD
    CS2103T (CS) F09 (T7) Fri 0900 COM1-B103 (ALL) TBD
    CS2103 F11 (9) Fri 1100 COM1-B103 (ALL) TBD
    CS2103 F12 (11) Fri 1200 COM1-B103 (ALL) TBD
    CS2103T (CS) F14 (T5) Fri 1400 COM1-B103 (ALL) TBD

    *ALL: Active Learning Room

    1. Check the 'Files Changed' tab on GitHub to confirm the PR contains intended changes only.

    2. If the content of the PR is not as you expected, you can fix those problems in your local repo, commit, and push those new commits to the fork. The PR content will update automatically to match new commits. Alternatively, you can close that PR and create a new one with the correct content.

    3. If your PR adapted/referred code from elsewhere (e.g. a stackoverflow post or a classmate's PR -- which is allowed, even encouraged), acknowledge the source in your PR description text. e.g. Some code adapted from #2431 (I followed the same technique for parsing user command)

    4. If the PR is not ready for review yet, add a comment Work in progress. When the PR is ready for review later, add a comment Ready for review If there is no comment, we assume the PR is ready for review.

    Organization setup

    The instructions below are for setting up a GitHub organization for your team, which you should do at the start of Phase B.

    You can create your GitHub account after receiving your Phase B team ID. Here are the instructions (please follow the organization/repo name format closely because we use scripts to download your code. If the names are not as expected, our scripts will not work):

    • One team member (e.g. team leader) should create an organization with the following details:
    • Organization name : CS2103JAN2018-TEAM_ID. e.g.  CS2103JAN2018-W09-B3
    • Plan:  Open Source ($0/month)
    • After that, the same person can add members to the organization:
    • Create a team called developers to your organization.
    • Add your team members to the developers team.

    Repo setup

    Only one team member:

    1. Fork Address Book Level 4 to your team org.
    2. Rename the forked repo as main. This repo is to be used as the repo for your project.
    3. Ensure your team members have the desired level of access to your team repo

    All team members:

    1. Fork the main repo (created above) to your personal GitHub account.
    2. Clone the fork to your Computer.
    3. Set it up as an Intellij project (follow the instructions in the Developer Guide carefully).

    Note that some of our download scripts depend on the following folder paths. Please do not alter those paths in your project.

    • /src/main
    • /src/test
    • /docs

    Issue tracker setup

    When you create a repo, you get an issue tracker for that repo automatically. Configure it as follows:

    • Delete existing labels and add the following labels.

    Issue type labels:

    • type.epic : A big feature which can be broken down into smaller stories e.g. search
    • type.story : A user story
    • type.enhancement: An enhancement to an existing story
    • type.task : Something that needs to be done, but not a story, bug, or an epic. e.g. Move testing code into a new folder)
    • type.bug : A bug

    Status labels:

    • status.ongoing : The issue is currently being worked on. note: remove this label before closing an issue.

    Priority labels:

    • priority.high : Must do
    • priority.medium : Nice to have
    • priority.low : Unlikely to do

    Bug Severity labels:

    • severity.Low : A flaw that is unlikely to affect normal operations of the product. Appears only in very rare situations and causes a minor inconvenience only.
    • severity.Medium : A flaw that causes occasional inconvenience to some users but they can continue to use the product.
    • severity.High : A flaw that affects most users and causes major problems for users. i.e., makes the product almost unusable for most users.
    • Create following milestones : v1.0v1.1v1.2v1.3v1.4v1.5rc, v1.5

    • You may configure other project settings as you wish. e.g. more labels, more milestones

    Project Schedule Tracking

    In general, use the issue tracker (Milestones, Issues, PRs, Tags, Releases, and Labels) for assigning, scheduling, and tracking all noteworthy project tasks, including user stories. Update the issue tracker regularly to reflect the current status of the project. You can also use GitHub's new Projects feature to manage the project, but keep it linked to the issue tracker as much as you can.

    Using Issues:

    • Record each of the user stories you plan to deliver as an issue in the issue tracker. e.g. Title: As a user I can add a deadline
      Description: ... so that I can keep track of my deadlines

    • Assign the type.* and priority.* labels to those issues.

    • When you start implementing a story, break it down to tasks. Define reasonable sized, standalone tasks. A task should be able to done by one person, in a few hours. e.g.

      • 👍 Good: Update class diagram in the project manual for v1.5
      • 👎 Bad (reasons: not a one-person task, not small enough): Write the project manual
    • Write a descriptive title for the issue. e.g. Add support for the 'undo' command to the parser.

    • There is no need to break things into VERY small tasks. Keep them as big as possible, but they should be no bigger than what you are going to assign a single person to do within a week. eg.,

      • Implementing parser  : too big because it cannot be done by a single person in a week.
      • Implementing parser support for adding of floating tasks : appropriate size.
    • Do not track things taken for granted. e.g., push code to repo should not be a task to track. In the example given under the previous point, it is taken for granted that the owner will also (a) test the code and (b) push to the repo when it is ready. Those two need not be tracked as separate tasks.

    • Omit redundant details. In some cases, the summary/title is enough to describe the task. In that case, no need to repeat it in the description. There is no need for well-crafted and detailed descriptions for tasks. A minimal description is enough. Similarly, labels such as priority can be omitted if you think they don't help you.

    • Assign tasks to team members using the assignees field. At any point, there should be some ongoing tasks and some pending tasks against each team member.

    • Optionally, you can use status.ongoing label to indicate issues currently ongoing.

    Using Milestones:

    • Use GitHub milestones to indicate which issues are to be handled for which milestone by assigning issues to suitable milestones.

    • Set the deadlines for milestones (in GitHub). Your internal milestones can be set earlier than the deadlines we have set, to give you a buffer.

    • Note that you can change the milestone plan along the way as necessary.

    Wrapping up a Milestone:
    Here are the conditions to satisfy for a milestone to be considered properly wrapped up:

    • A working product tagged with the correct tag (e.g. v1.2) is pushed to the main repo.

    • All tests passing on Travis for the version tagged above.

    • Milestone updated to match the product i.e. all issues completed and PRs merged for the milestone should be assigned to the milestone.

    • Milestone closed. If there are incomplete issues or unmerged PRs in the milestone, move them to a future milestone.

    • Optionally, issues for the next milestone are assigned to team members (this is not compulsory to do before the tutorial, but we recommend you to do it soon after the tutorial).

    • Optionally, future milestones are revised based on what you experienced in the current milestone  e.g. if you could not finish all issues assigned to the current milestone, it is a sign that you overestimated how much you can do in a week, which means you might want to reduce the issues assigned to future milestones to match that observation.

    • Doing a 'release' on GitHub is optional for v1.1 and v1.2 but compulsory from v1.3.

    Workflow

    We recommend using the Forking Workflow.

    Appendix F: Handling teamwork issues

    If your team is facing difficulties due to differences in skill/motivation /availability among team members,

    • First, do not expect everyone to have the same skill/motivation level as you. It is fine if someone wants to do less and have low expectations from the module. That doesn't mean that person is a bad person. Everyone is entitled to have their own priorities.

    • Second, don't give up. It is unfortunate that your team ended up in this situation, but you can turn it into a good learning opportunity. You don't get an opportunity to save a sinking team every day 😃

    • Third, if you care about your grade and willing to work for it, you need to take initiative to turn the situation around or else the whole team is going to suffer. Don't hesitate to take charge if the situation calls for it. By doing so, you'll be doing a favor for your team. Be professional, kind, and courteous to the team members, but also be firm and assertive. It is your grade that is at stake. Don't worry about making a bad situation worse. You won't know until you try.

    • Finally, don't feel angry or 'wronged'. Teamwork problems are not uncommon in this module and we know how to grade so that you will not be penalized for others' low contribution. We can use Git to find exactly what others did. It's not your responsibility to get others to contribute.

    Given below are some suggestions you can adopt if the project work is not going smooth due to team issues. Note that the below measures can result in some team members doing more work than others and earning better project grades than others. It is still better than sinking the whole team together.

    • Redistribute the work: Stronger programmers in the team should take over the critical parts of the code.

    • Enforce stricter integration workflow: Appoint an integrator (typically, the strongest programmer). His/her job is to maintain the integrated version of the code. He/she should not accept any code that breaks the existing product or is not up to the acceptable quality standard. It is up to others to submit acceptable code to the integrator. Note that if the integrator rejected your code unreasonably, you can still earn marks for that code. You are allowed to submit such 'rejected' code for grading. They can earn marks based on the quality of the code.

    If you have very unreliable or totally disengaged team members :

    • Re-allocate to others any mission-critical work allocated to that person so that such team members cannot bring down the entire team.
    • However, do not leave out such team members from project communications. Always keep them in the loop so that they can contribute any time they wish to.
    • Furthermore, evaluate them sincerely and fairly during peer evaluations so that they do get the grade their work deserves, no more, no less.
    • Be courteous to such team members too. Some folks have genuine problems that prevent them from contributing more although they may not be able tell you the reasons. Just do your best for the project and assume everyone else is doing their best too, although their best may be lower than yours.